NetSuite
NetSuite's AI Connector Service MCP lets your Dust assistants query records, run searches, and interact with your NetSuite account directly from conversations. Each user authenticates with their own NetSuite account, so permissions are enforced per user.
Requirements: NetSuite administrator access to install a SuiteApp and create an integration record.
Enable required features
Go to Setup → Company → Enable Features → SuiteCloud tab and make sure the following are enabled:
- Server SuiteScript
- REST Web Services
- Token-Based Authentication
- OAuth 2.0
2. Install the MCP Standard Tools SuiteApp
Go to Customization → SuiteBundler → Search & Install Bundles, search for MCP Standard Tools and click Install.
3. Create a custom role
Important: the Administrator role cannot be used with MCP. You must create a dedicated role.
Go to Setup → Users/Roles → Manage Roles → New and add the following permissions:
| Tab | Permission | Level |
|---|---|---|
| Setup | MCP Server Connection | Full |
| Setup | Log in using OAuth 2.0 Access Tokens | Full |
| Setup | REST Web Services | Full |
| Lists | Perform Search | Full |
Assign this role to the relevant users via Setup → Users/Roles → Manage Users.
4. Create an integration record
Go to Setup → Integration → Manage Integrations → New and configure:
- Name:
Dust Connector(or any name) - State: Enabled
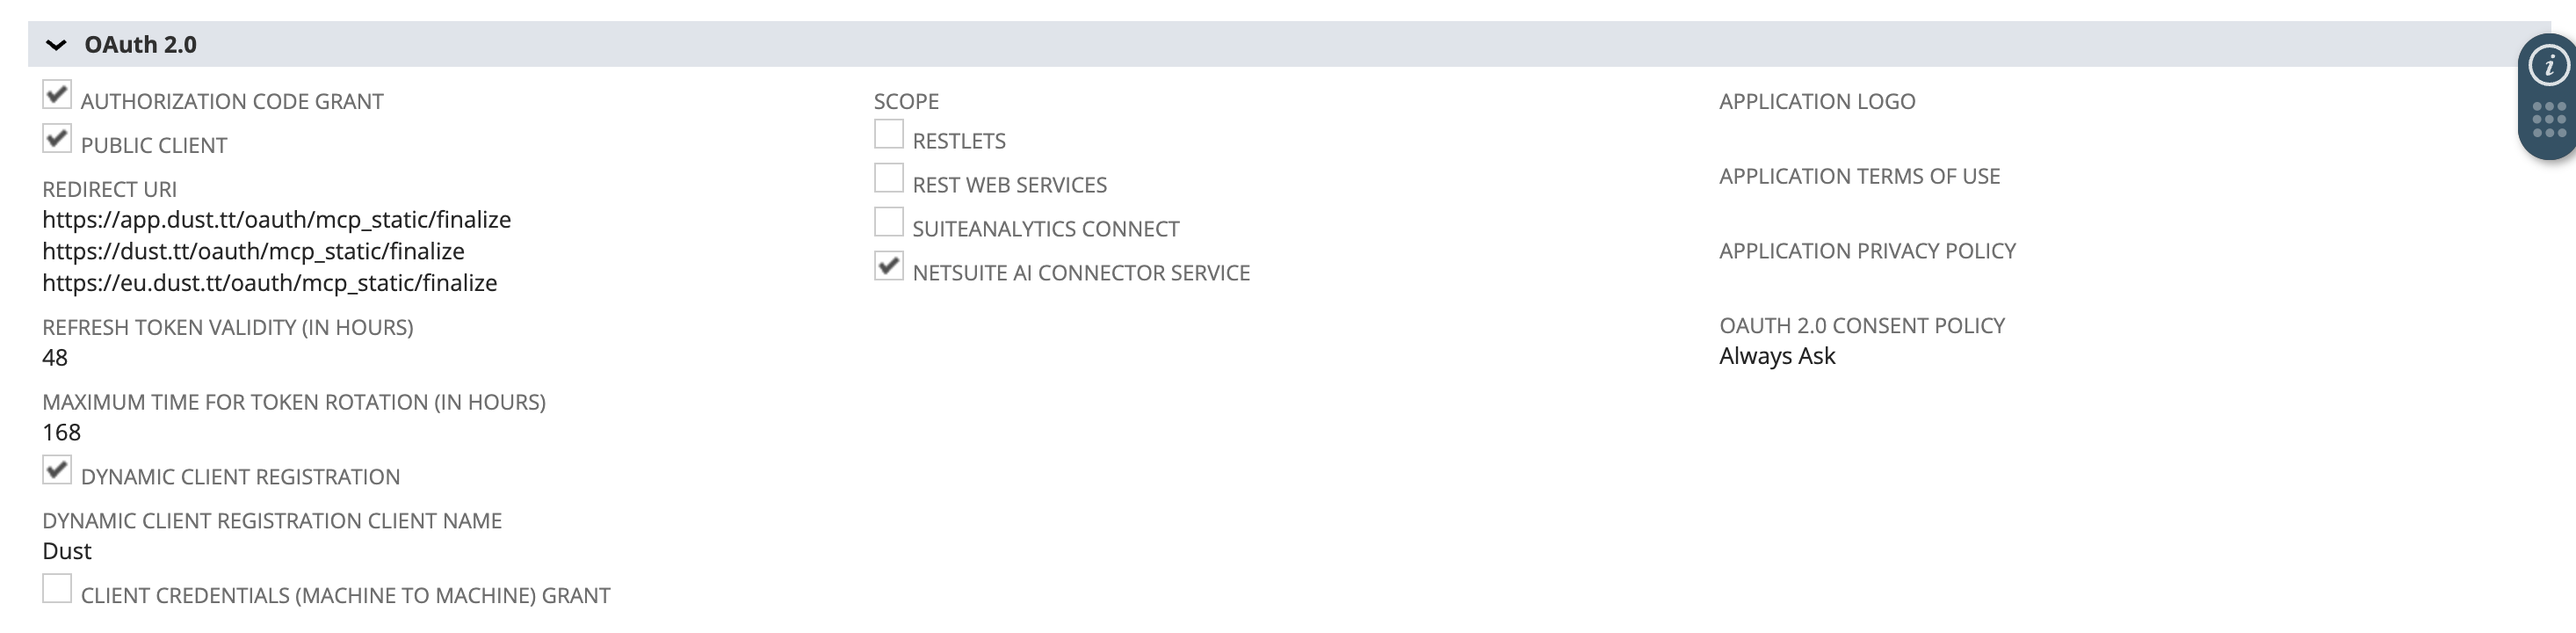
Under Authentication, check:
- Authorization Code Grant
- Public Client
- Add these three Redirect URIs:
https://app.dust.tt/oauth/mcp_static/finalize
https://eu.dust.tt/oauth/mcp_static/finalize
https://dust.tt/oauth/mcp_static/finalize- Dynamic Client Registration
- Dynamic Client Registration Client Name: "Dust"
- Scope: NetSuite AI Connector Service
Click Save and copy the Consumer Key / Client ID immediately (it won't be shown again after leaving the page).
You app should be set-up as following:
5. Connect in Dust
In Dust, go to Spaces → Tools → Add tools → Add MCP server → Static OAuth.
Server URL:
https://<accountid>.suitetalk.api.netsuite.com/services/mcp/v1/suiteapp/com.netsuite.mcpstandardtoolsReplace <accountid> with your NetSuite account ID (visible in your NetSuite URL, e.g. td3485262).
Authentication: OAuth, then fill in:
| Field | Value |
|---|---|
| Client ID | Your Consumer Key from step 4 (without the ID prefix) |
| Client Secret | Your Consumer Secret from step 4 |
| Authorization URL | https://<accountid>.app.netsuite.com/app/login/oauth2/authorize.nl |
| Token URL | https://<accountid>.suitetalk.api.netsuite.com/services/rest/auth/oauth2/v1/token |
| Scope | mcp |
Replace <accountid> with your NetSuite account ID.
Important: copy the Client ID exactly as shown — do not include any prefix such as
ID.
Save, authenticate with your NetSuite account using your custom MCP role, and the tools will appear.
Troubleshooting
| Error | Fix |
|---|---|
| "Invalid login attempt" on the consent page | Make sure you select your custom MCP role (not Administrator) during login. |
| "MCP Server Connection" permission not visible | The MCP Standard Tools SuiteApp is not installed (step 2). |
| "Wrong role or account" | Click "Choose another role" and select the custom role created in step 3. |
| Client ID rejected / invalid application | You likely added an ID prefix to the Consumer Key. Use only the hex string. |
| Redirect URI mismatch | Make sure the three /mcp_static/finalize URIs are added (not /mcp/finalize). |