Creating Google Calendar events from a Dust agent
Dust Apps are being deprecated. Only Dust Apps that were created before October 2025 are accessible to users. The creation of new Dust Apps is now deactivated.
💡 By combining Dust with Zapier (using a Dust App), we can give to an agent the capability to create Calendar events. This is an advanced use case that will help you understand how anything you can do in Zapier (or Make.com, Windmill.dev , pipedream etc…) can be triggered from Dust agents.
Create a Dust App

First, create a Dust App with an “Input” block. The input block will be responsible for collecting the data required to create the calendar event.
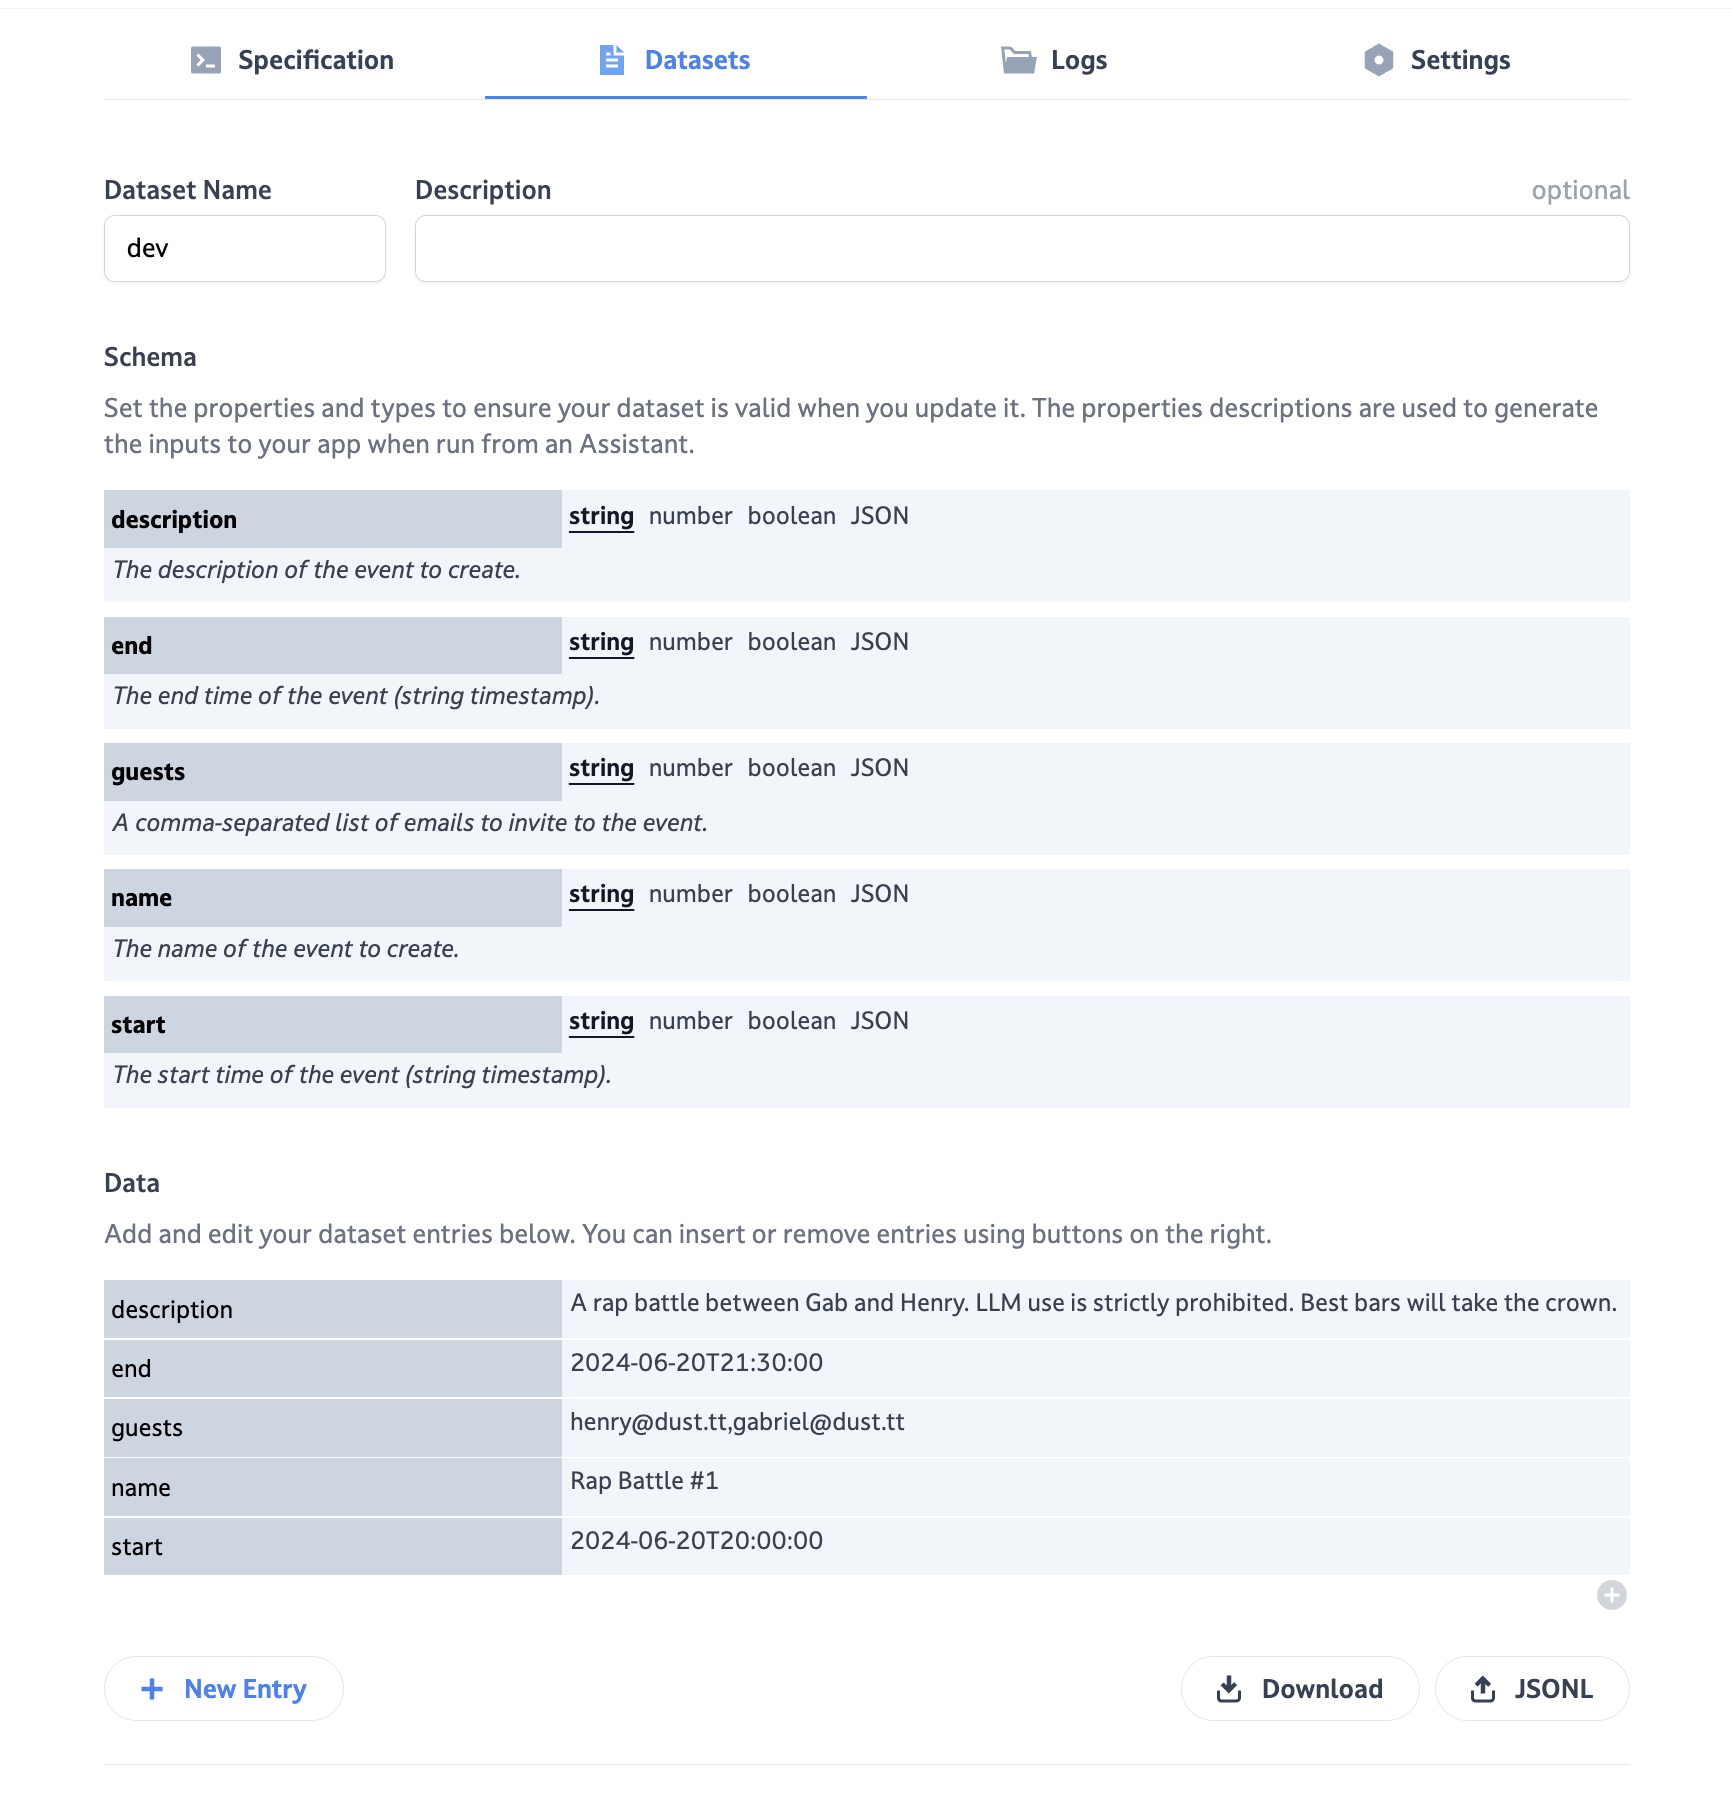
After clicking on “Create dataset” we can start filling the expected data schema. The description for each field is very important, as this is what the AI model will use to understand what should go in each of the field.
You should then add some test values in the “Data” section — these will be used to test your Dust App before making it available to a Dust agent.
Create a Zap
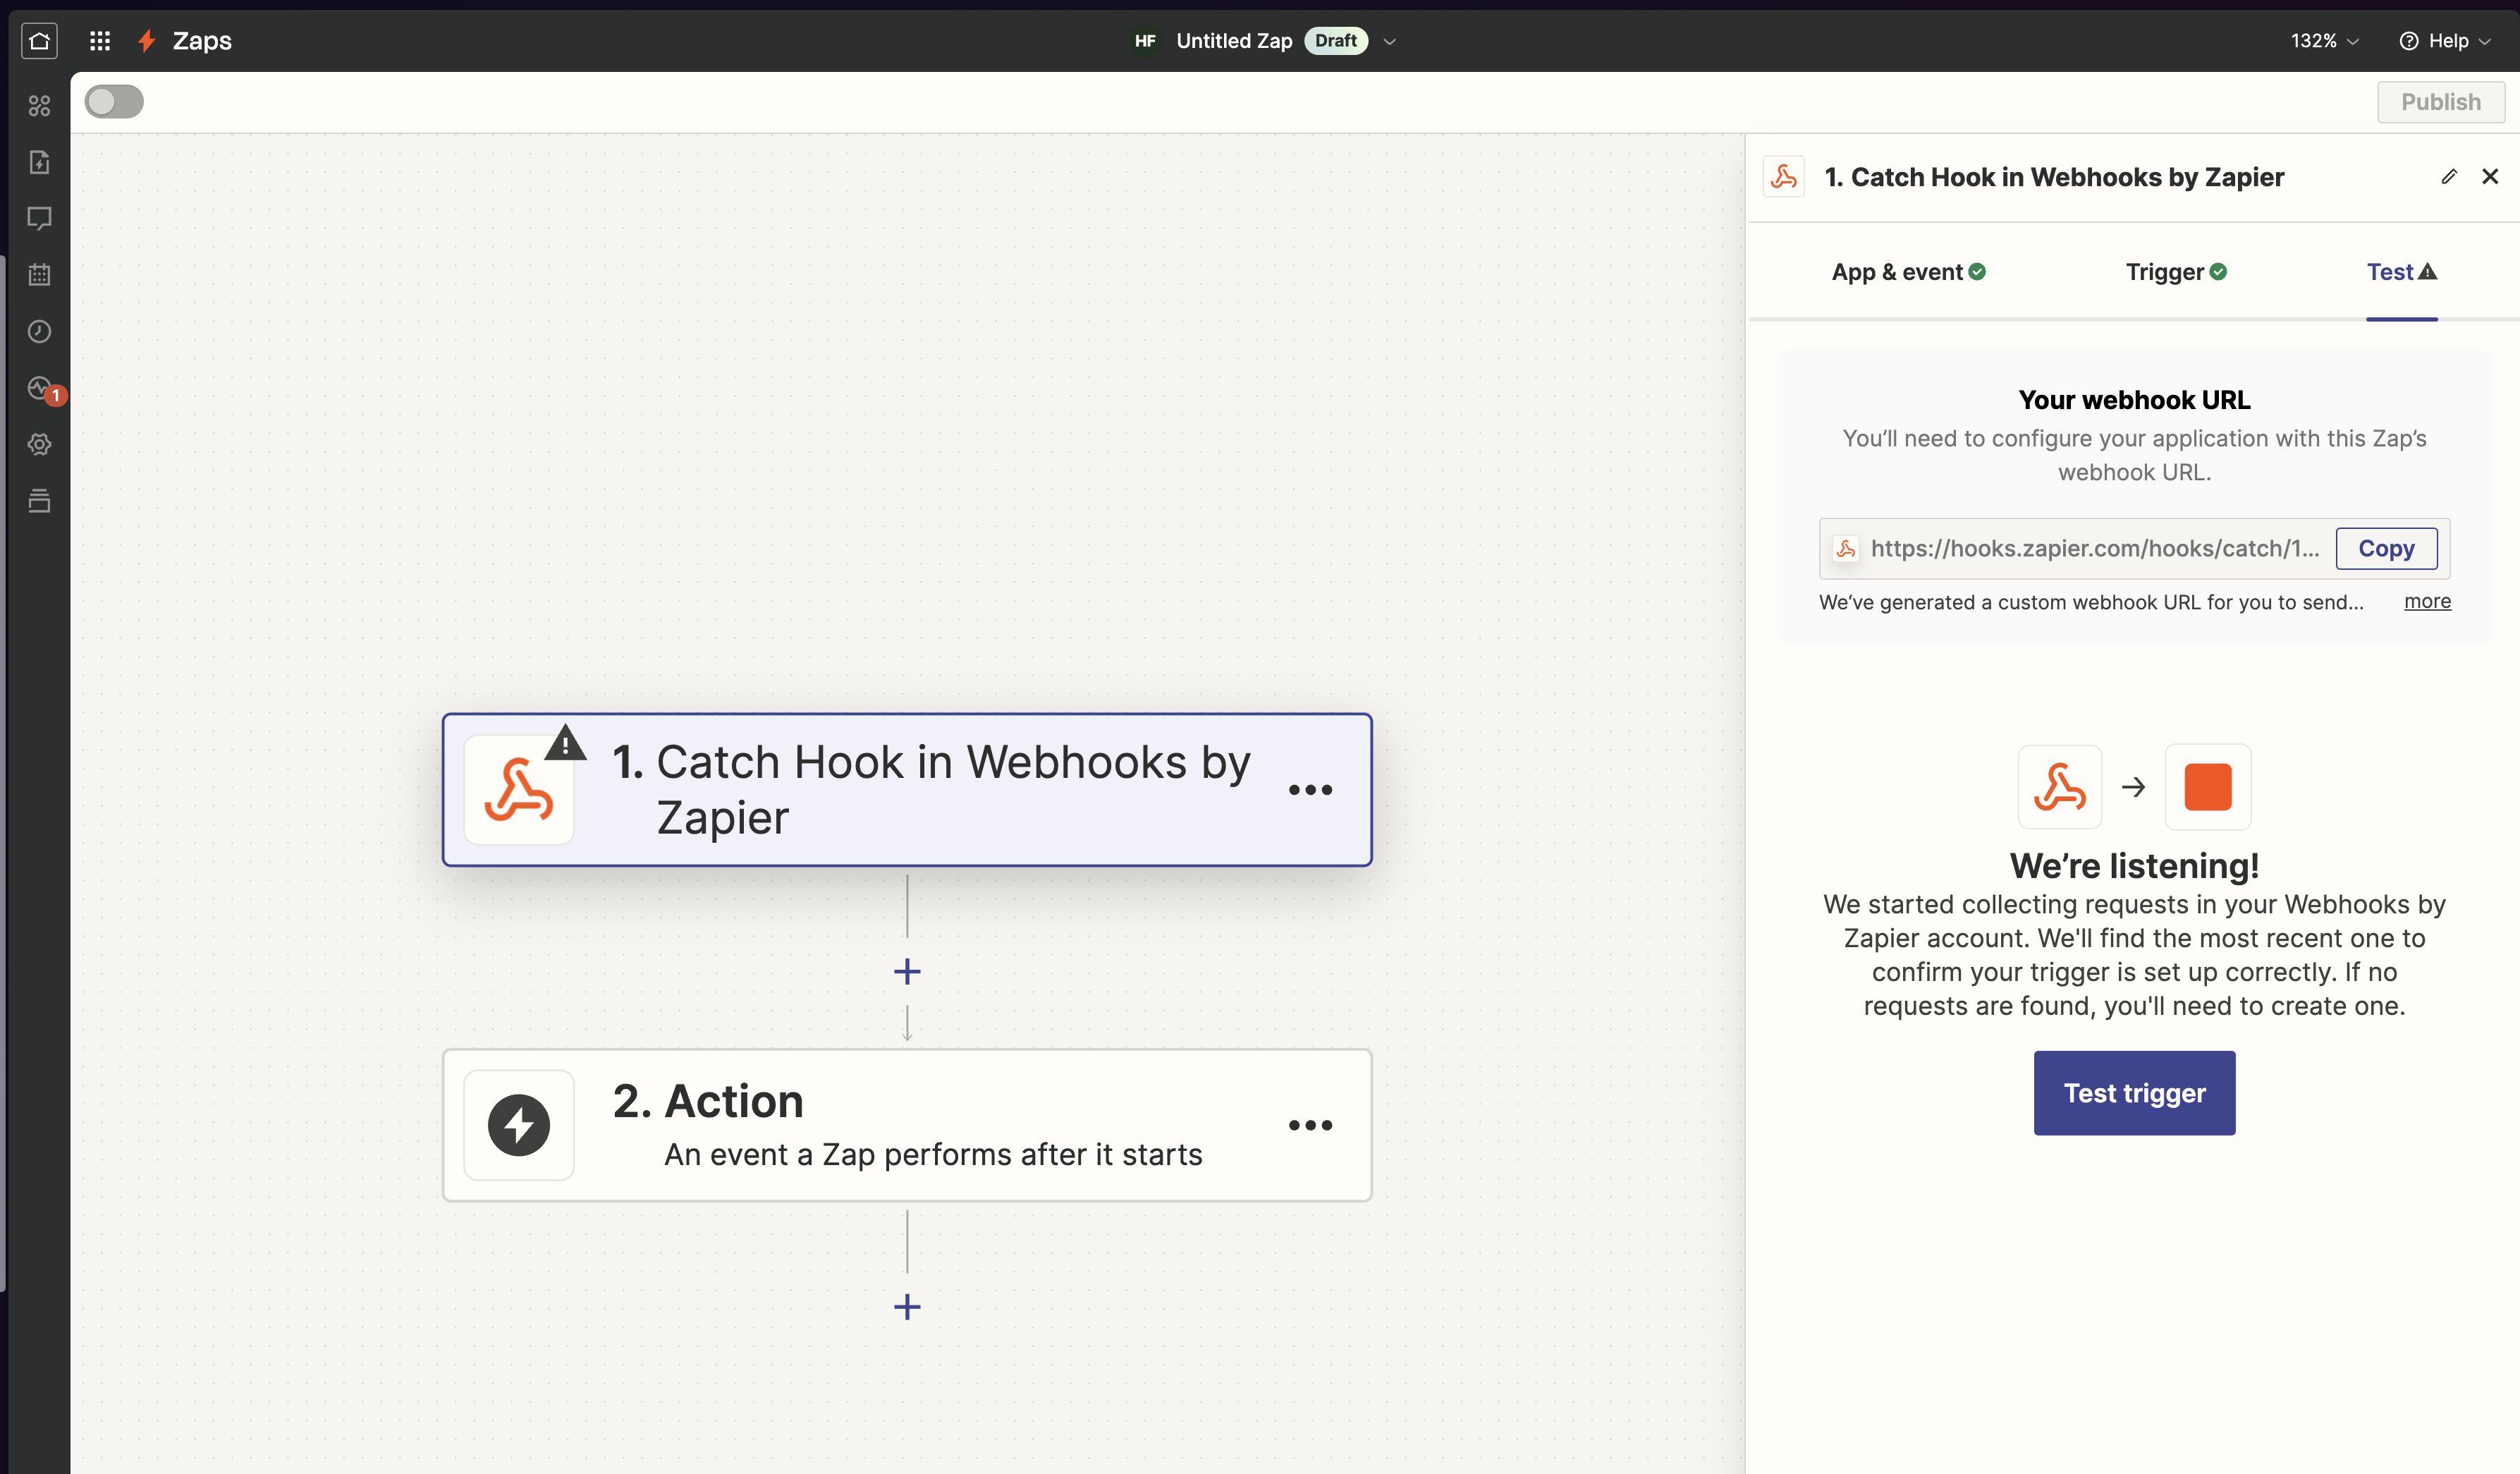
On Zapier, we create a new Zap. The Zap should use the “Catch Hook” webhook trigger: this is how your Dust App will be calling your Zap.
Once the Zap trigger is created, go to the “Test” tab and copy the webhook URL to your clipboard.
Call your Zap from your Dust App
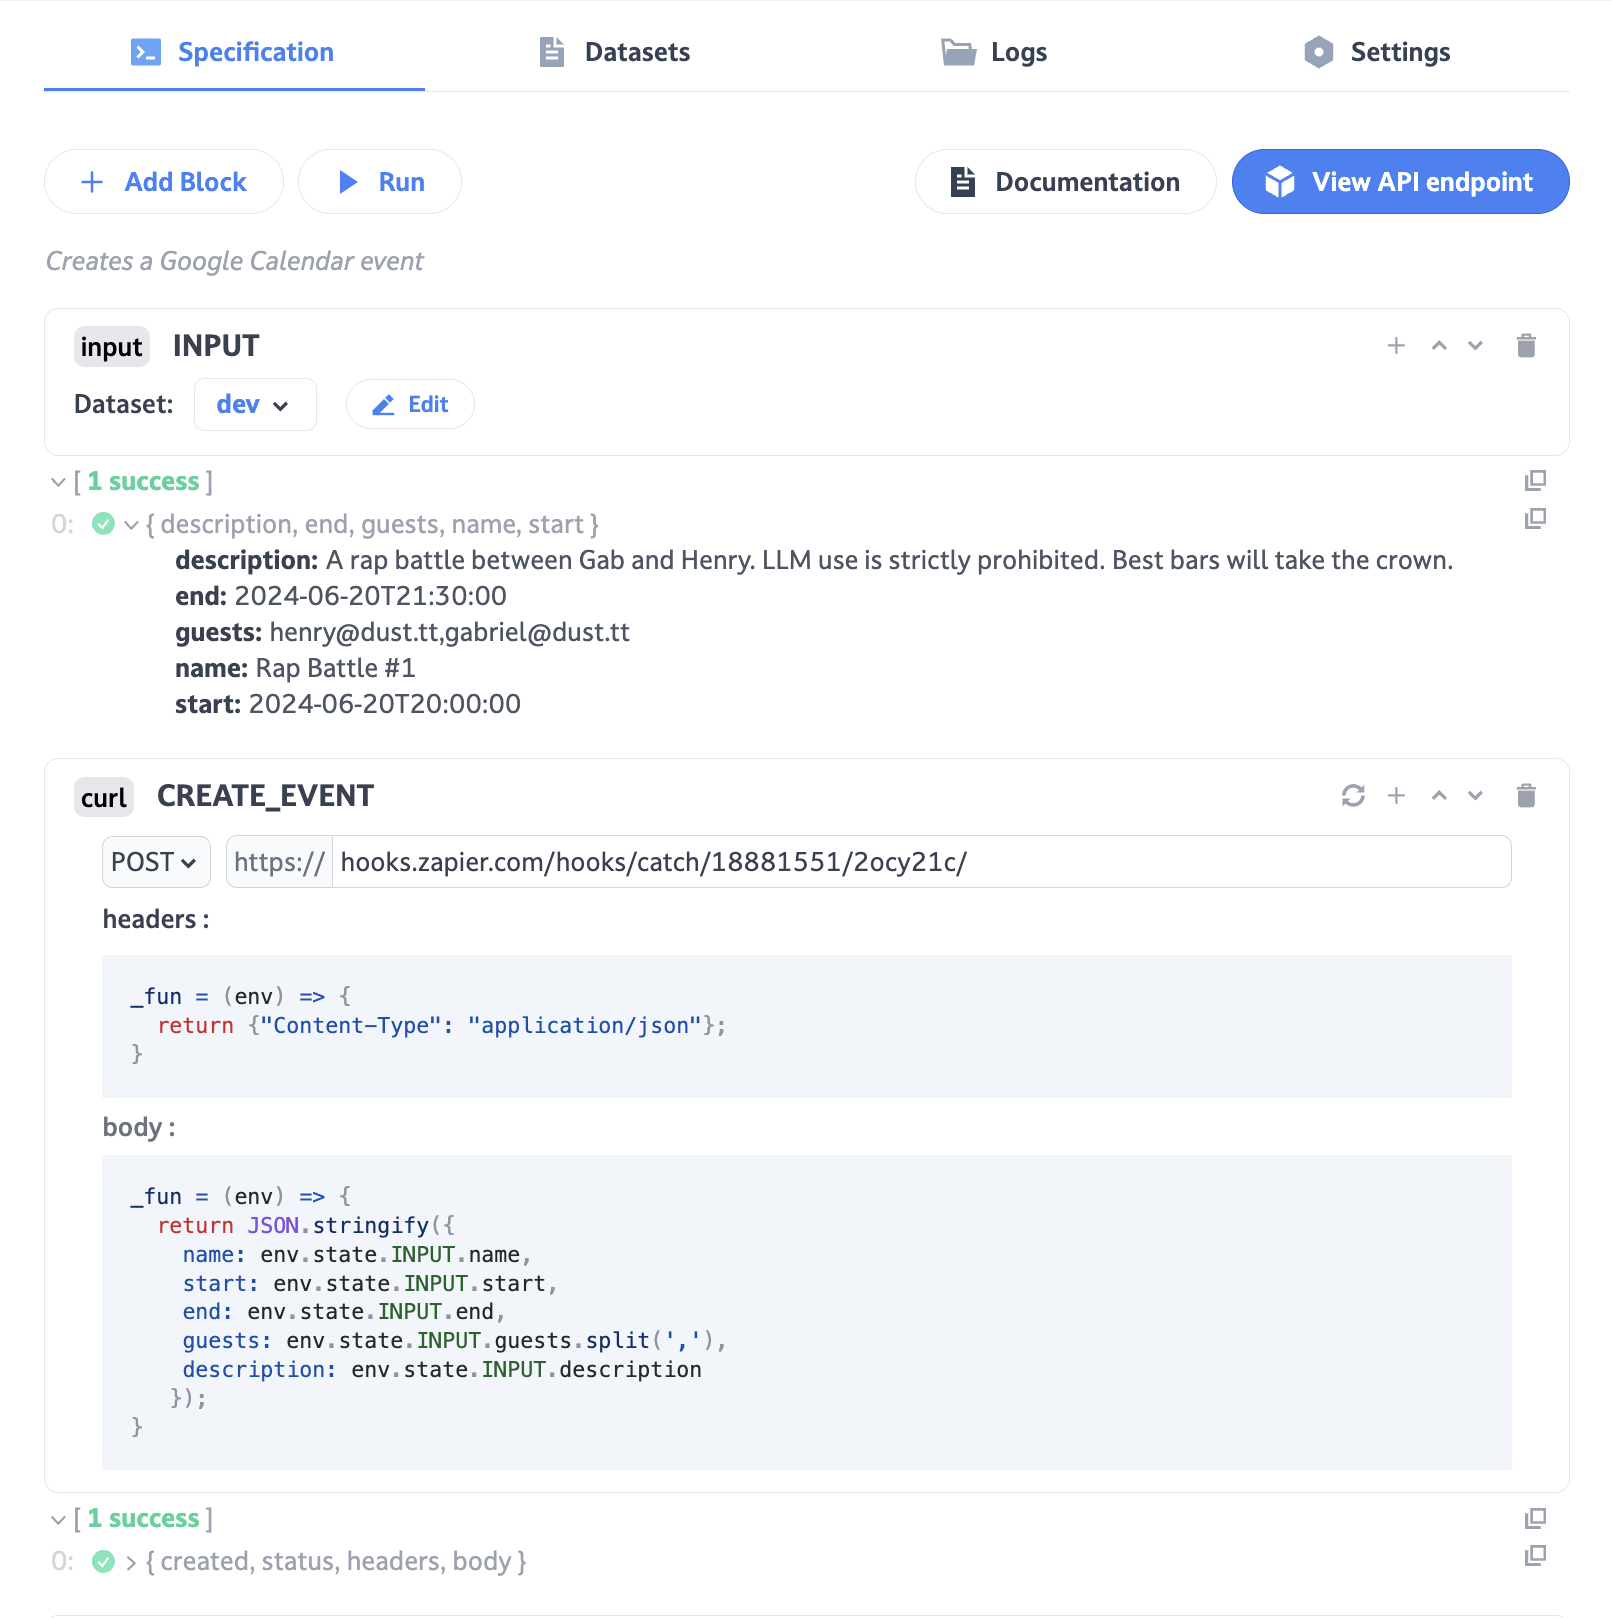
In your Dust App, add a CURL block as pictured above. The CURL block is used to call your Zap’s webhook trigger.
Once you have pasted the webhook URL of your Zap and filled-in the body section of the block with all the required parameters, you can run your Dust App.
To make it easier, you can simply copy and paste this code into your CURL block body section:
_fun = (env) => {
  return JSON.stringify({
    name: env.state.INPUT.name,
    start: env.state.INPUT.start,
    end: env.state.INPUT.end,
    guests: env.state.INPUT.guests.split(','),
    description: env.state.INPUT.description
   });
}
Create the Calendar Event from Zapier
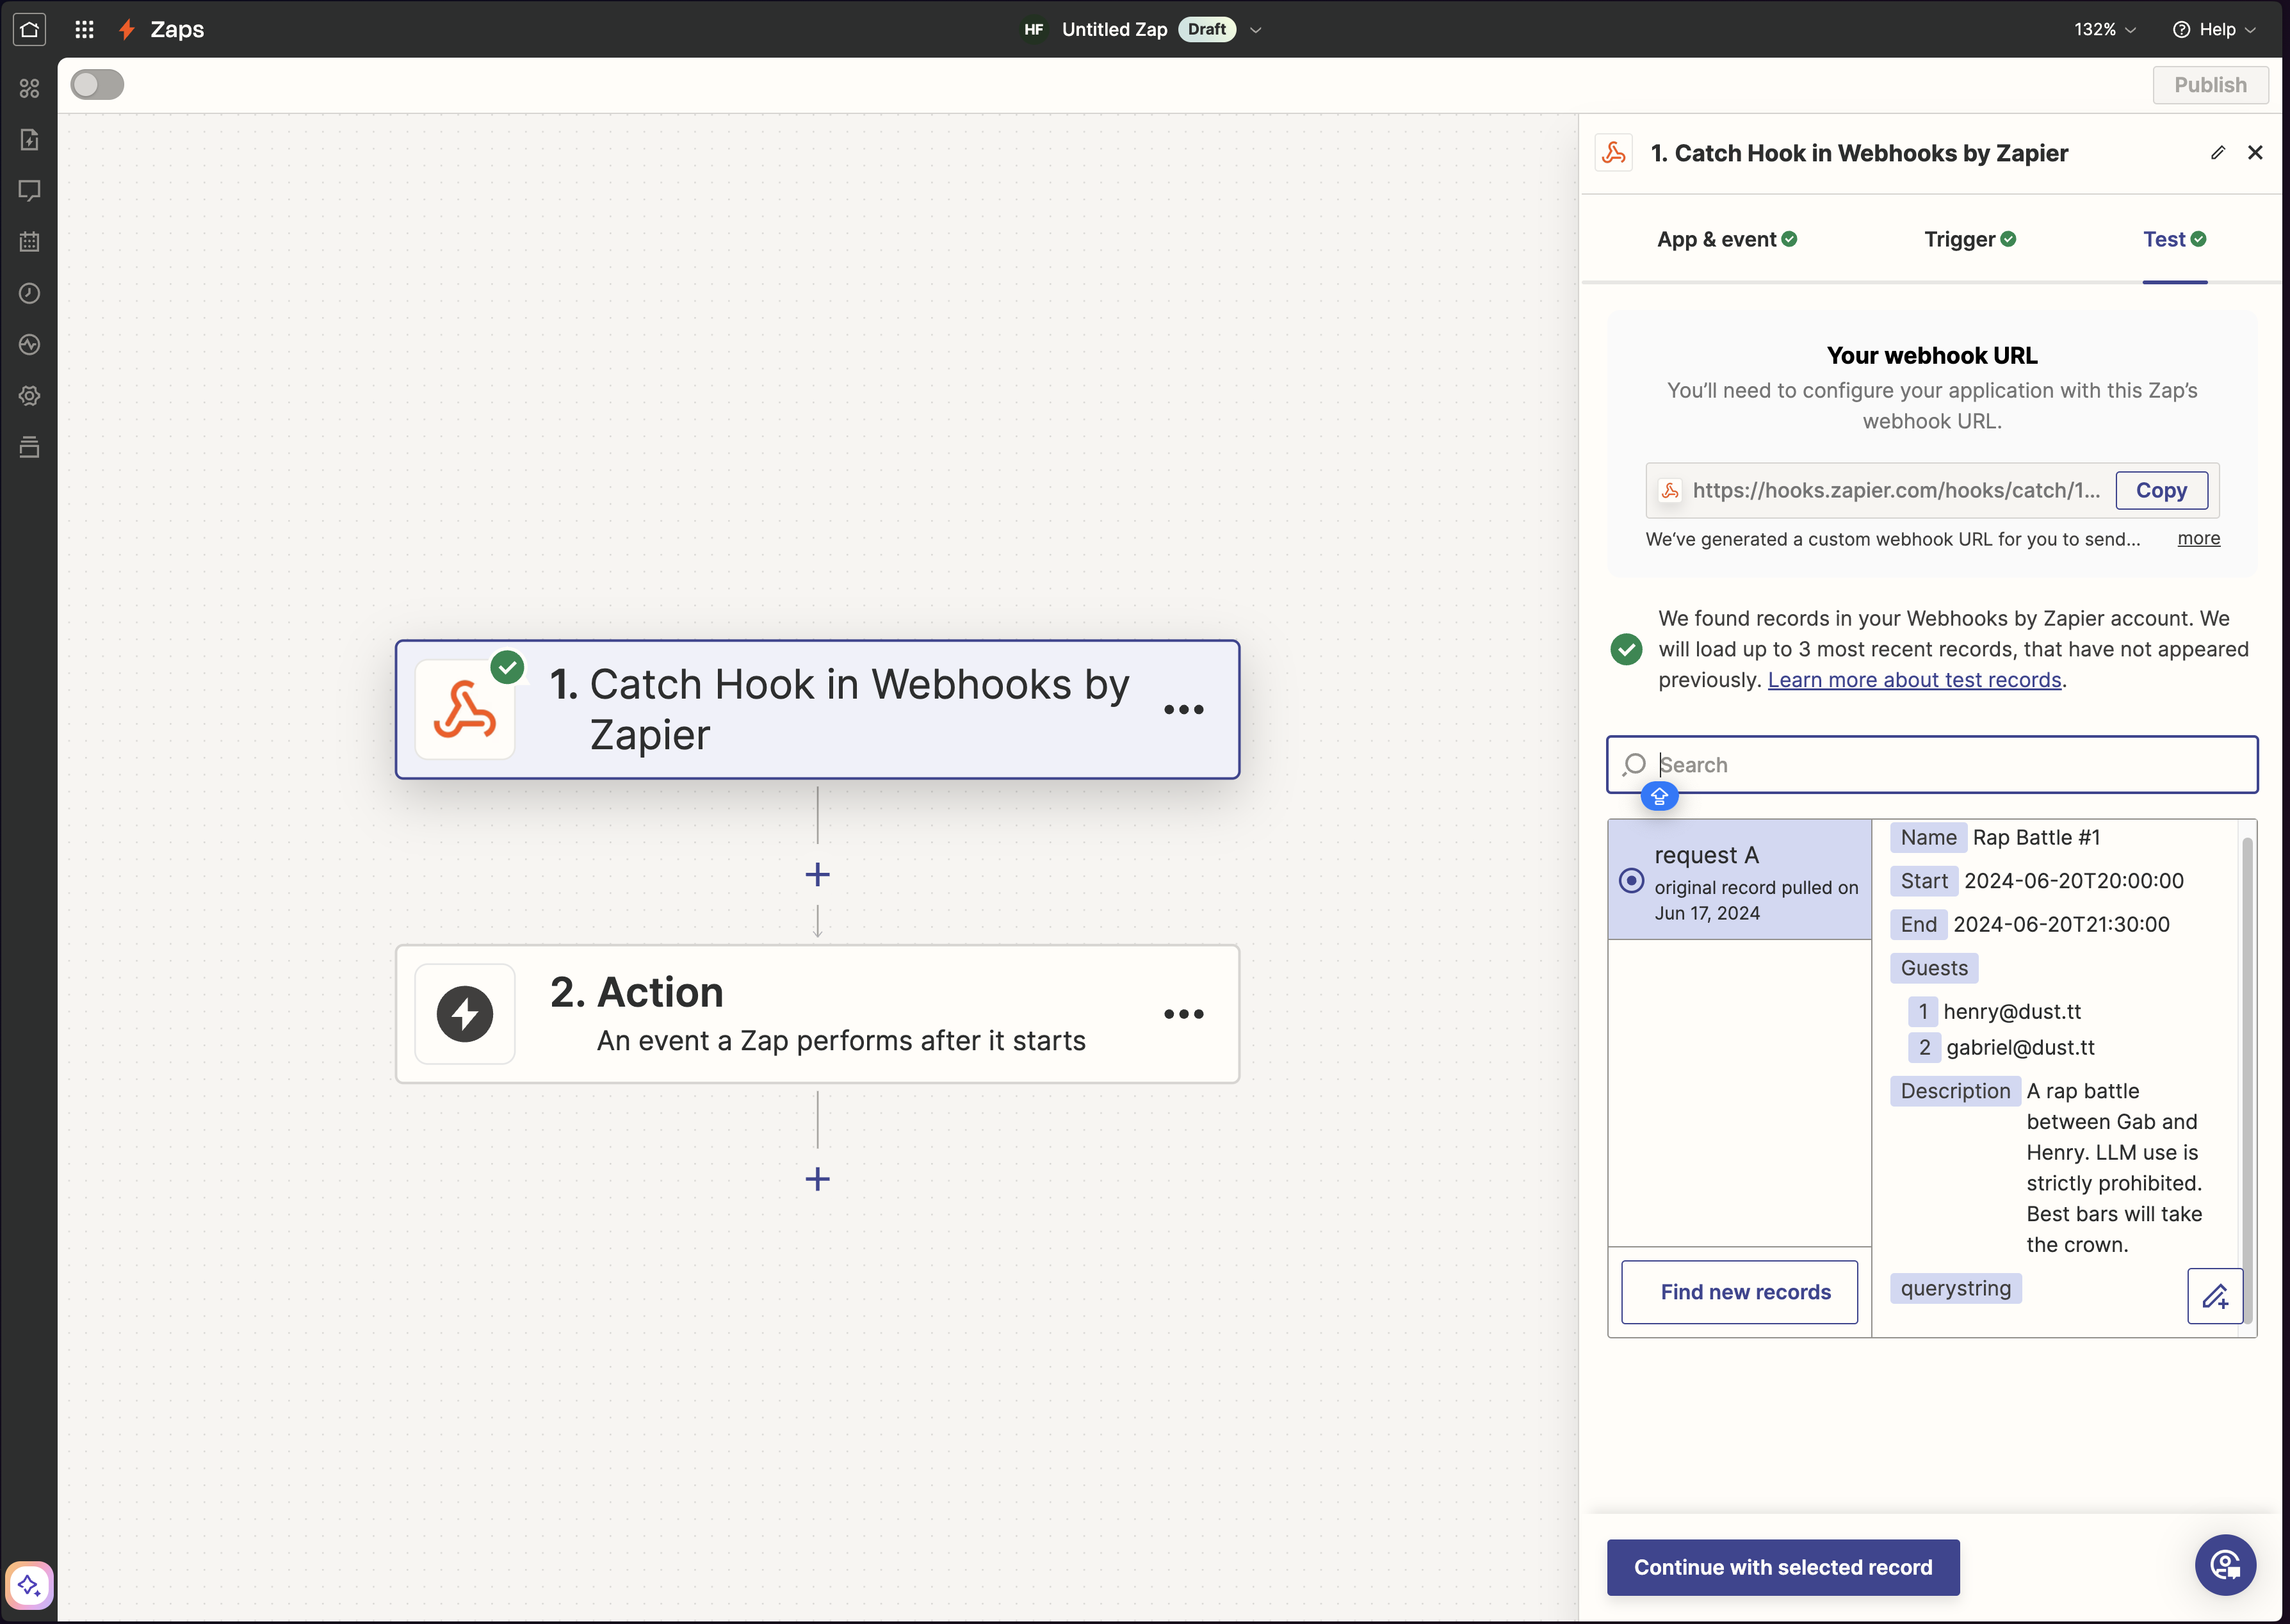
After running your Dust App, you can go back to your Zap. In the “Test” tab of your webhook block, you can now click on “Test trigger”, and you should see that the webhook event sent from Dust has been detected by Zapier. You can now click on “Continue with selected record”.
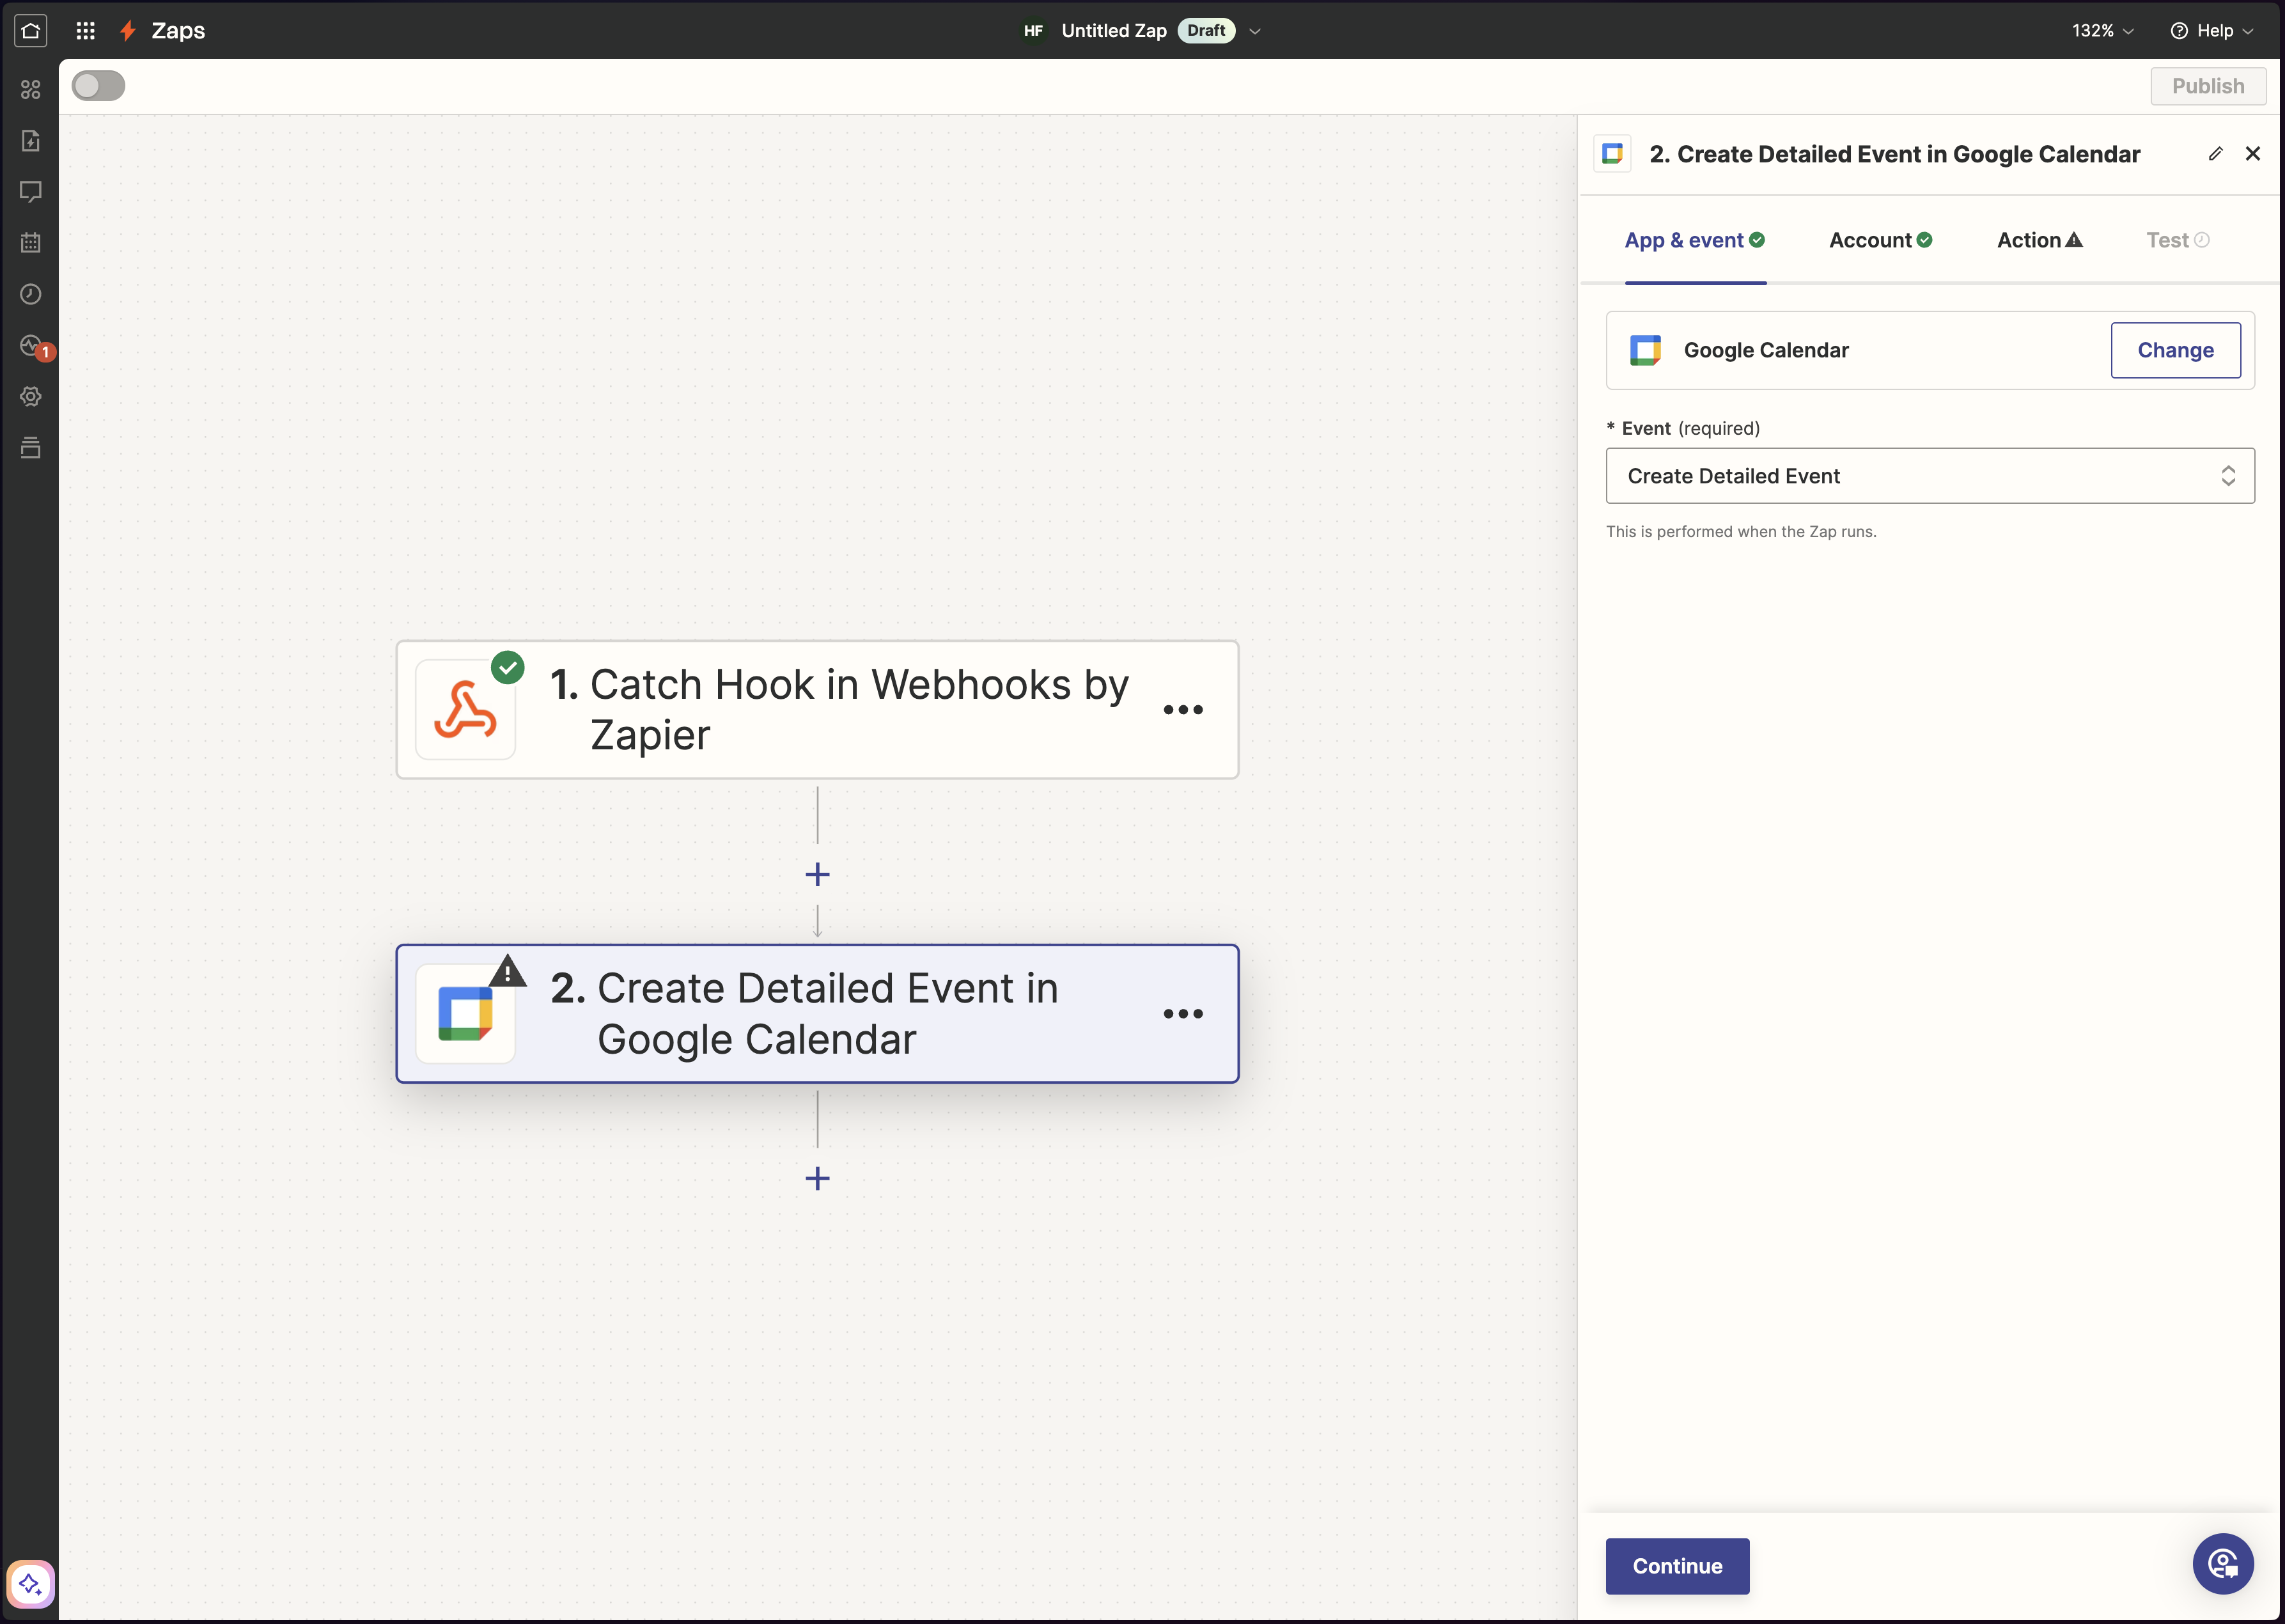
We’re now ready to add the Google Calendar action in Zapier. You should pick the “Create Detailed Event” from the Event dropdown.
Next, you should connect your Google account from the Account tab if not already done.
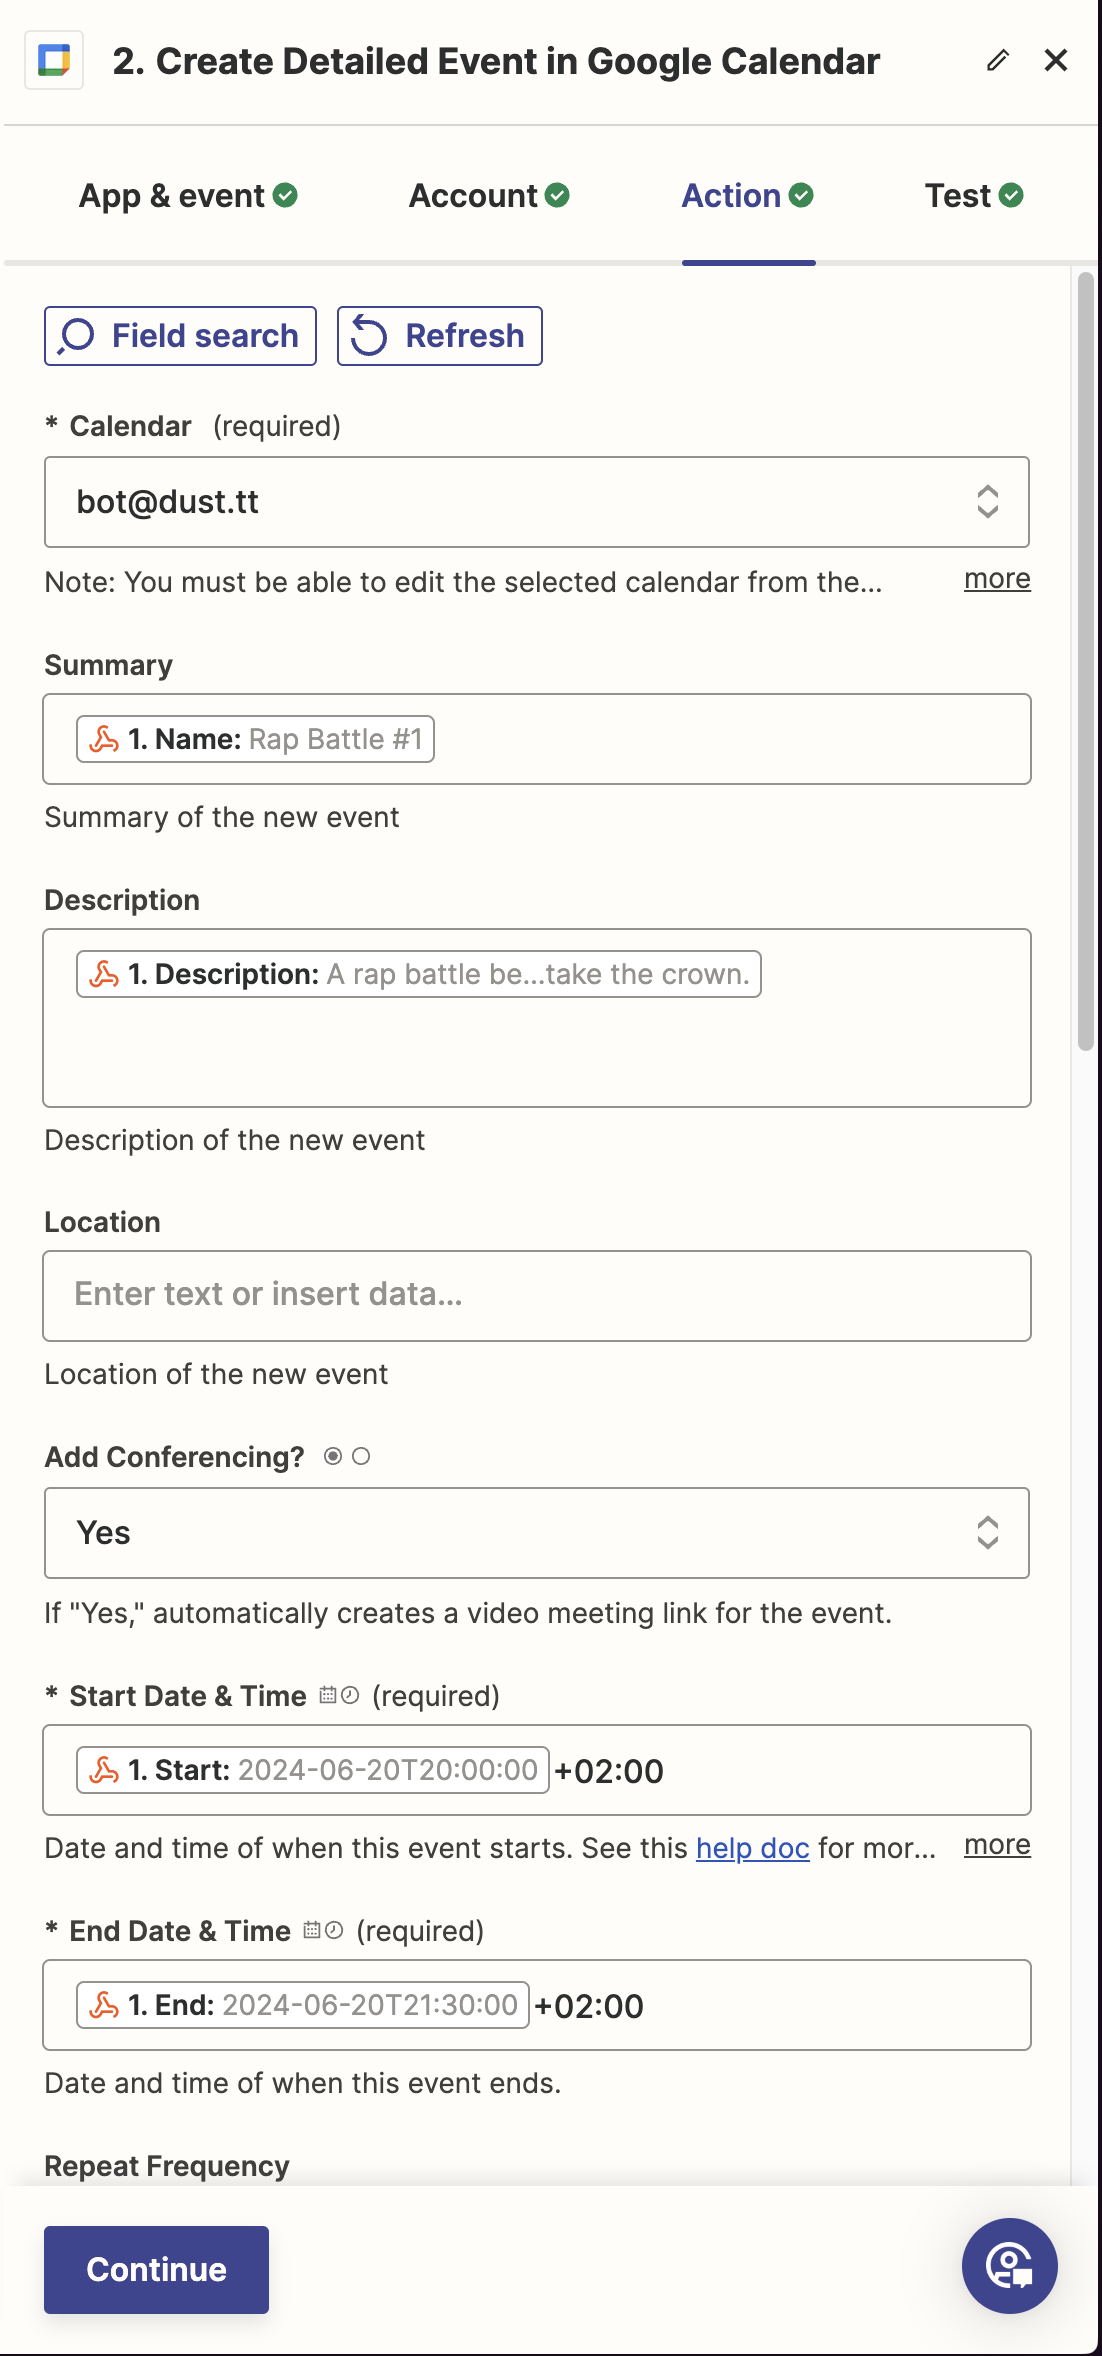
Now, navigate to the Tools tab and fill in all the relevant fields using the values from your webhook.
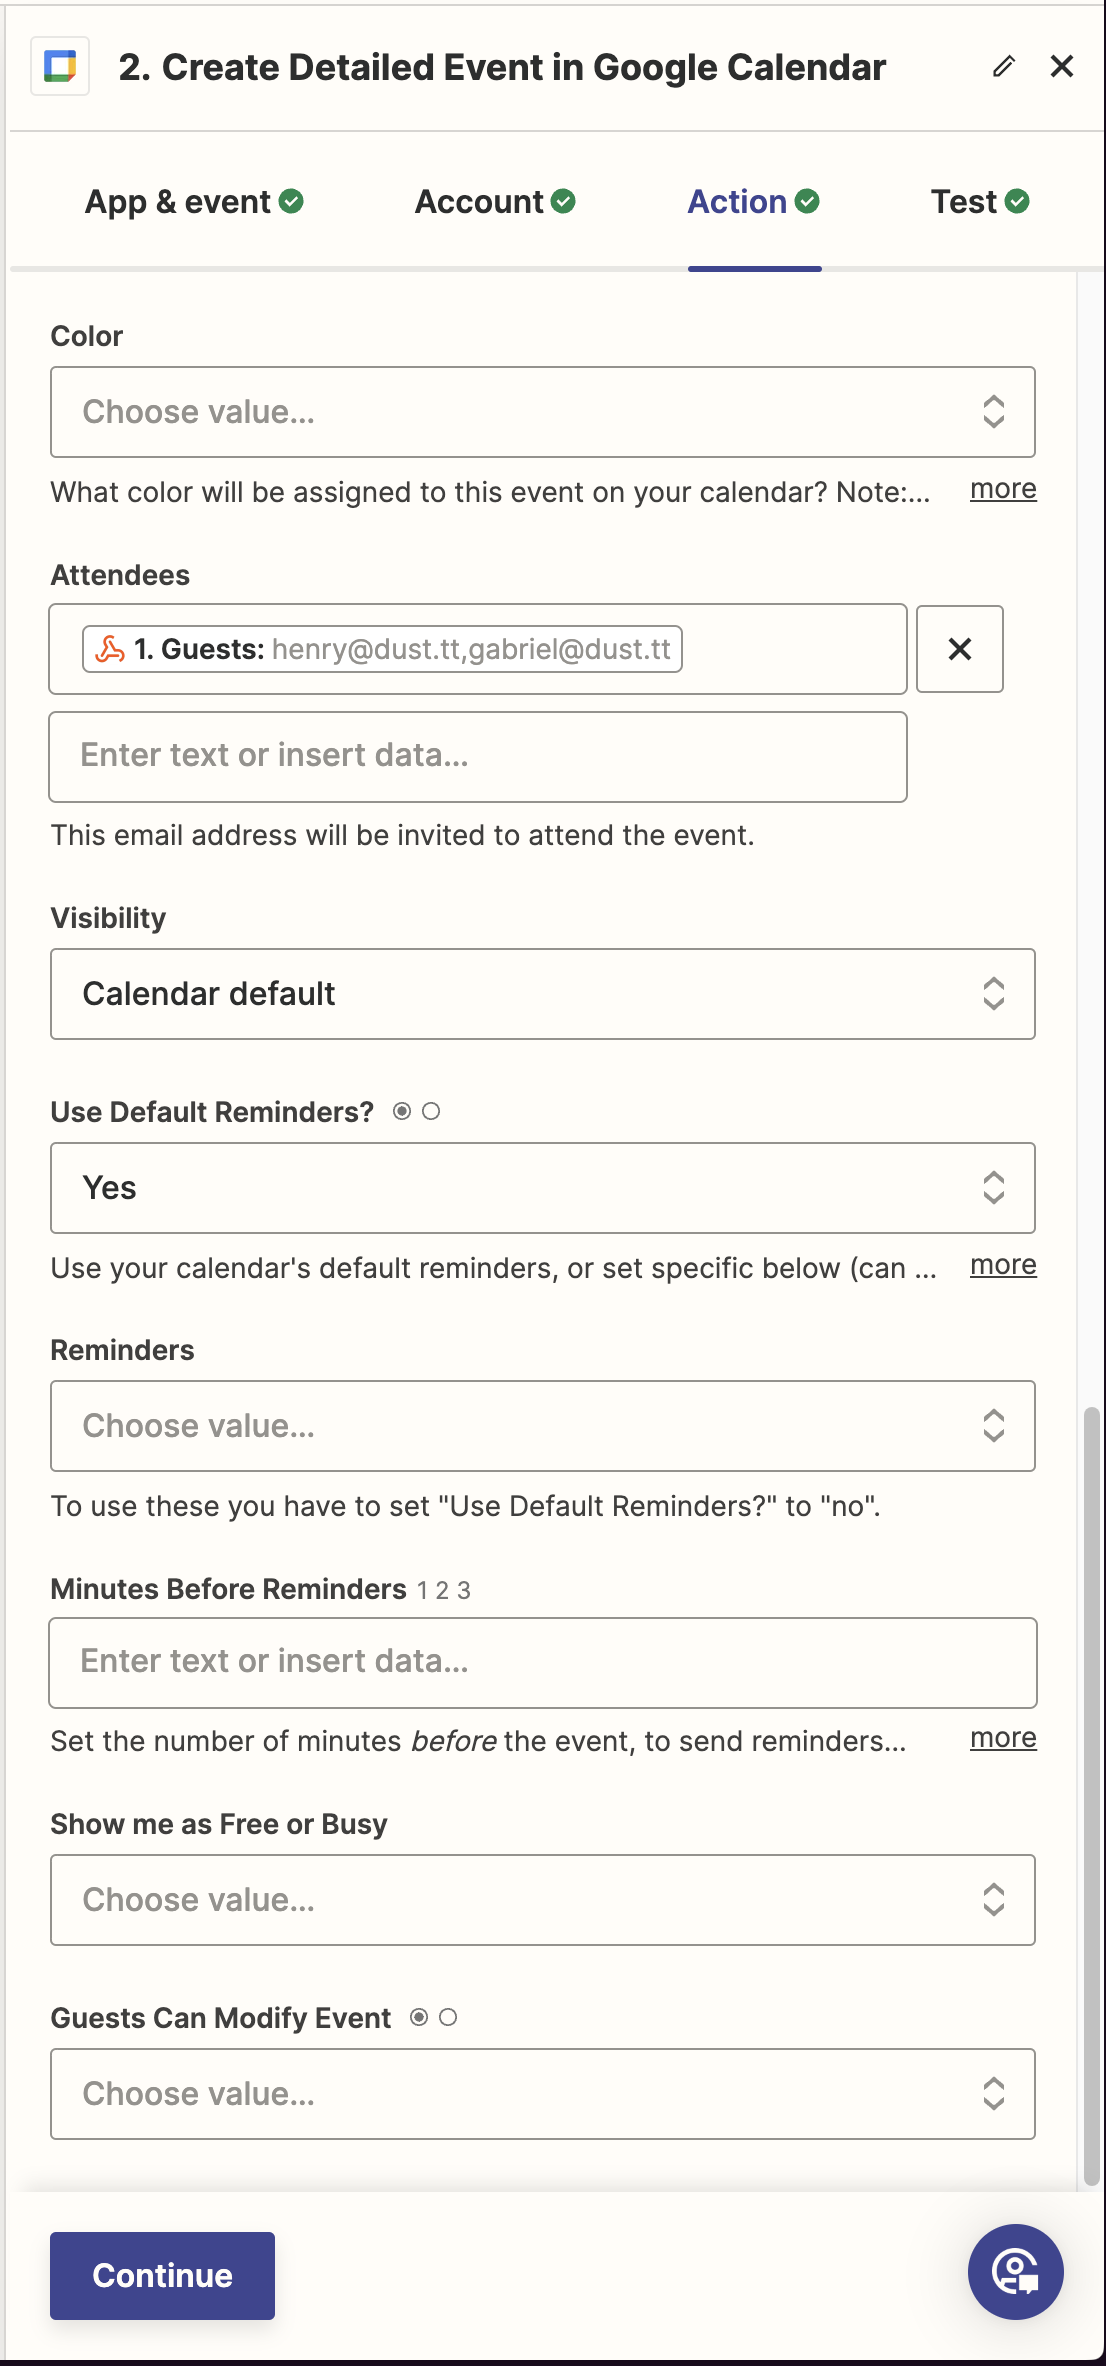
Finish adding all the values, including the Attendees field using the guests value from your webhook.
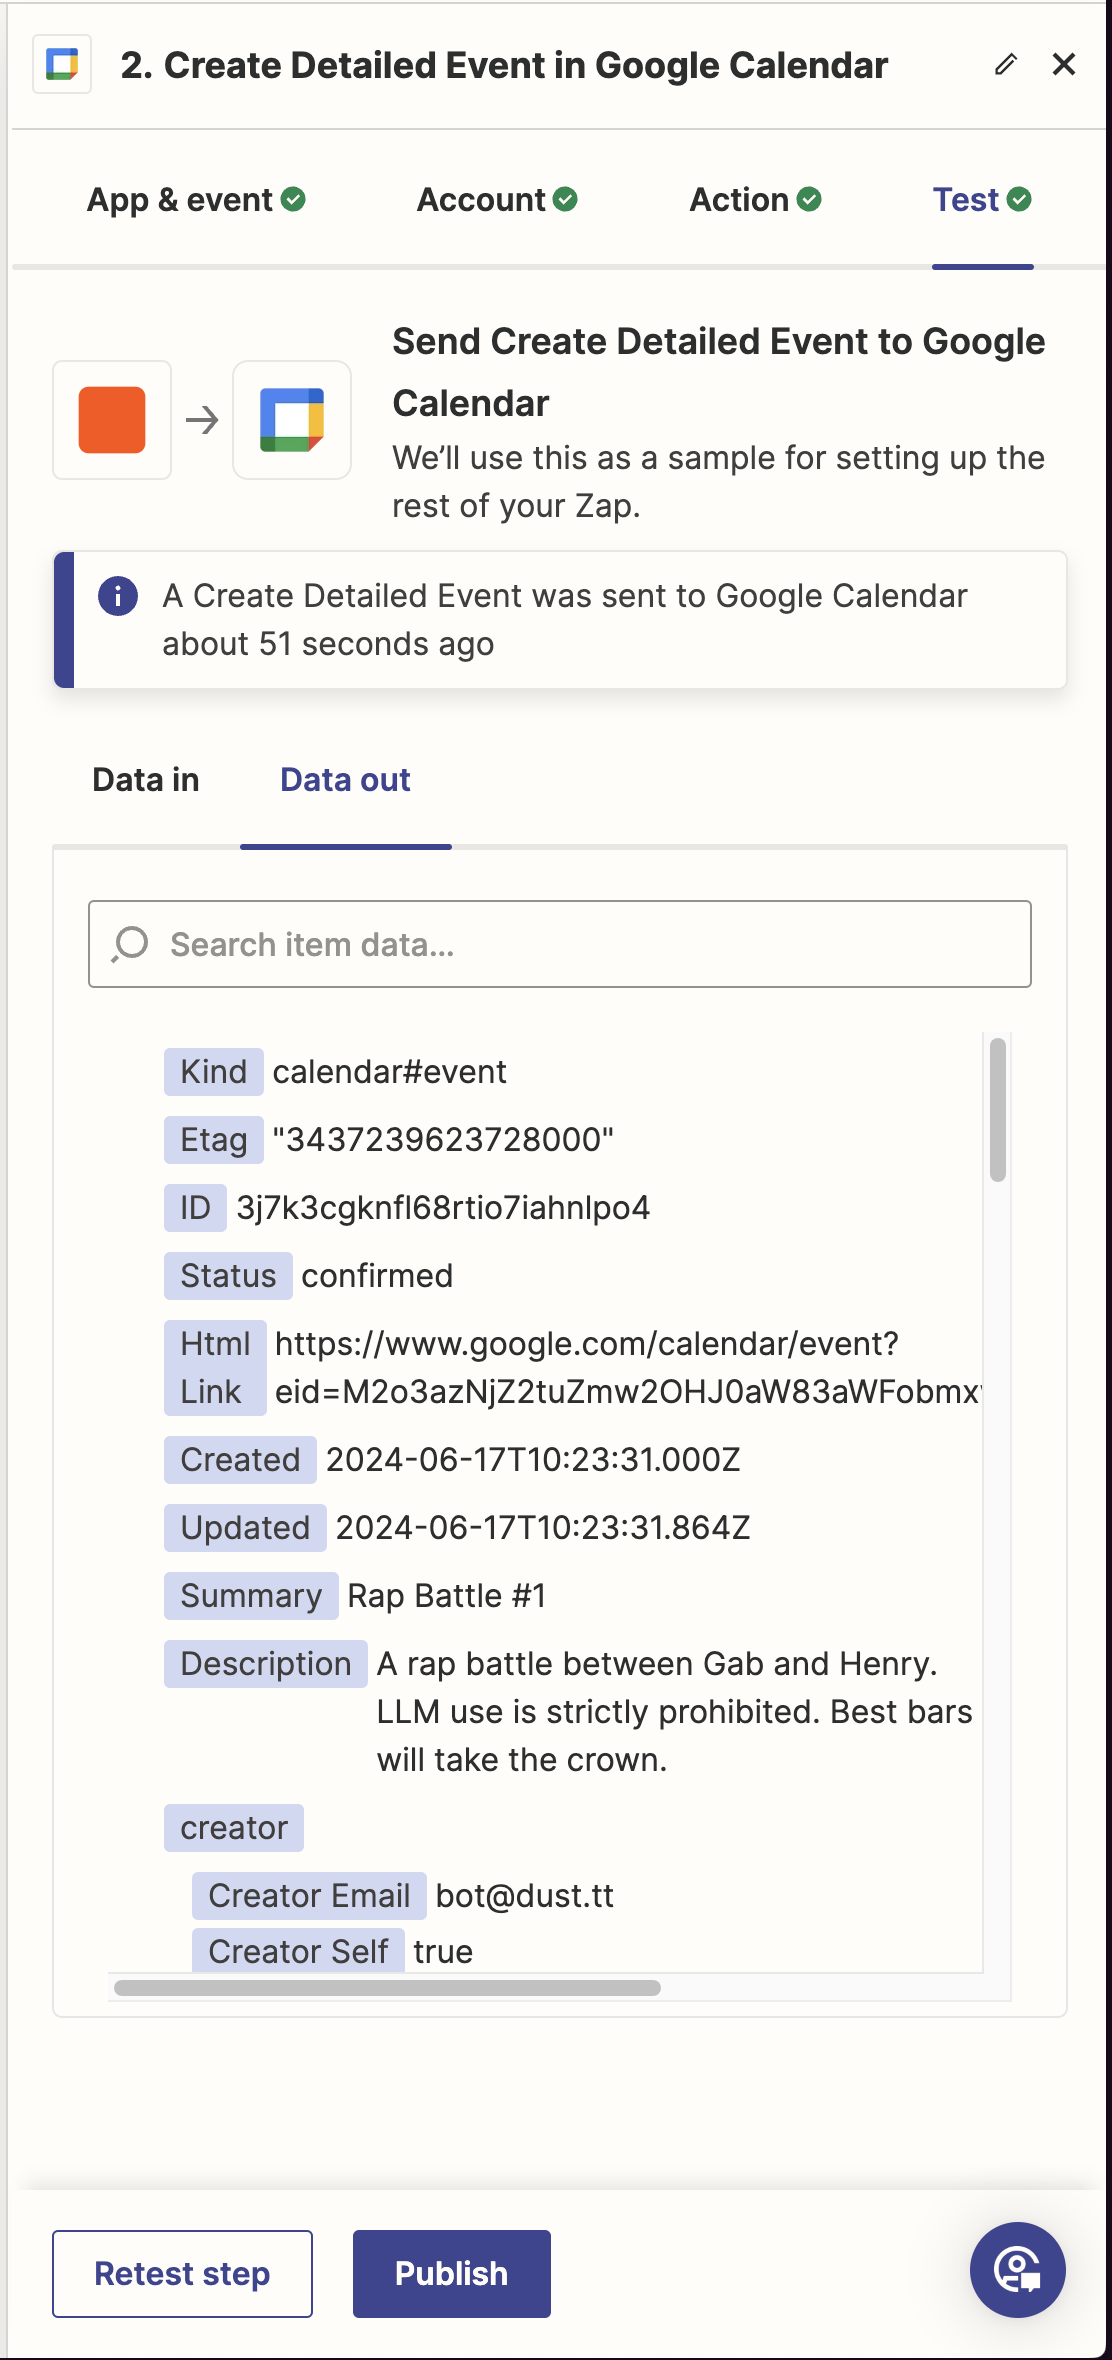
You can now test the Zap Google Calendar action. If everything went according to plan, you should see something similar to the picture above, and your test event should be created in Google Calendar.
Test your Dust App
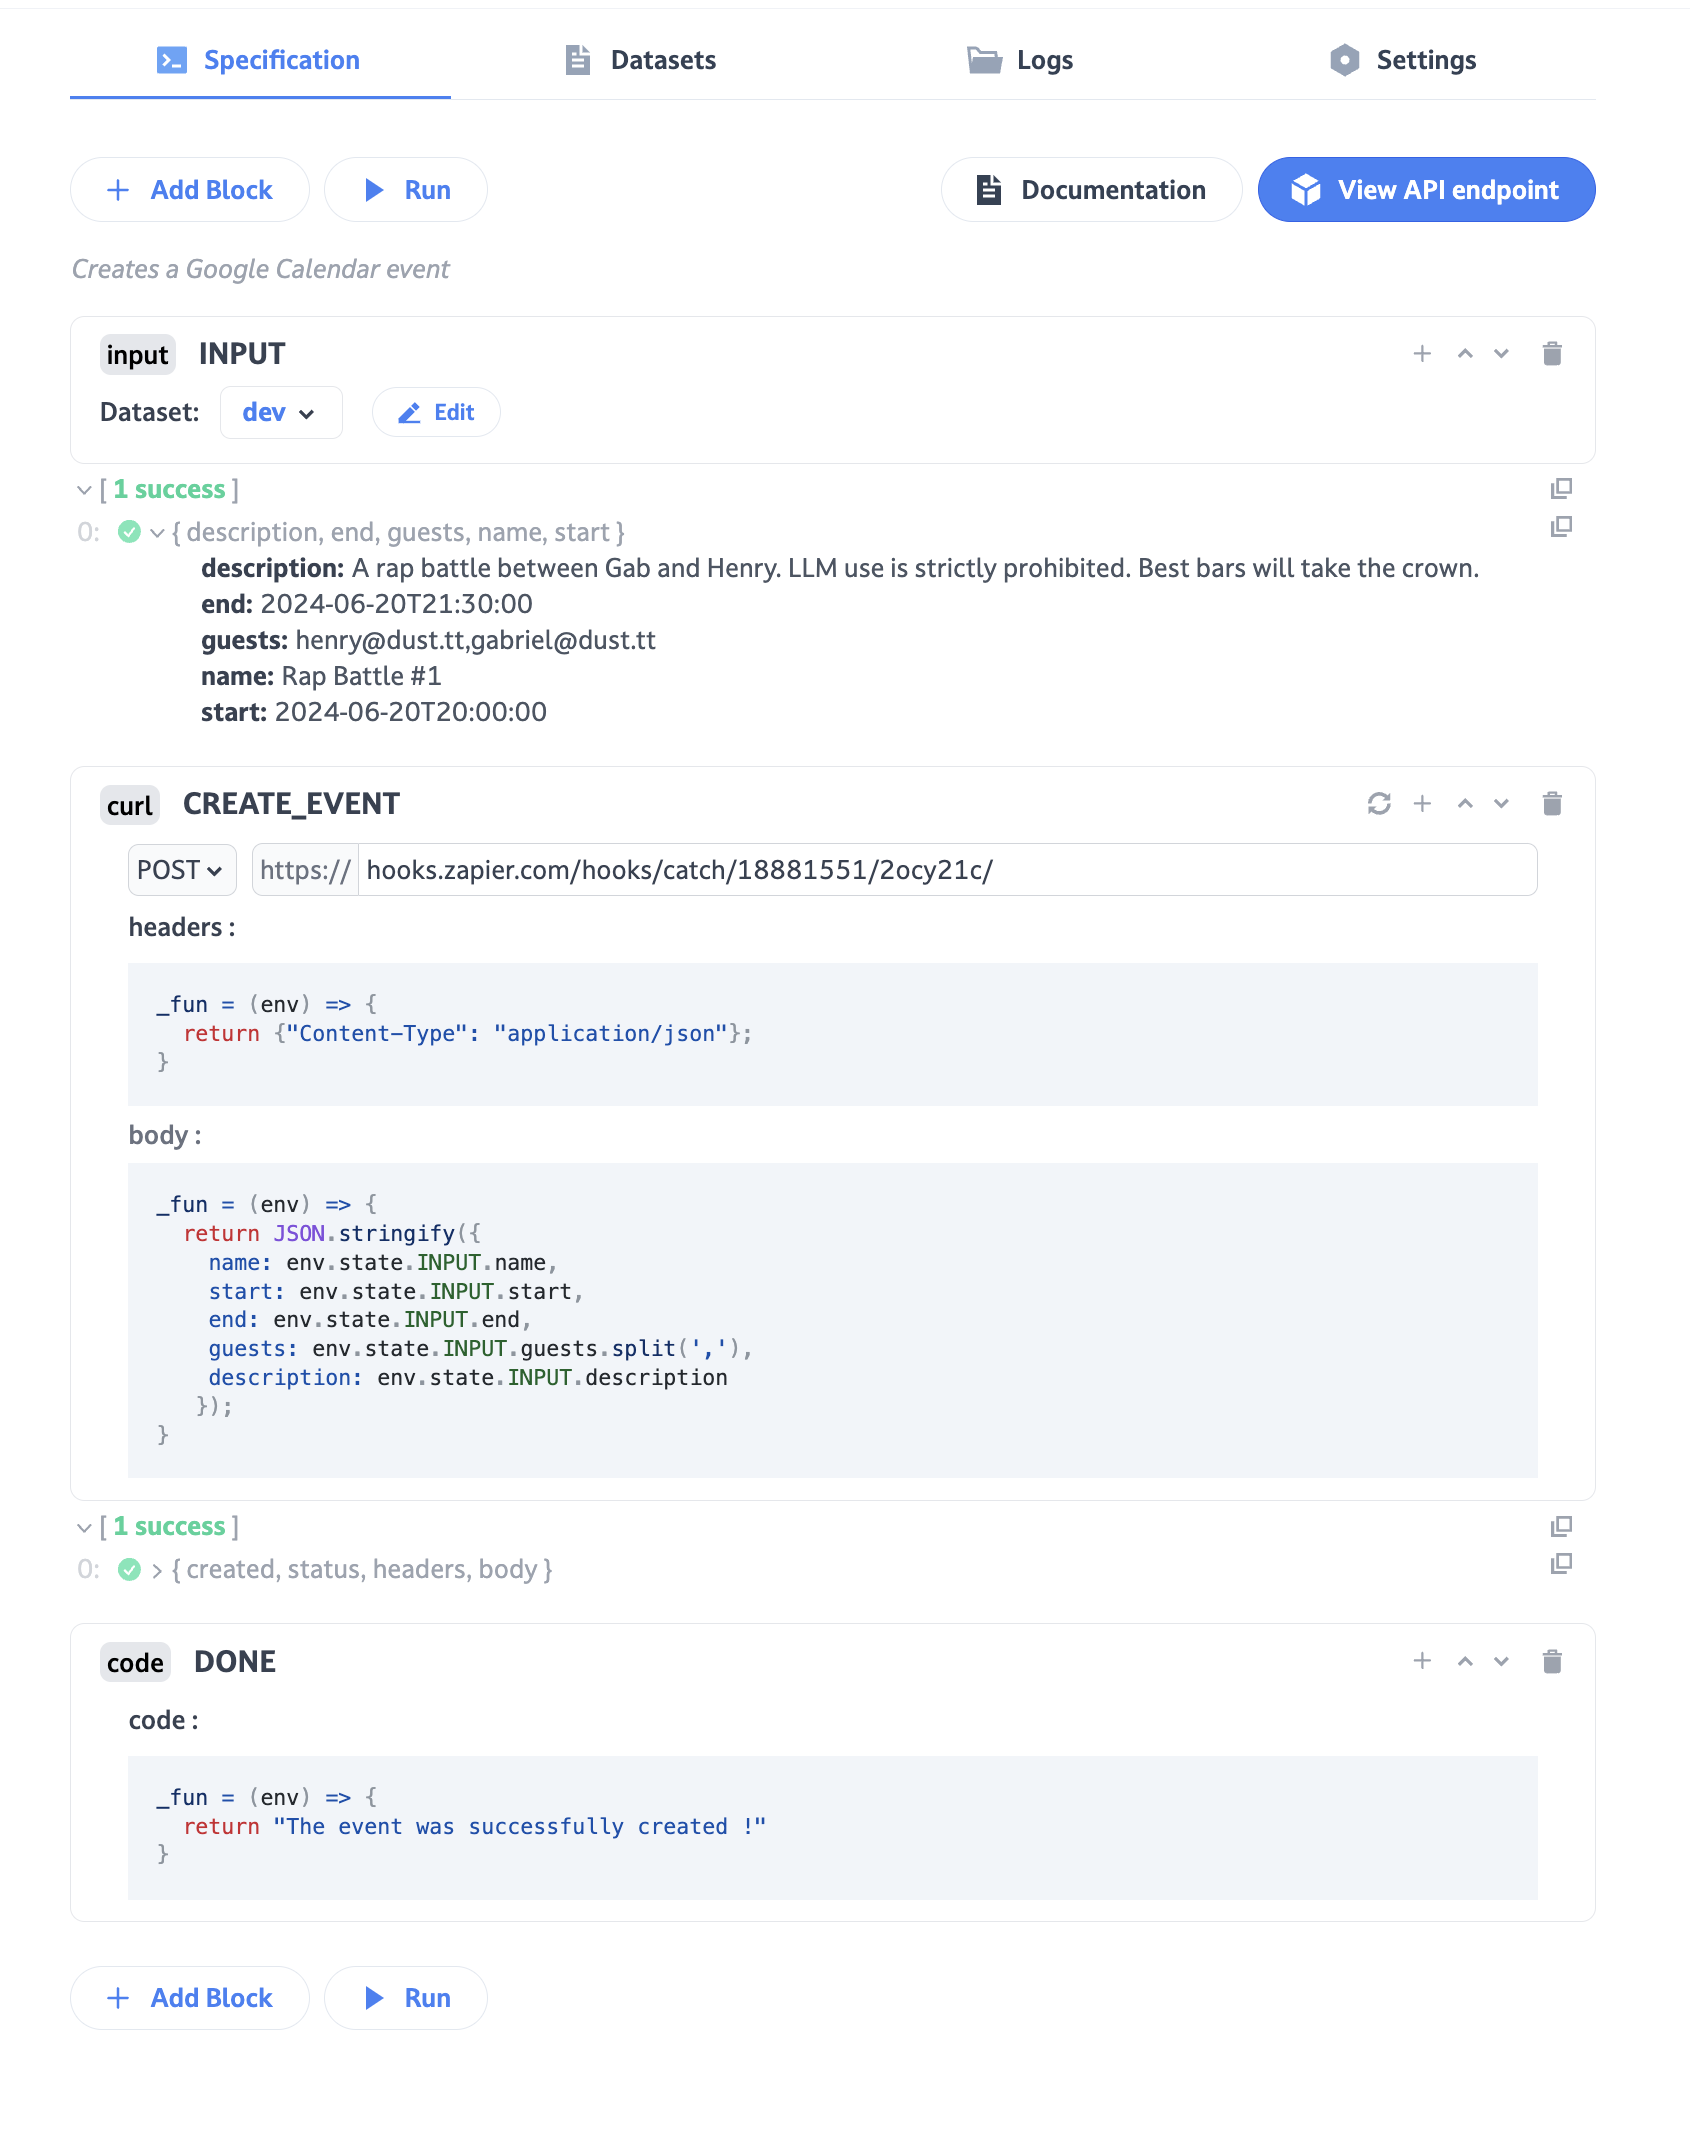
Go back to your Dust App and add a final CODE block at the end. This code block should simply return a string as pictured above. That will prevent your agent from receiving noisy technical (and useless) information from your CURL block.
You can simply copy and paste this into the block:
_fun = (env) => {
  return "The event was successfully created !"
}
Make sure you have deleted the Calendar event created via Zapier in the previous step. You can now run your Dust App. If the event has been created again, it means everything is working as expected!
Create a mapping between names and emails
When we ask our agents to create events for us, it is annoying to have to specify the exact email addresses every time. I prefer asking “Schedule a one on one with me and Gab tomorrow at 9:30am” than “Schedule a one on one with [email protected] and [email protected] tomorrow at 9:30 am”.
To achieve this, I’ll create a spreadsheet with a list of employees at Dust:
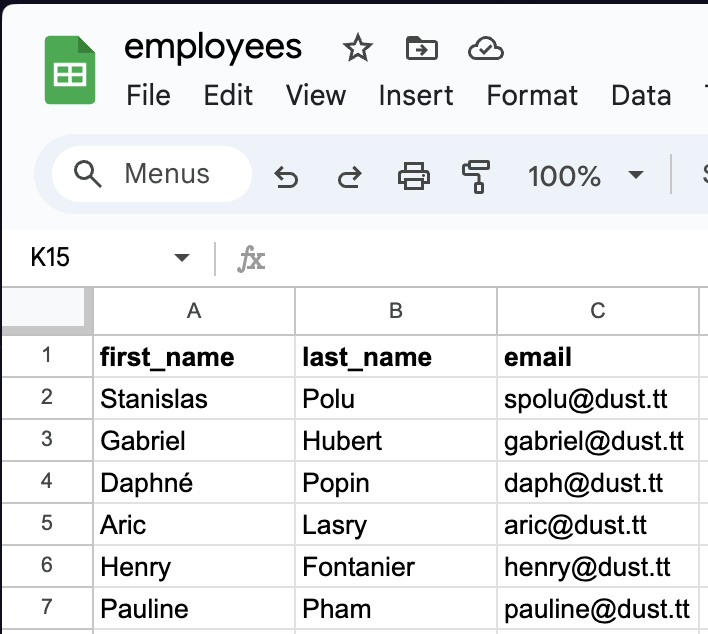
In practice, this could be a Notion Database, a CSV file, a Google Doc, a raw text file, a database or anything where you have a directory of employees that work at your company.
Plugging everything together
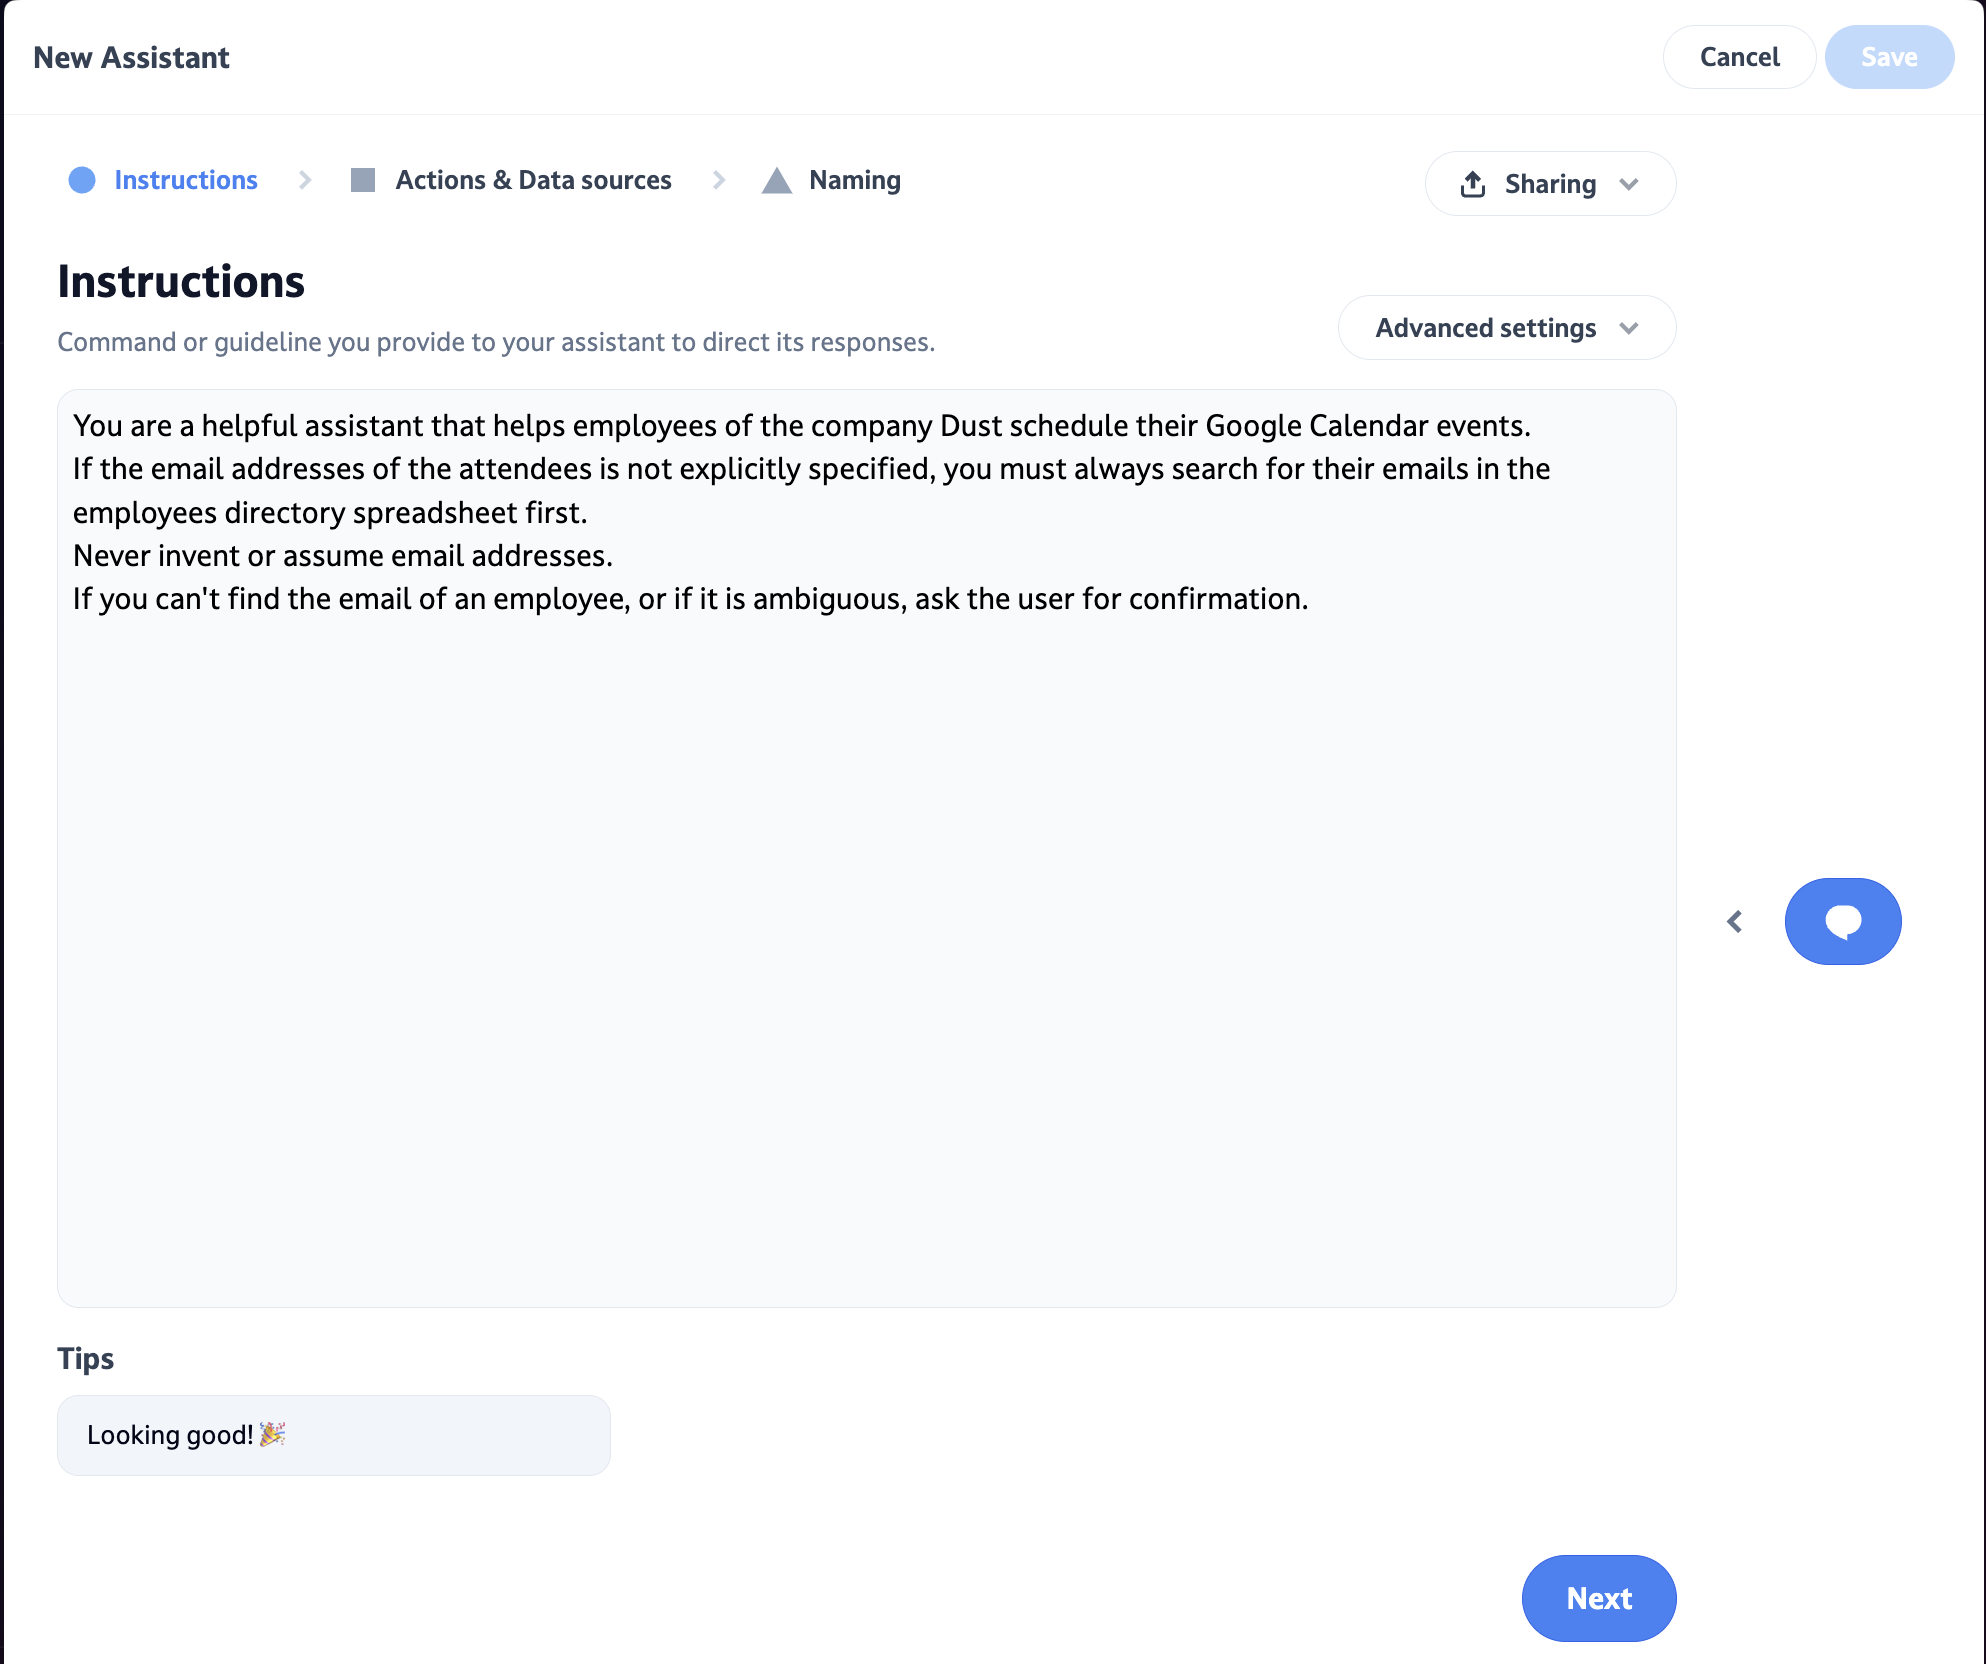
We can now proceed to create a Dust agent. First, fill in the instructions. These are the ones I have used:
You are a helpful agent that helps employees of the company Dust schedule their Google Calendar events. If the email addresses of the attendees is not explicitly specified, you must always search for their emails in the employees directory spreadsheet first. Never invent or assume email addresses. If you can't find the email of an employee, ask the user for confirmation.
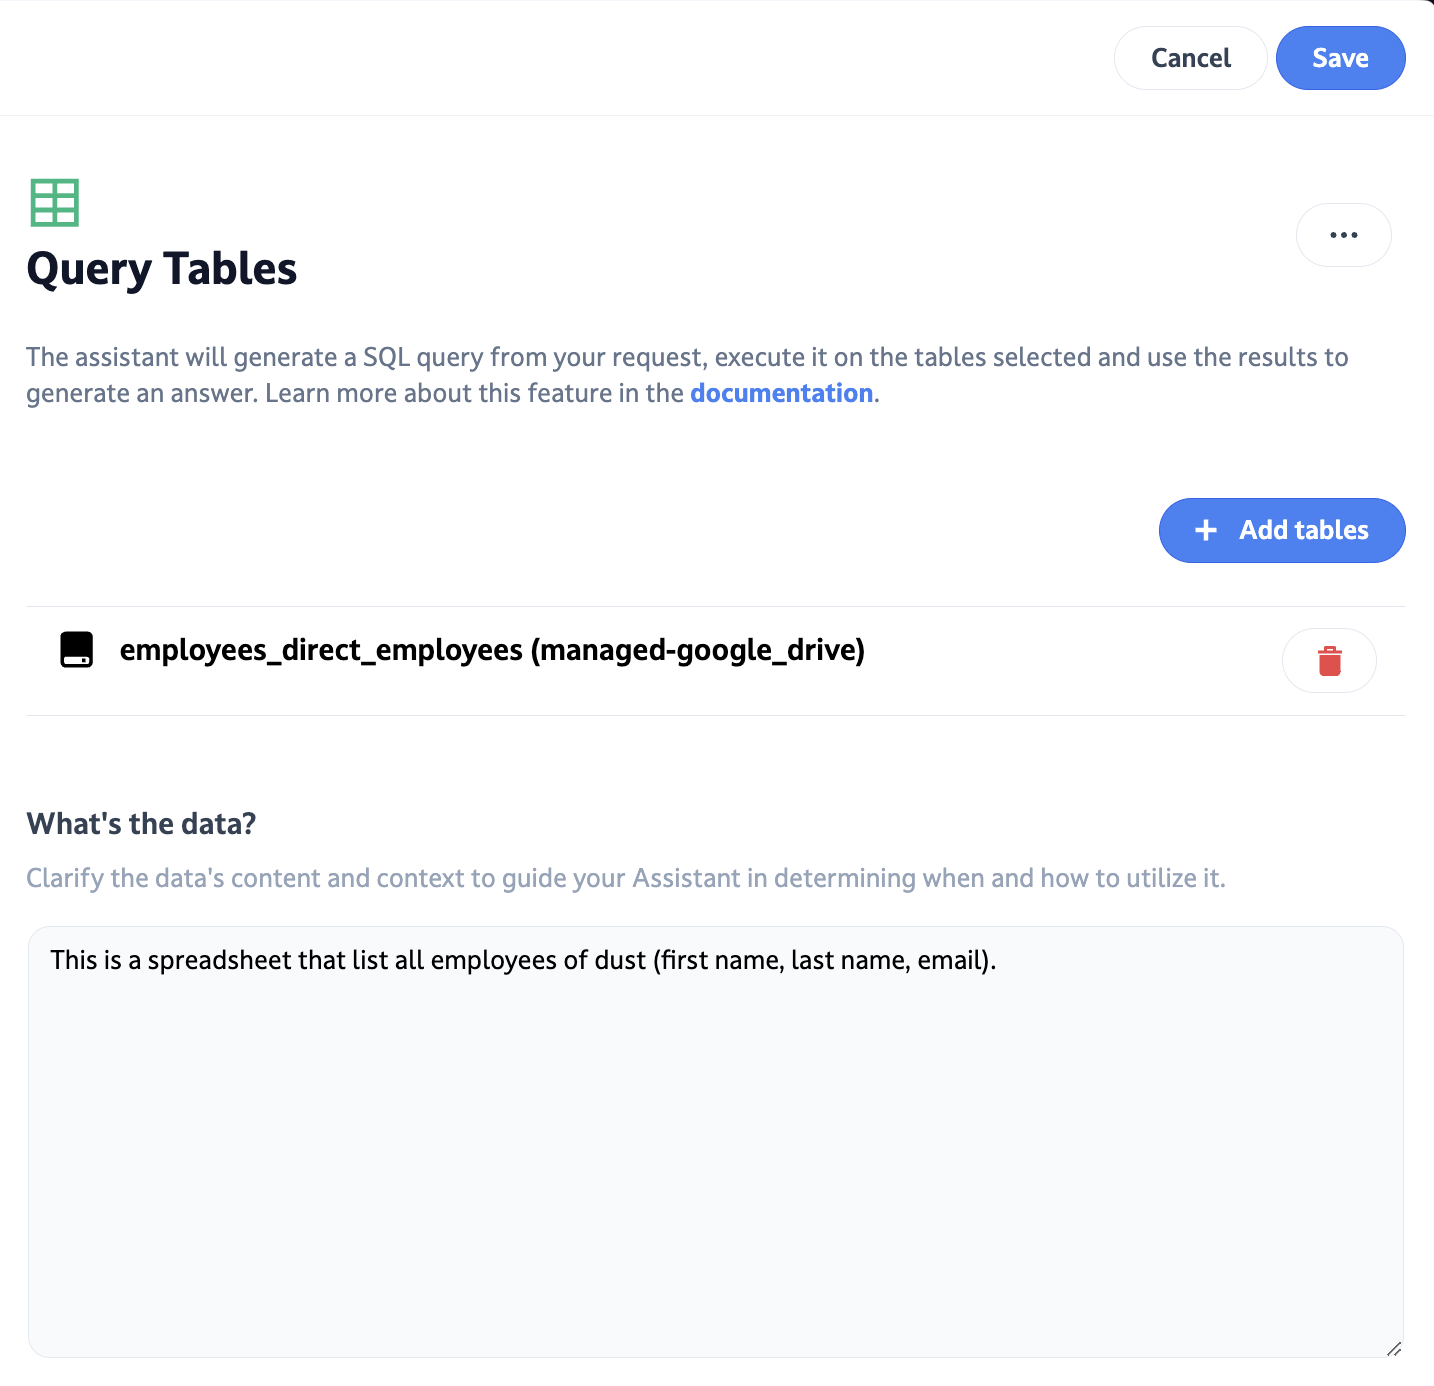
Next, you can add a Query Tables tool to plug your employees spreadsheet. This is what your agent will use to find the right email addresses for your query.
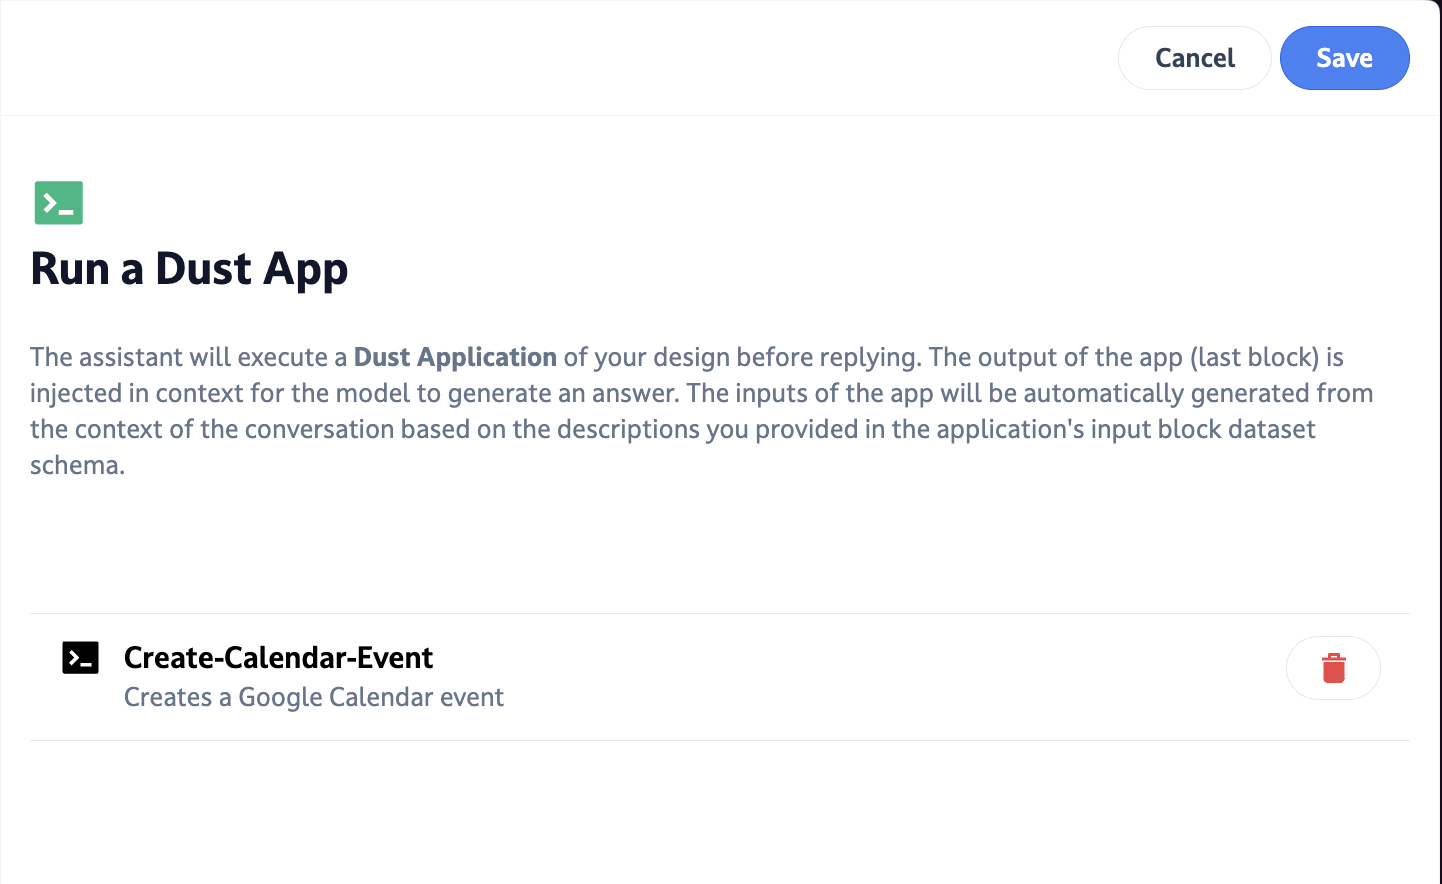
Finally, add the Dust App you previously created as a tool for your agent.
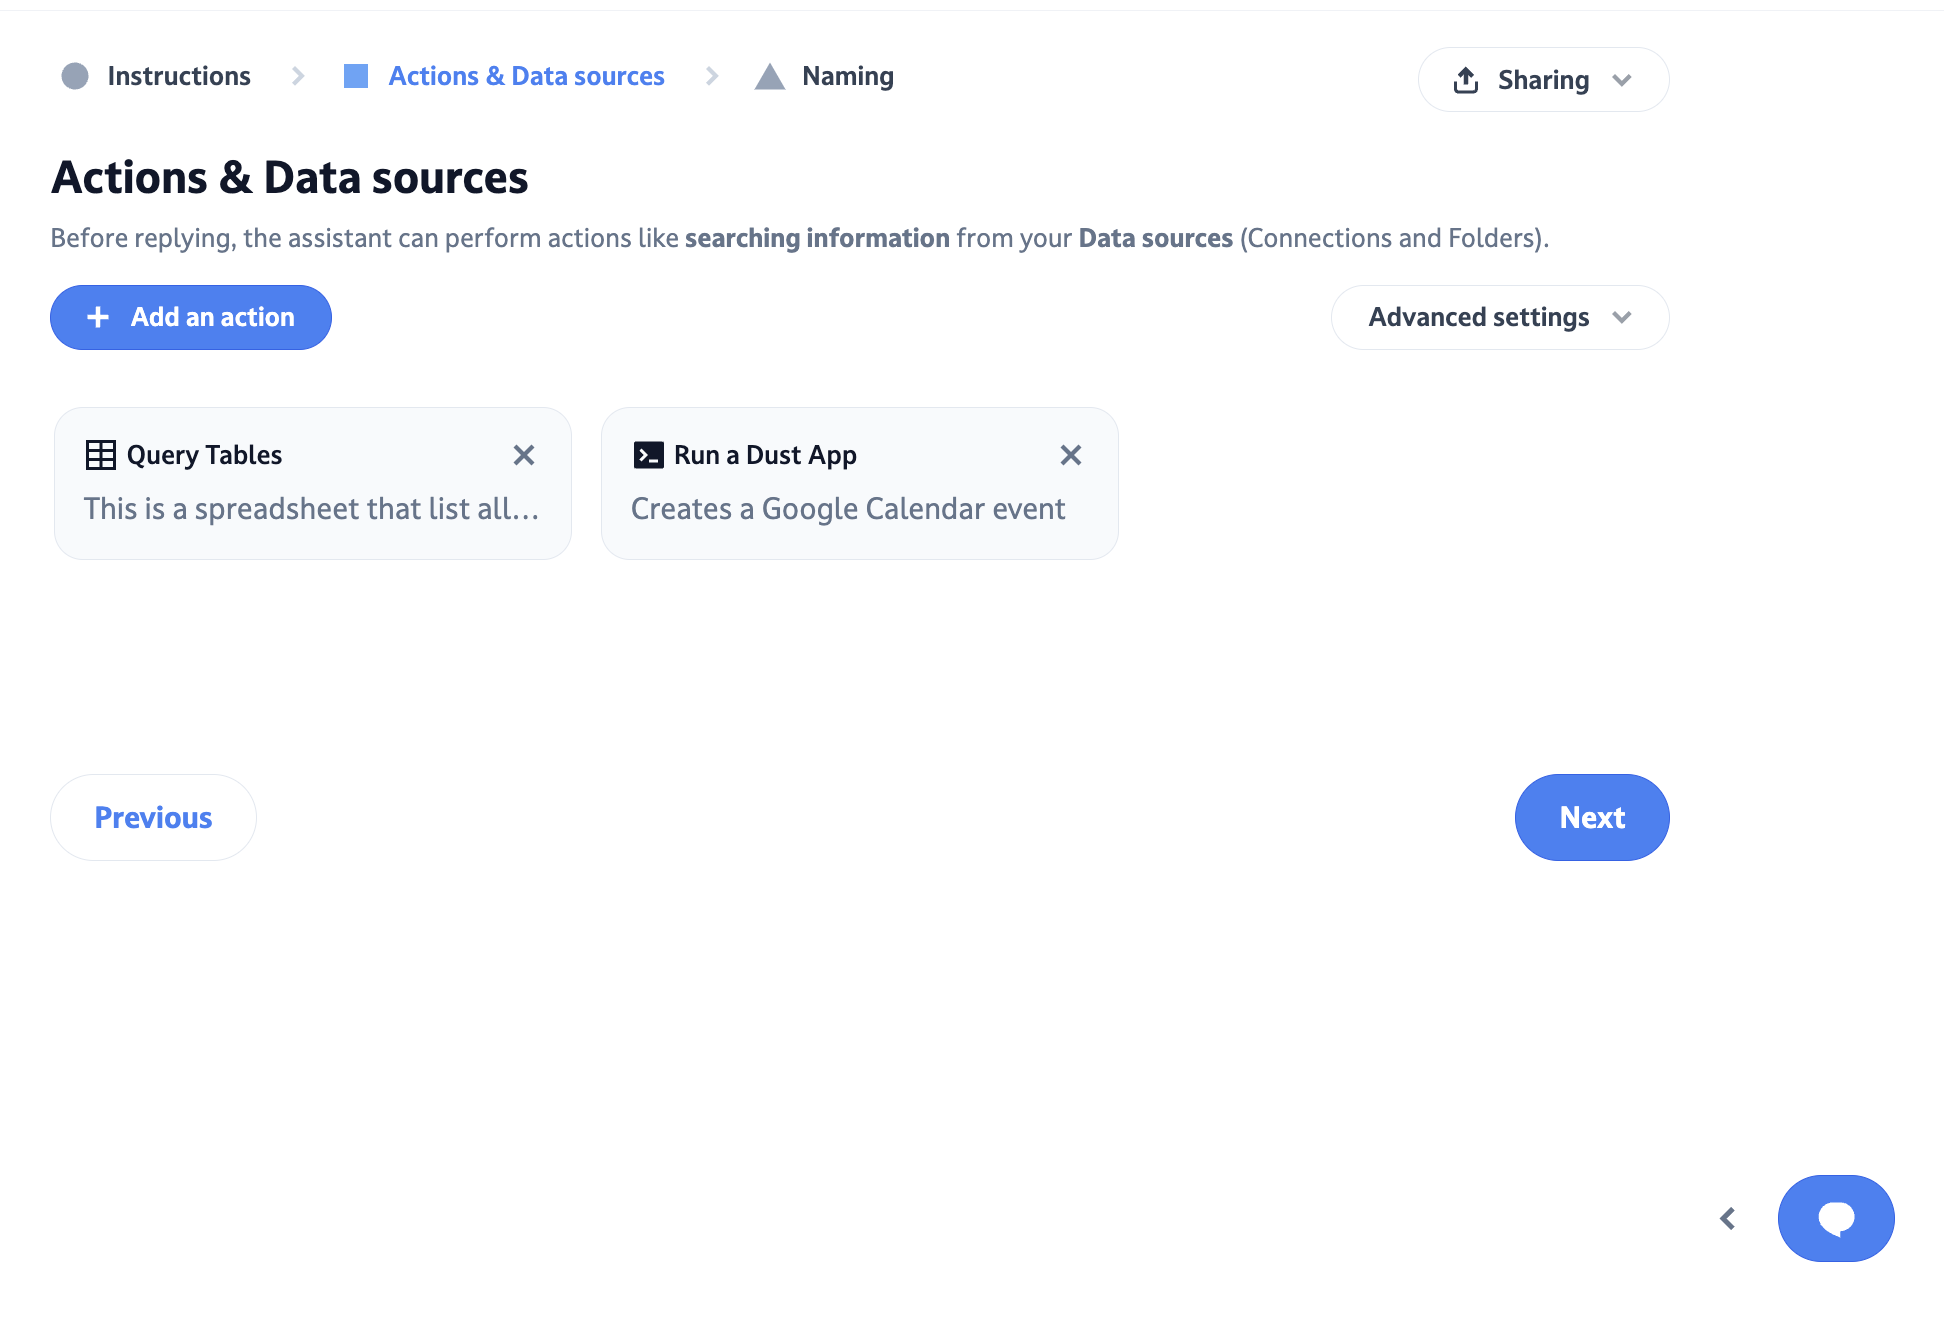
This is how your “Tools & Data sources” screen should look like.
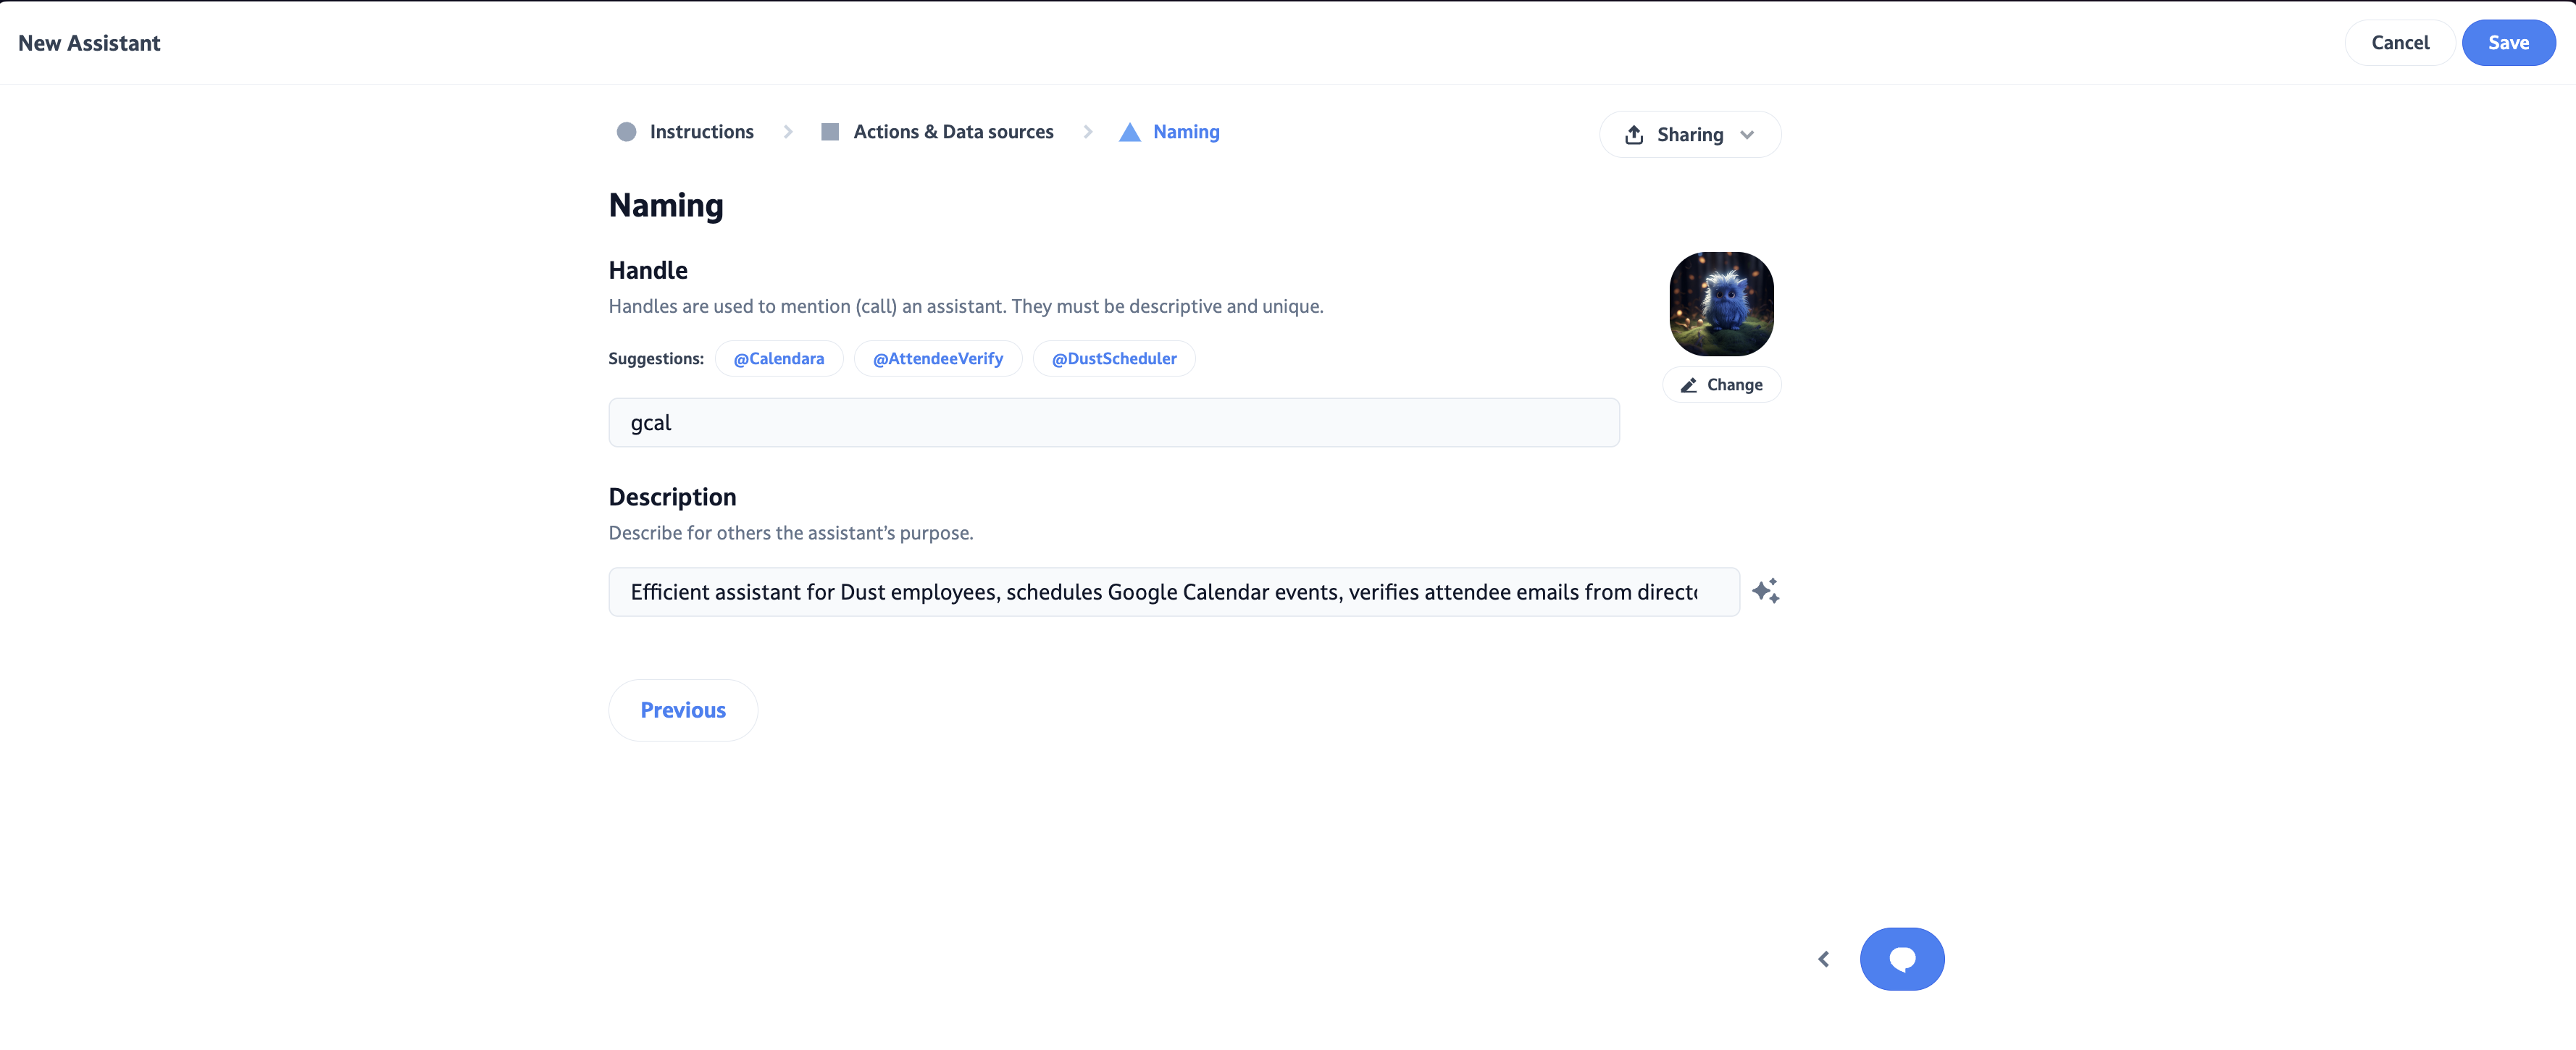
You should now be ready to save your new agent !
Try your agent !
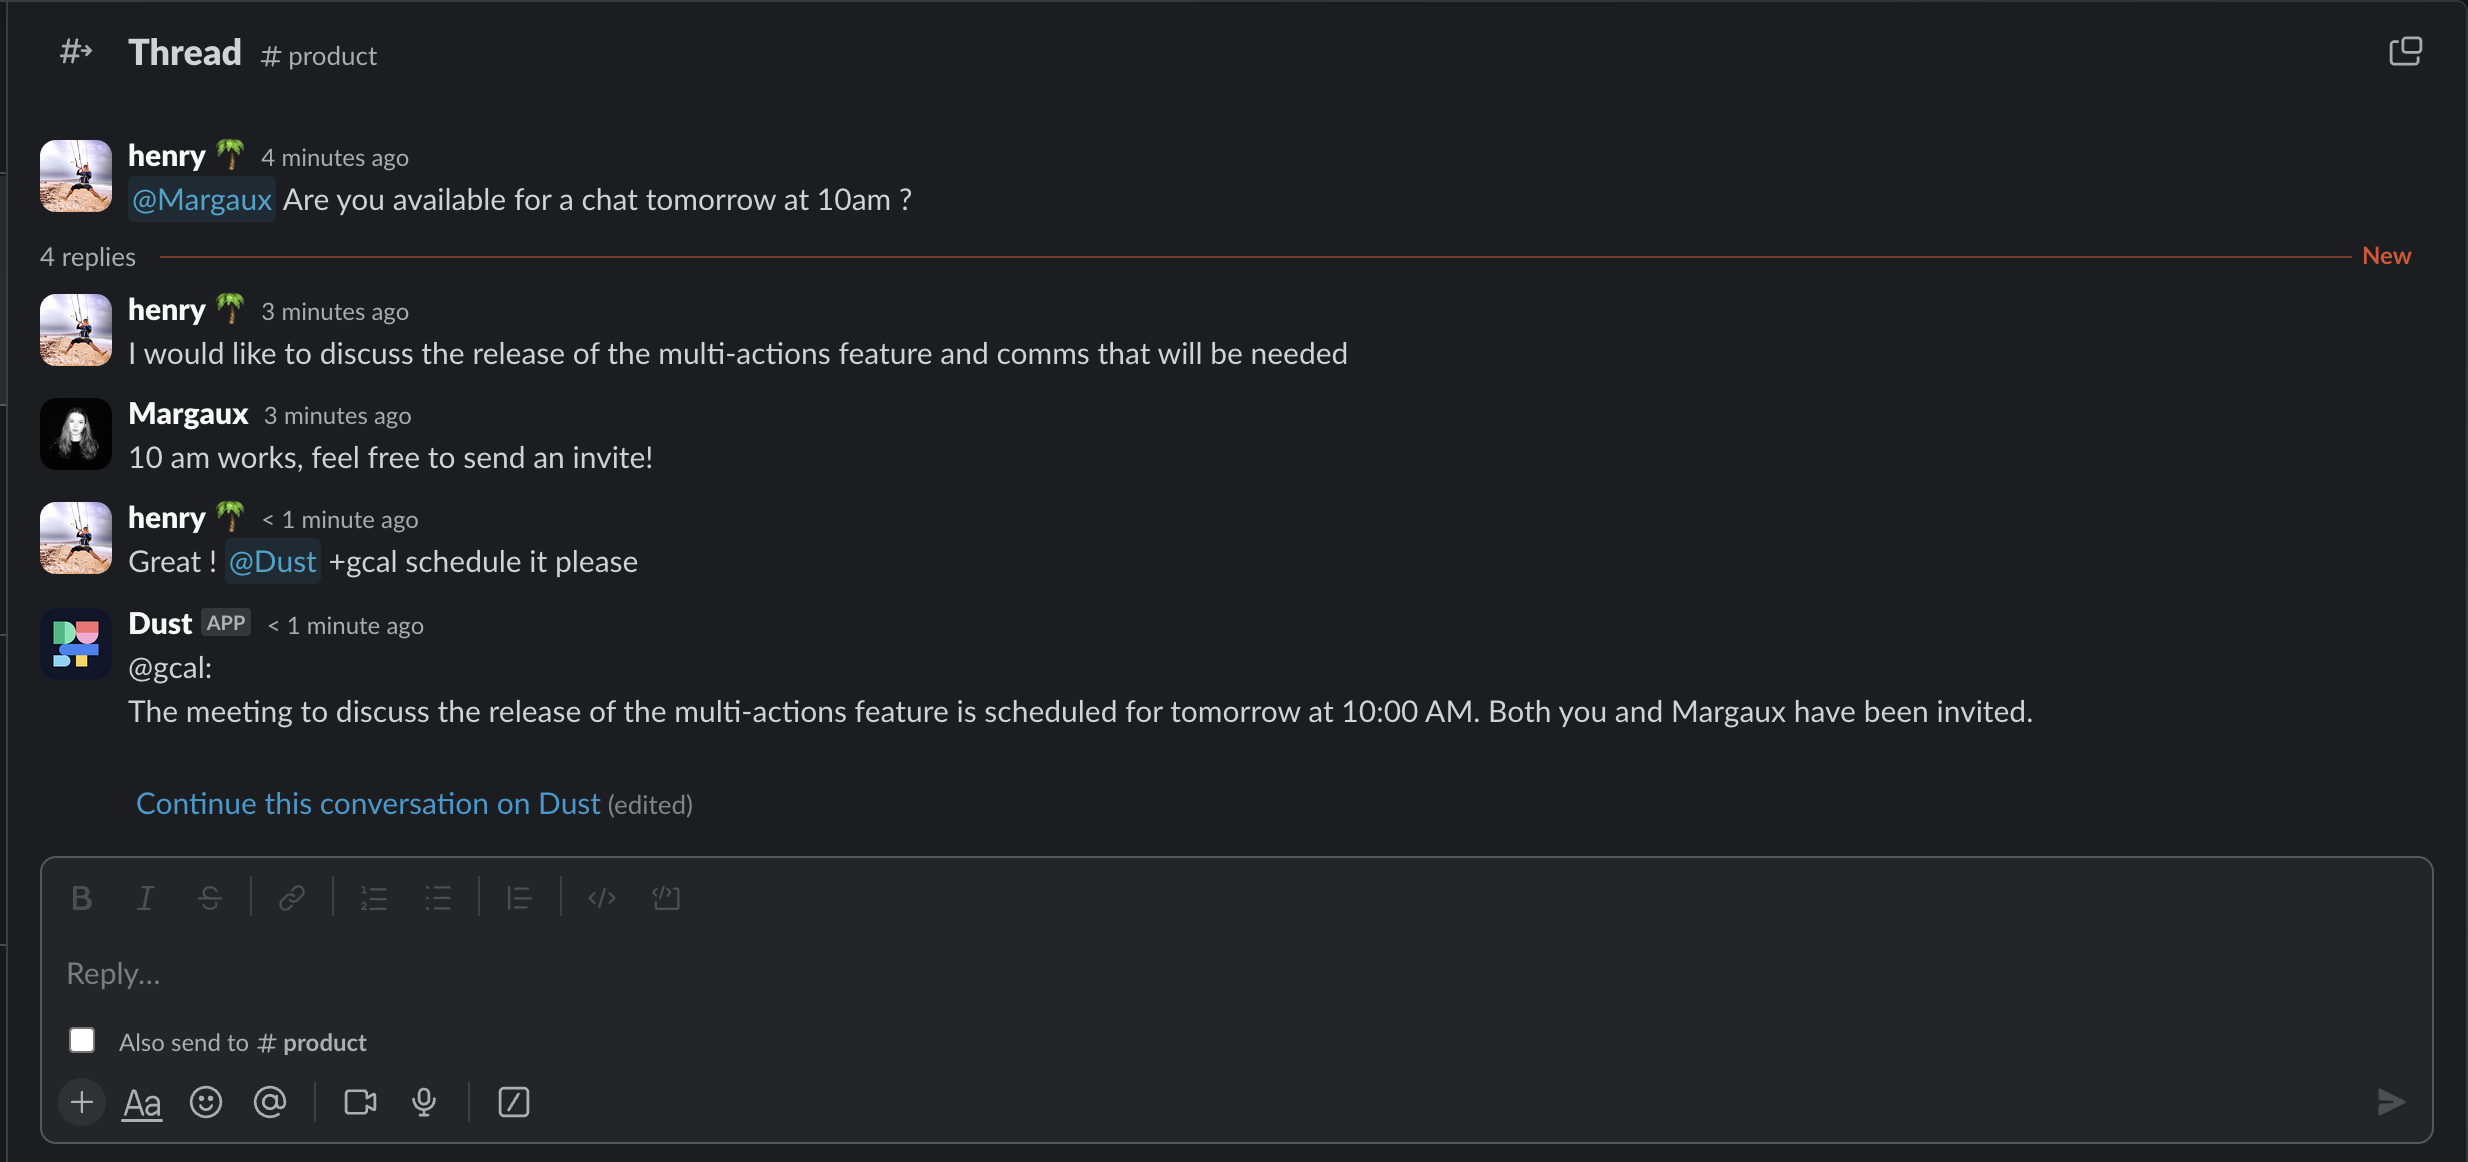
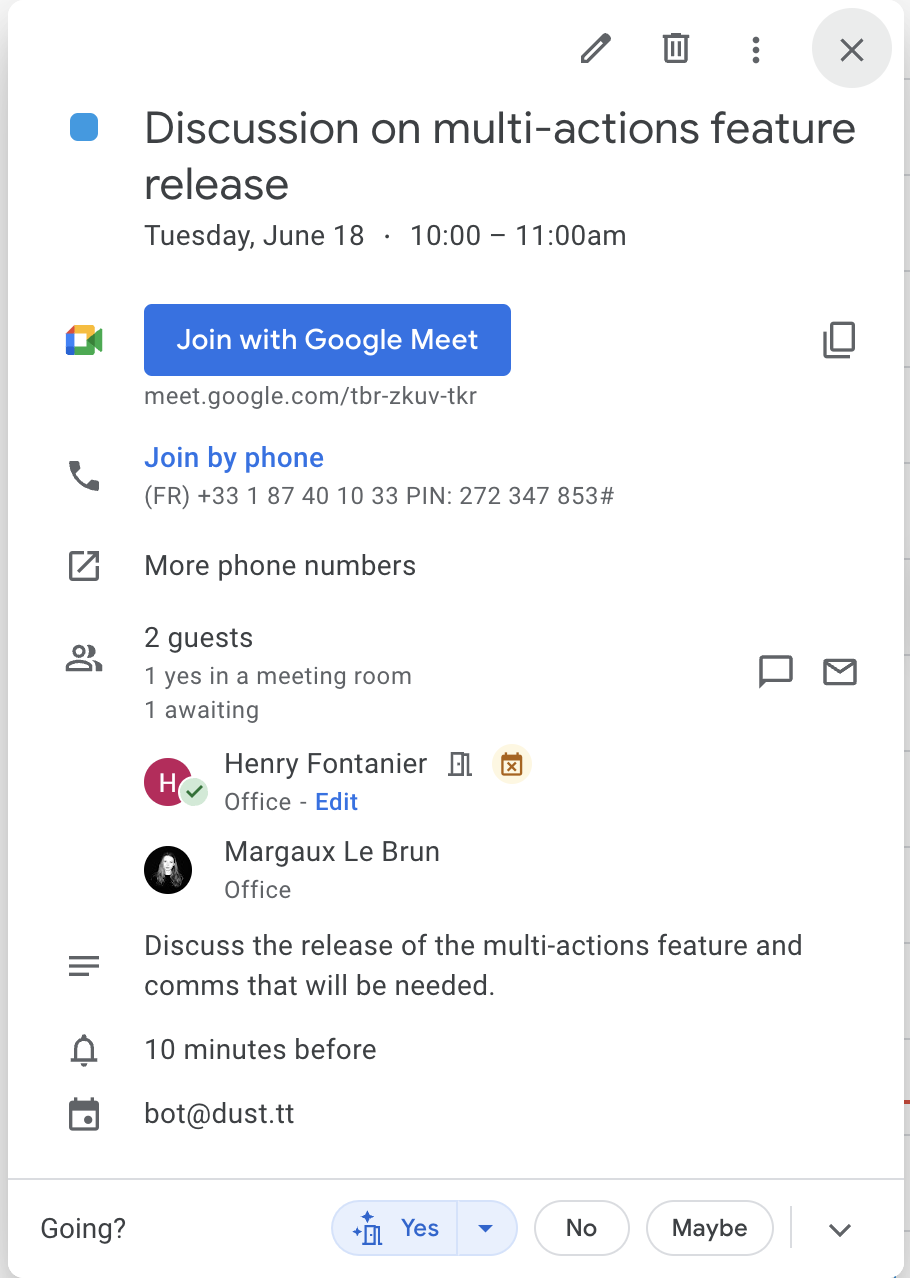
It worked !
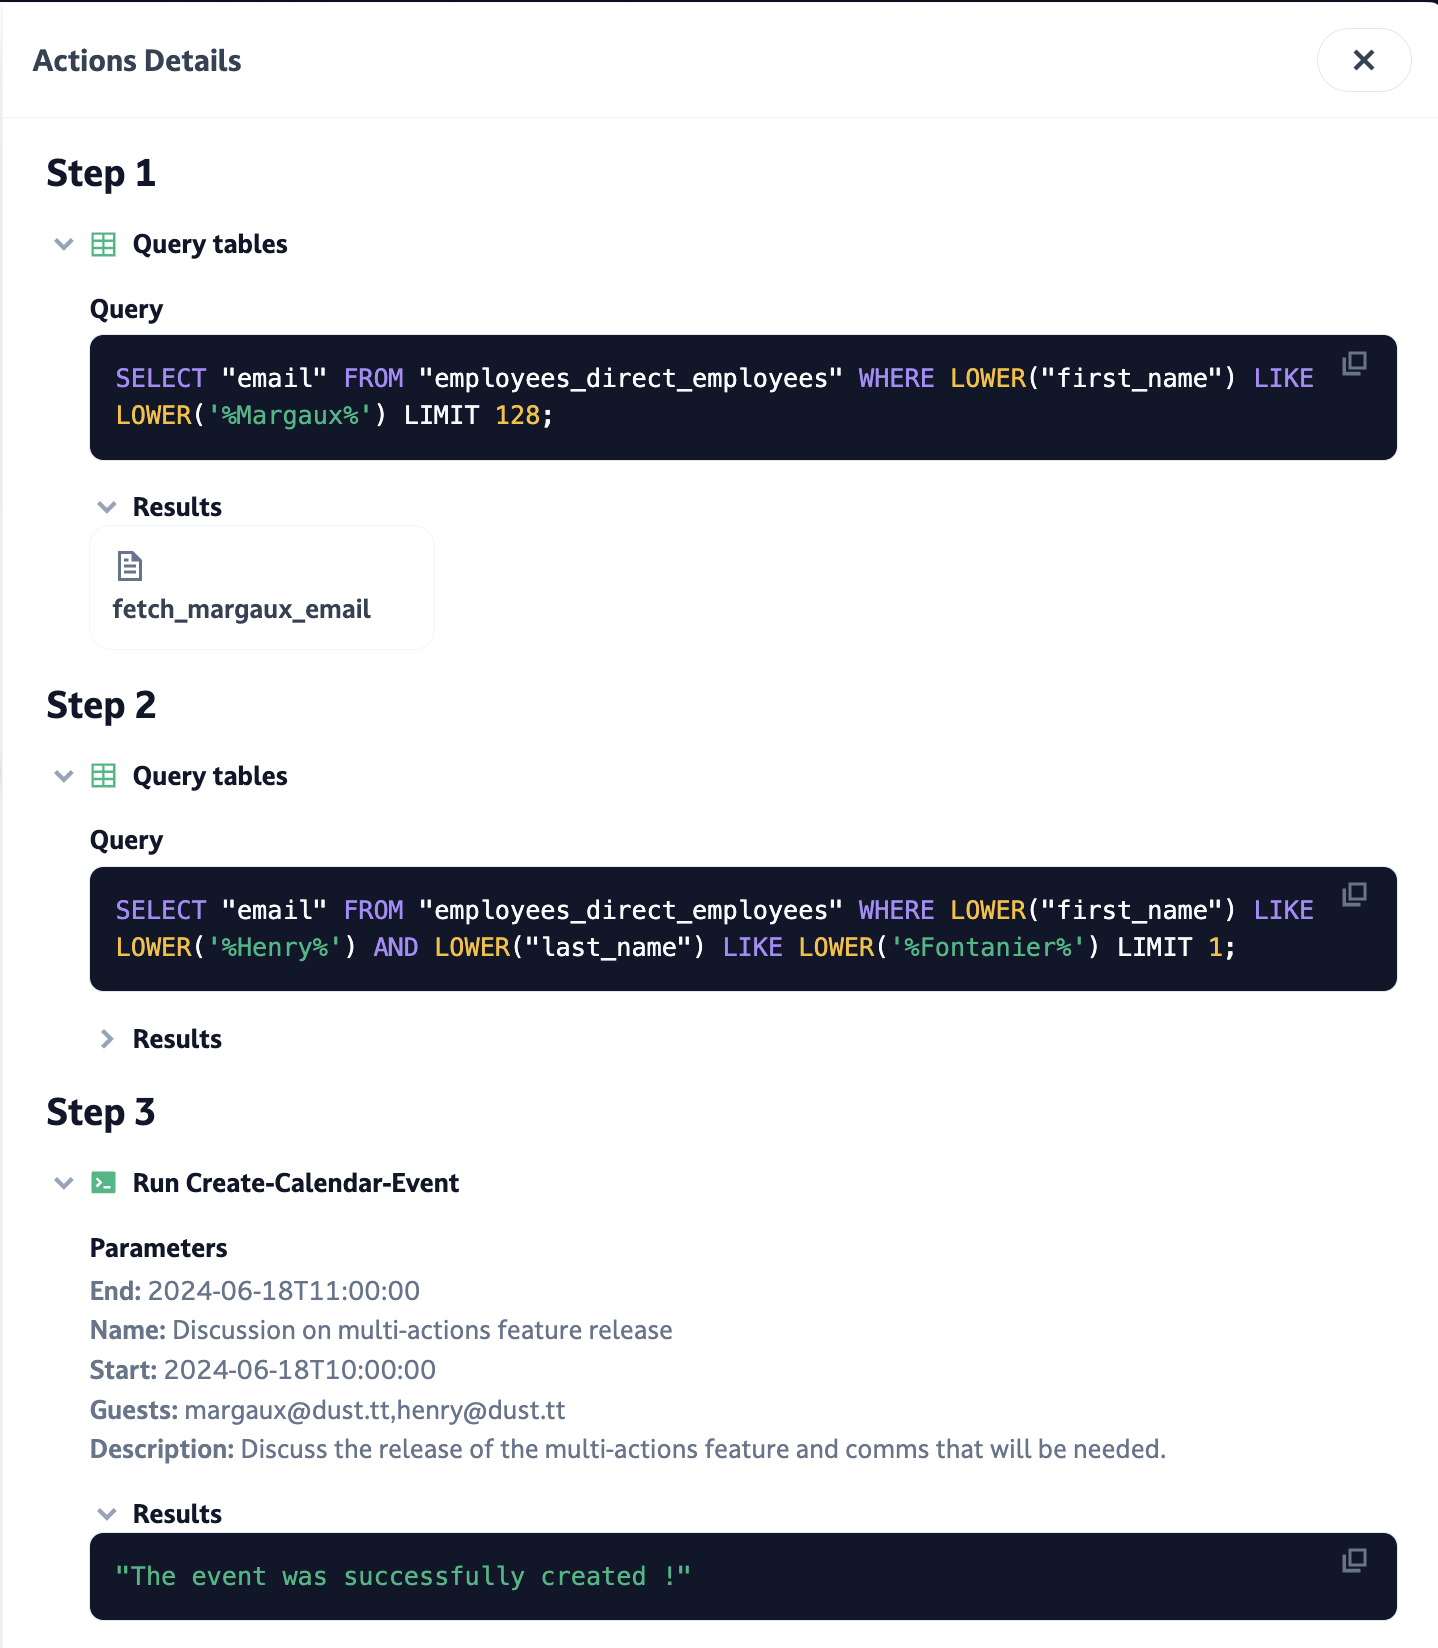
If we inspect the Tools Details, we can see the agent first queried our spreadsheet and then scheduled an event for me and Margaux.
Updated about 1 month ago
