OKTA
How to set-up SSO with OKTA on Dust.tt
Consider Standard SAML Integration
While this guide details Okta specific integration, we recommend considering our standard SAML SSO implementation instead, which:
- Provides identical security and features
- Offers more flexibility in configuration
- Makes it easier to switch identity providers in the future
- Works with ANY SAML-compatible identity provider
You can find our standard SAML implementation guide here .
Overview
Dust supports Okta Single Sign-On (SSO) to manage your team's access to our platform securely and effortlessly using your existing Okta credentials. This feature simplifies user management and enhances security by centralizing authentication.

Setting up Okta Single Sign-On (SSO)
To enable SSO for Dust using Okta, follow these steps to create a custom app integration in Okta.
1. Identify an Admin:
Choose an admin with comprehensive access to the Okta admin's dashboard and Dust admin. This is necessary as enabling Okta SSO requires creating a custom integration in Okta.
2. Create a Custom App Integration in Okta
- Navigate to the Okta admin dashboard and go to
Applications>Applications. - Click on Create App Integration.
- Select OIDC - OpenID Connect as the Sign-In Method.
- Choose Web Application as the Application Type and click on Next.
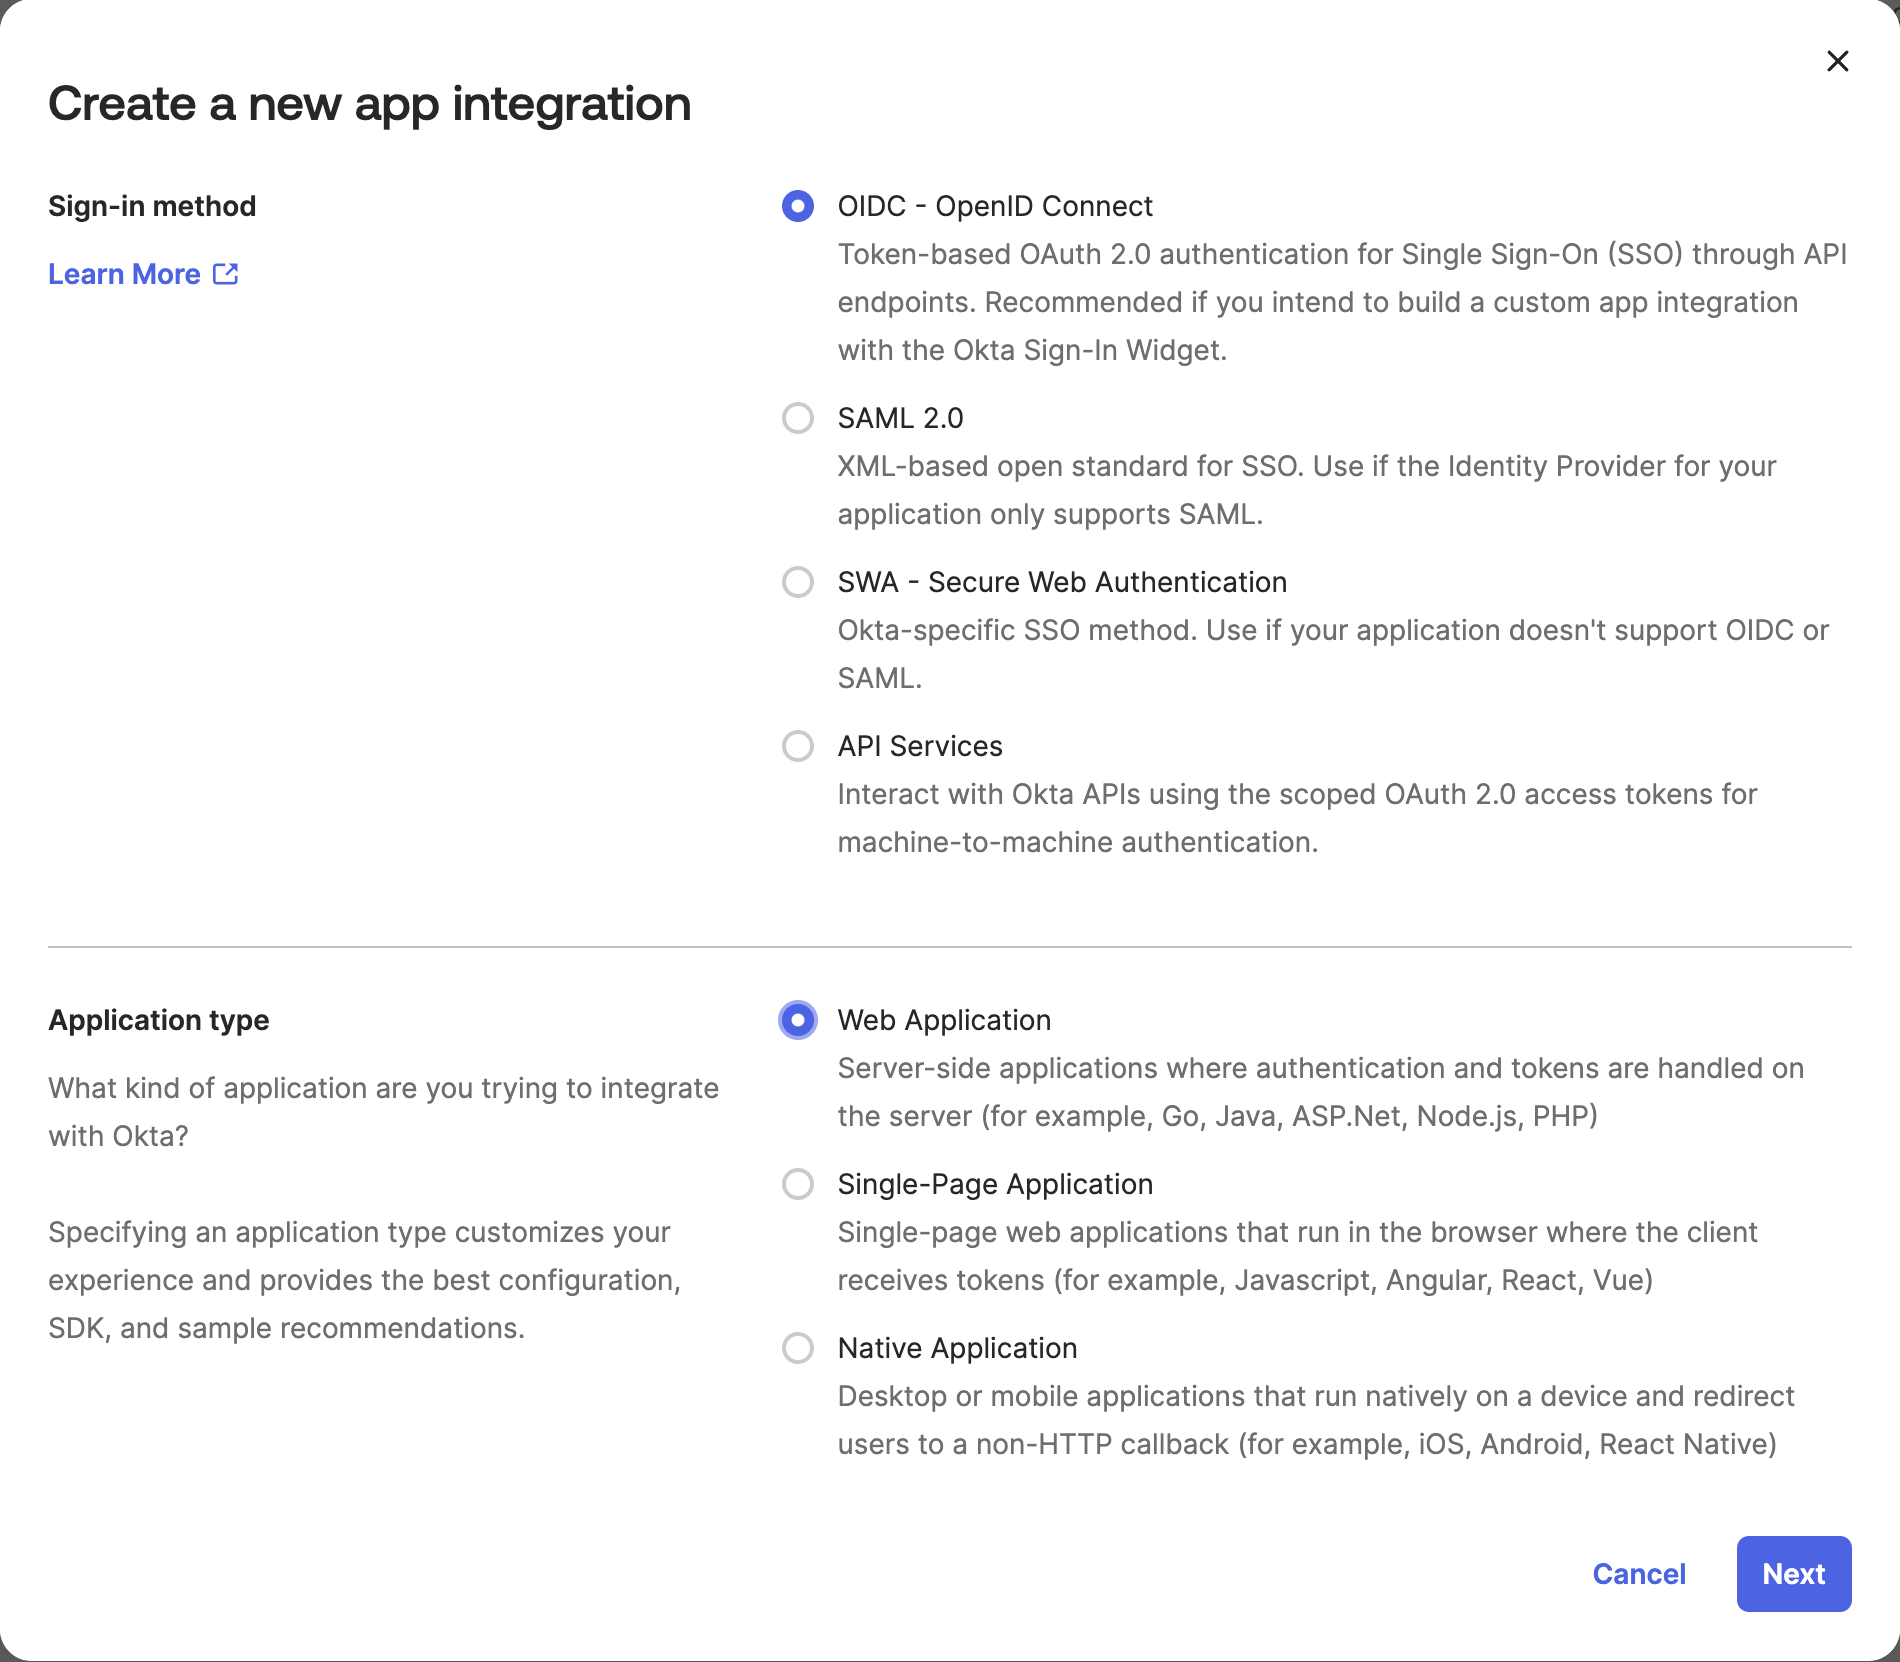
- Fill in the Required Fields
- App Integration Name: Enter "Dust" as the app integration name.
- Logo: You can find our logo here.
- Sign-in Redirect URIs: Enter
https://dust-tt.us.auth0.com/login/callback. - Sign-out Redirect URIs: Enter
https://dust.tt. - Select an Option for Access Control: Choose the desired option to control access to the Dust app.
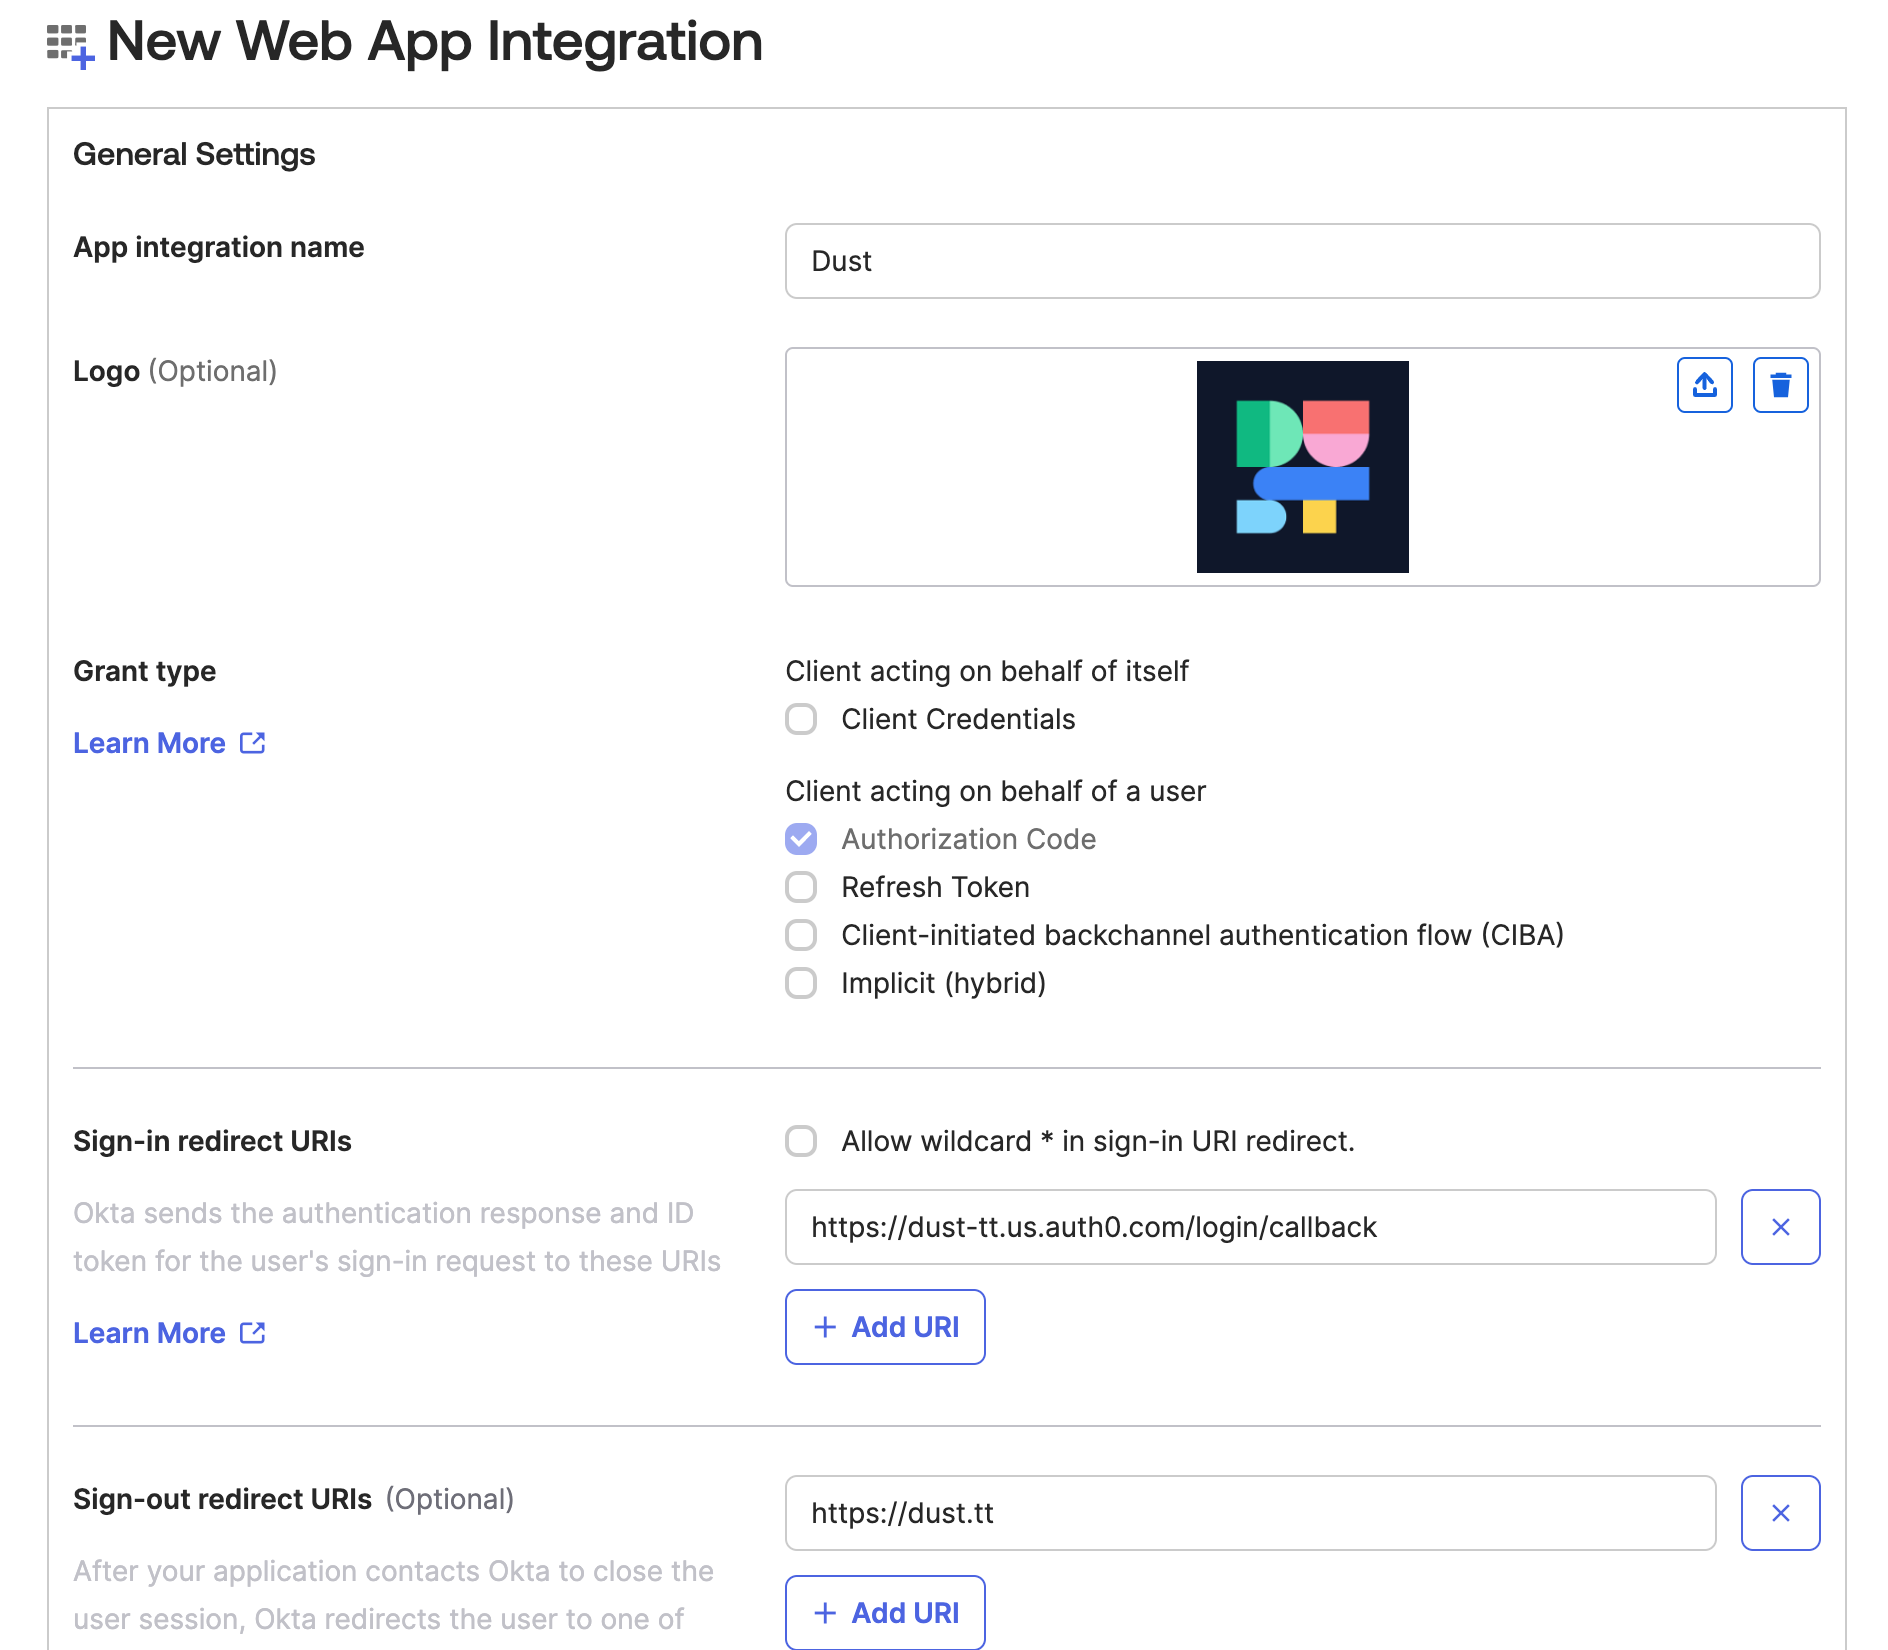
On the following screen, you'll find all the necessary credentials displayed. 👋 Ensure to keep this tab open for future reference:
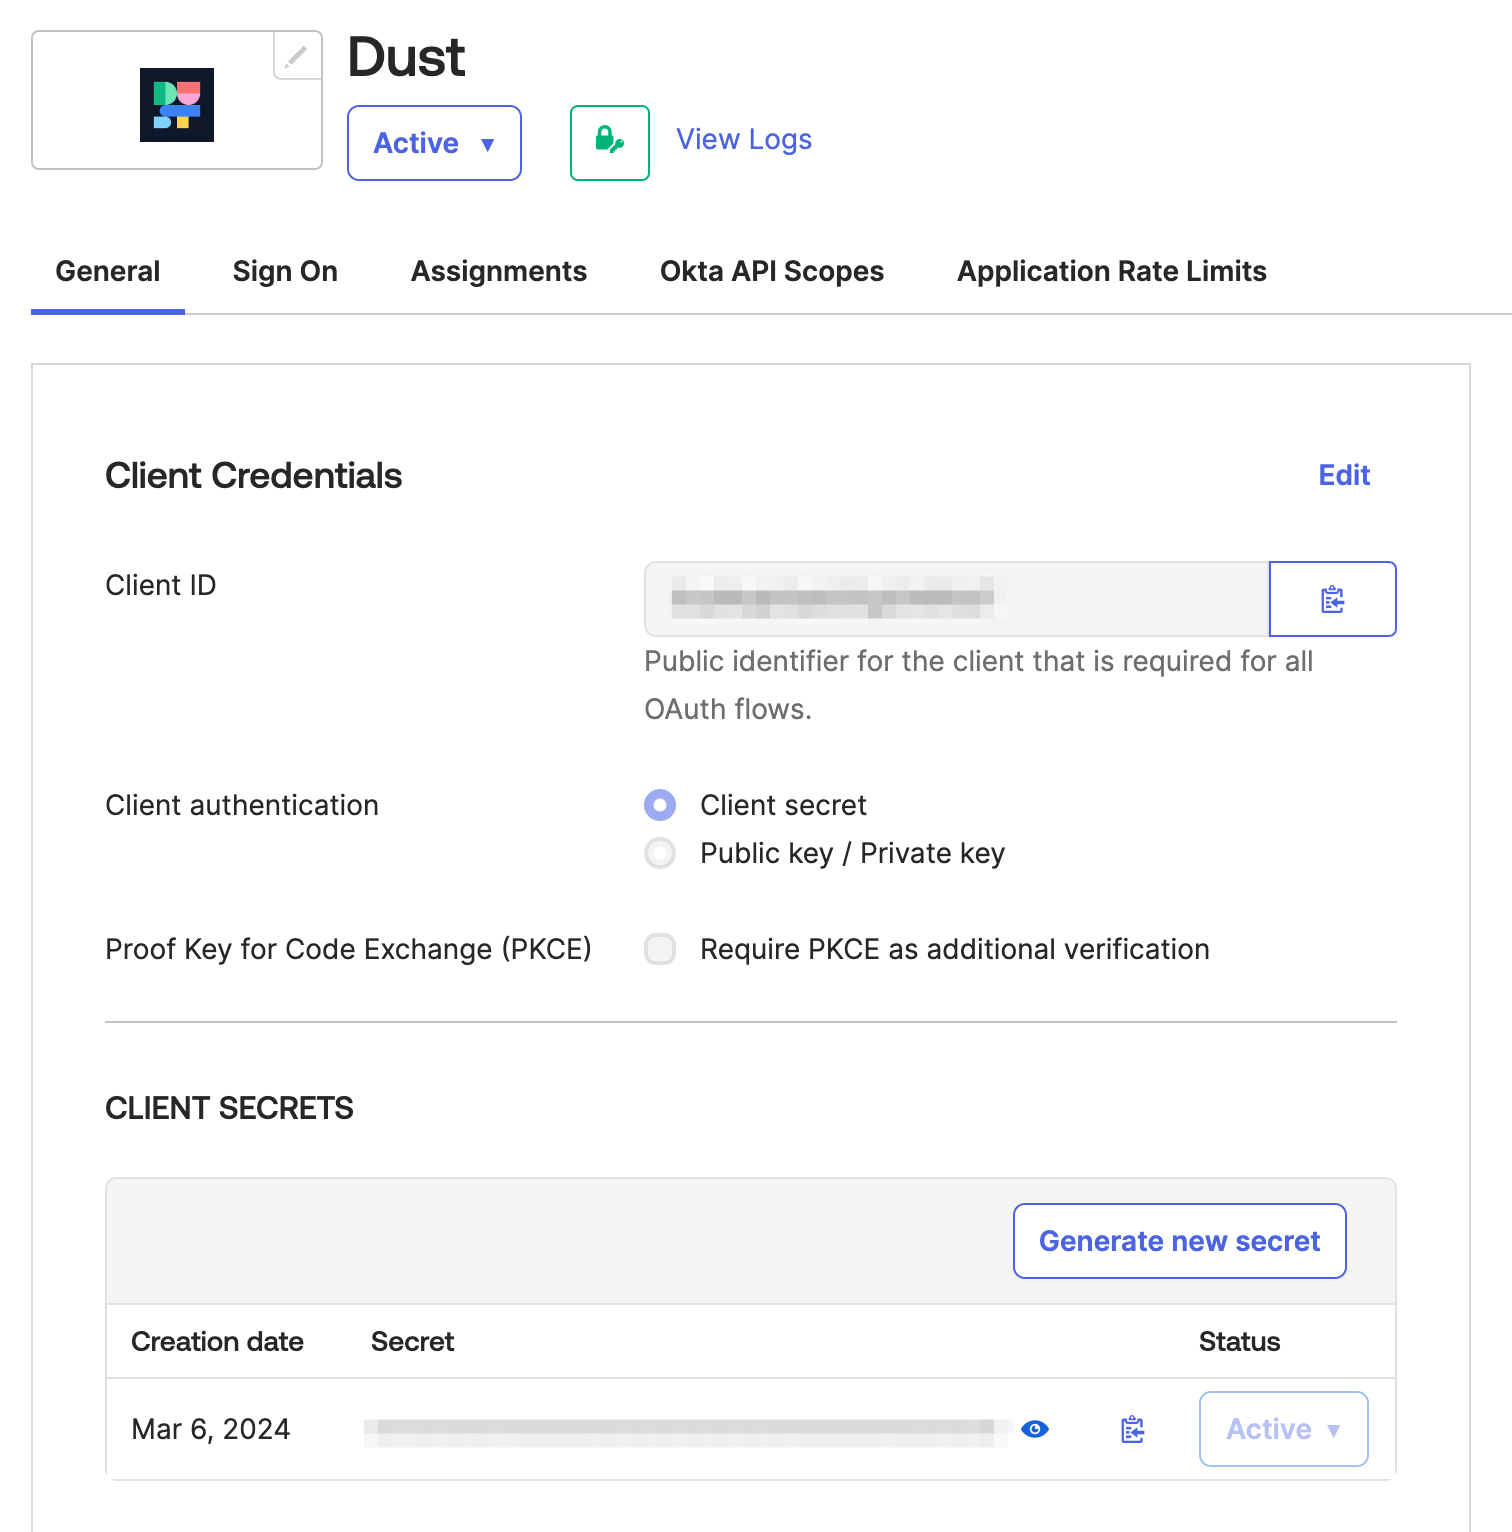
3. Enabling Okta Single Sign-On (SSO) in Dust
To enable SSO for Dust using Okta, follow these steps:
- Navigate to
Settings>Membersin Dust. - If your plan allows it, you'll see an option for Activate Single Sign-On.
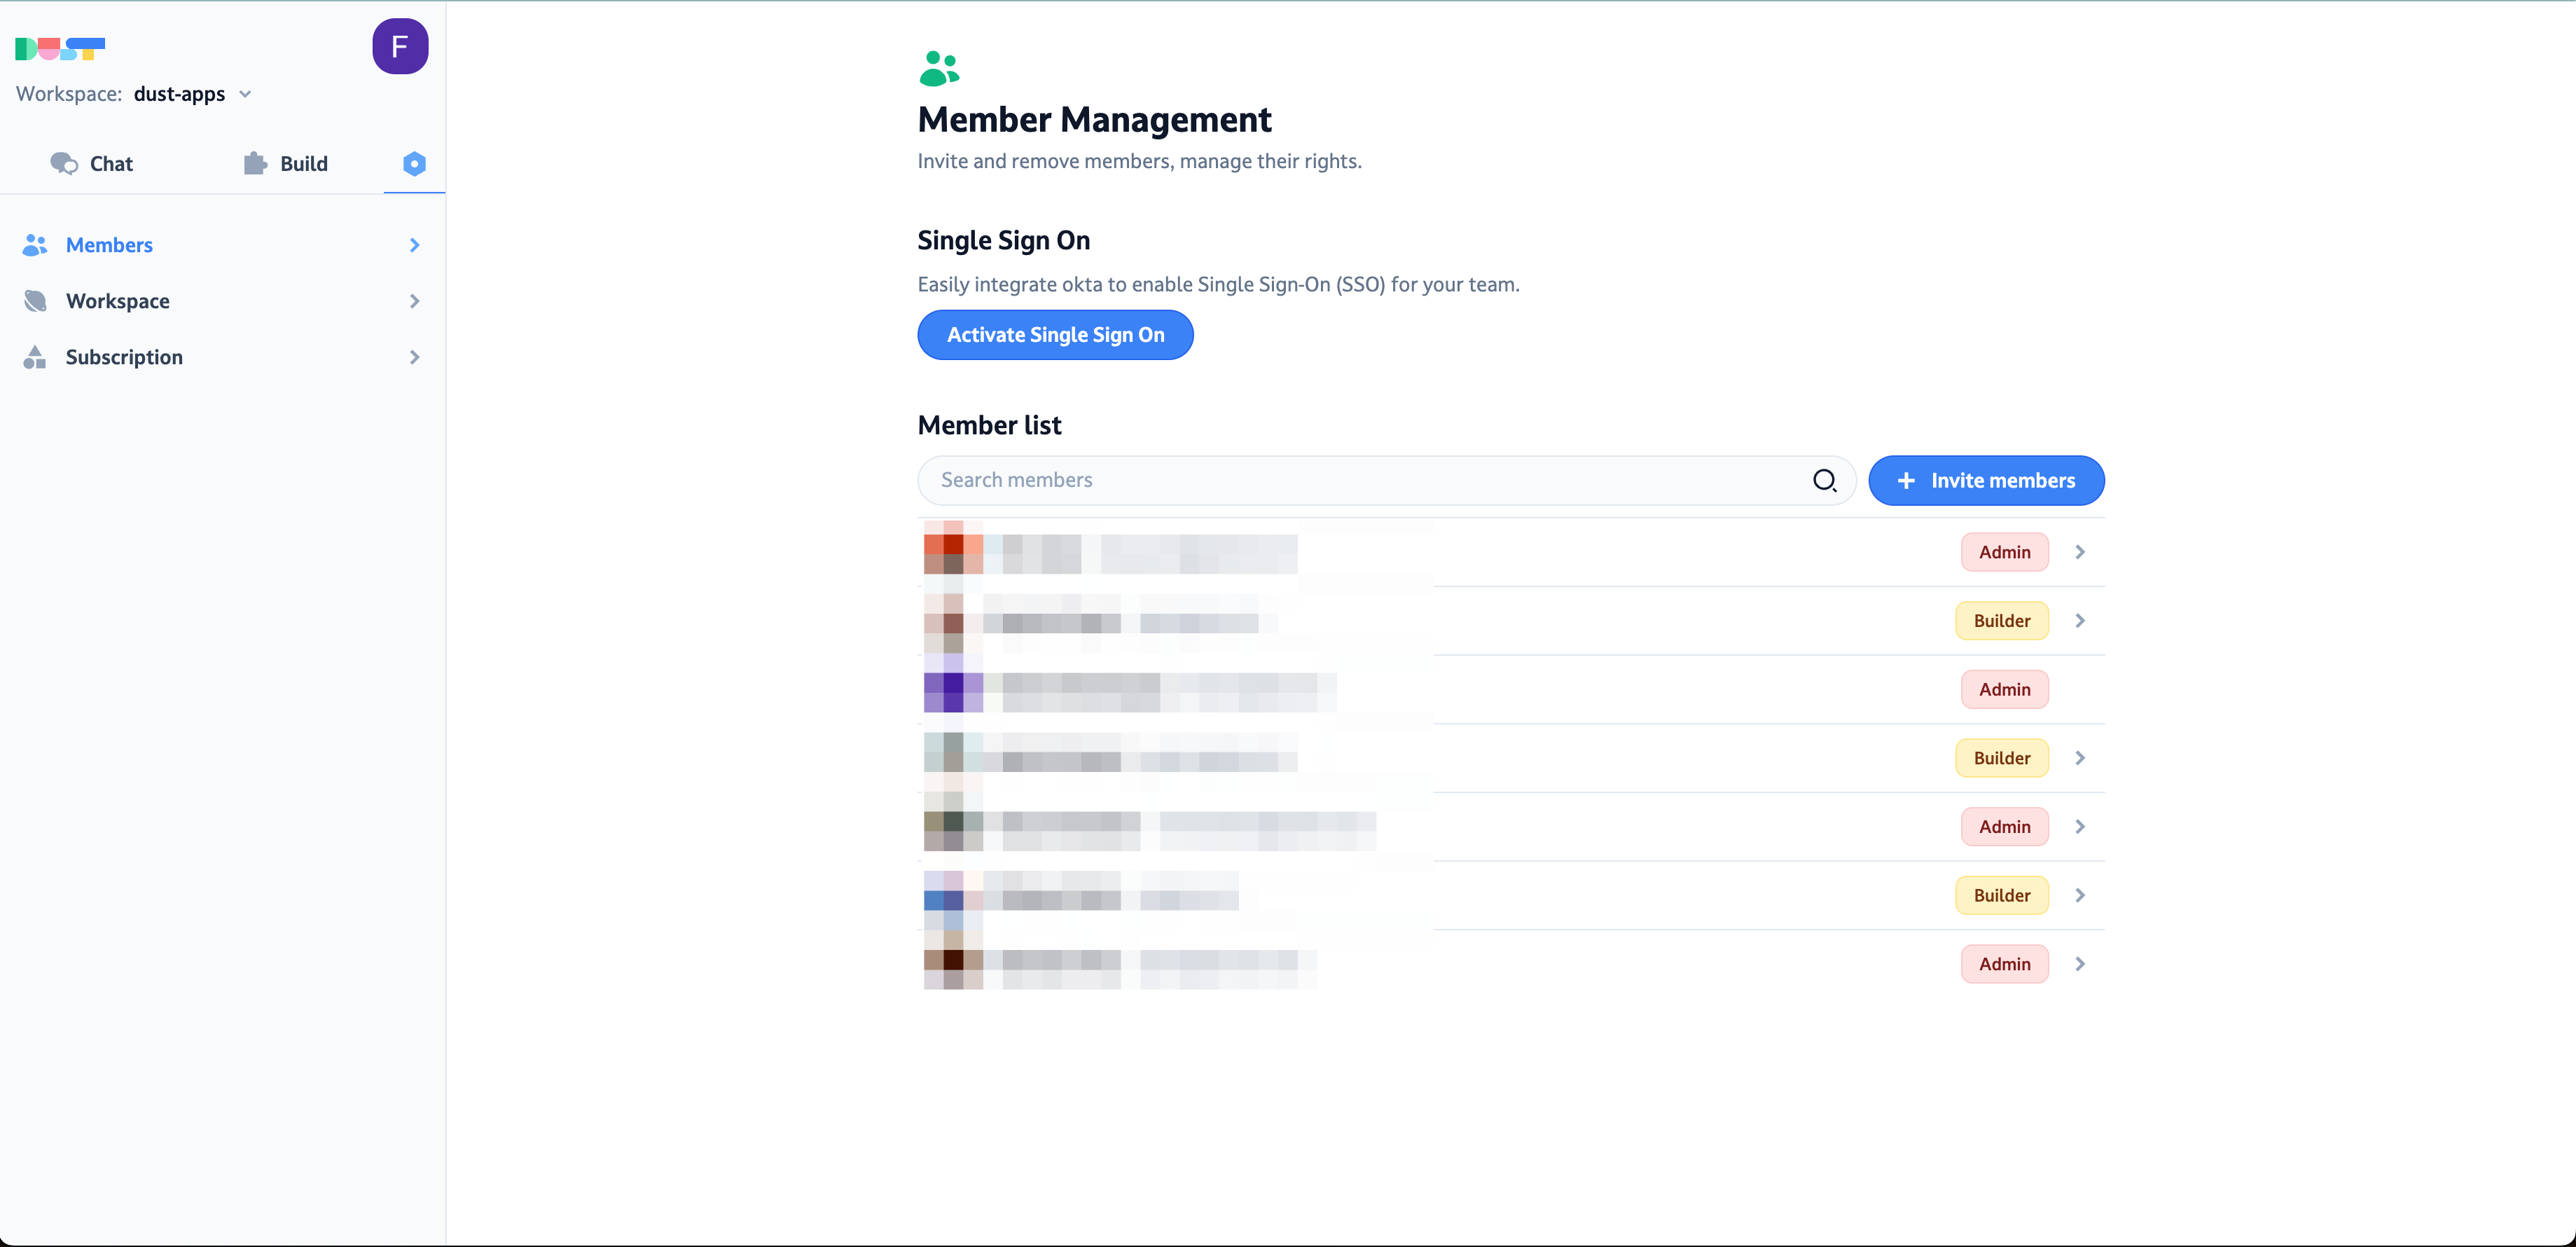
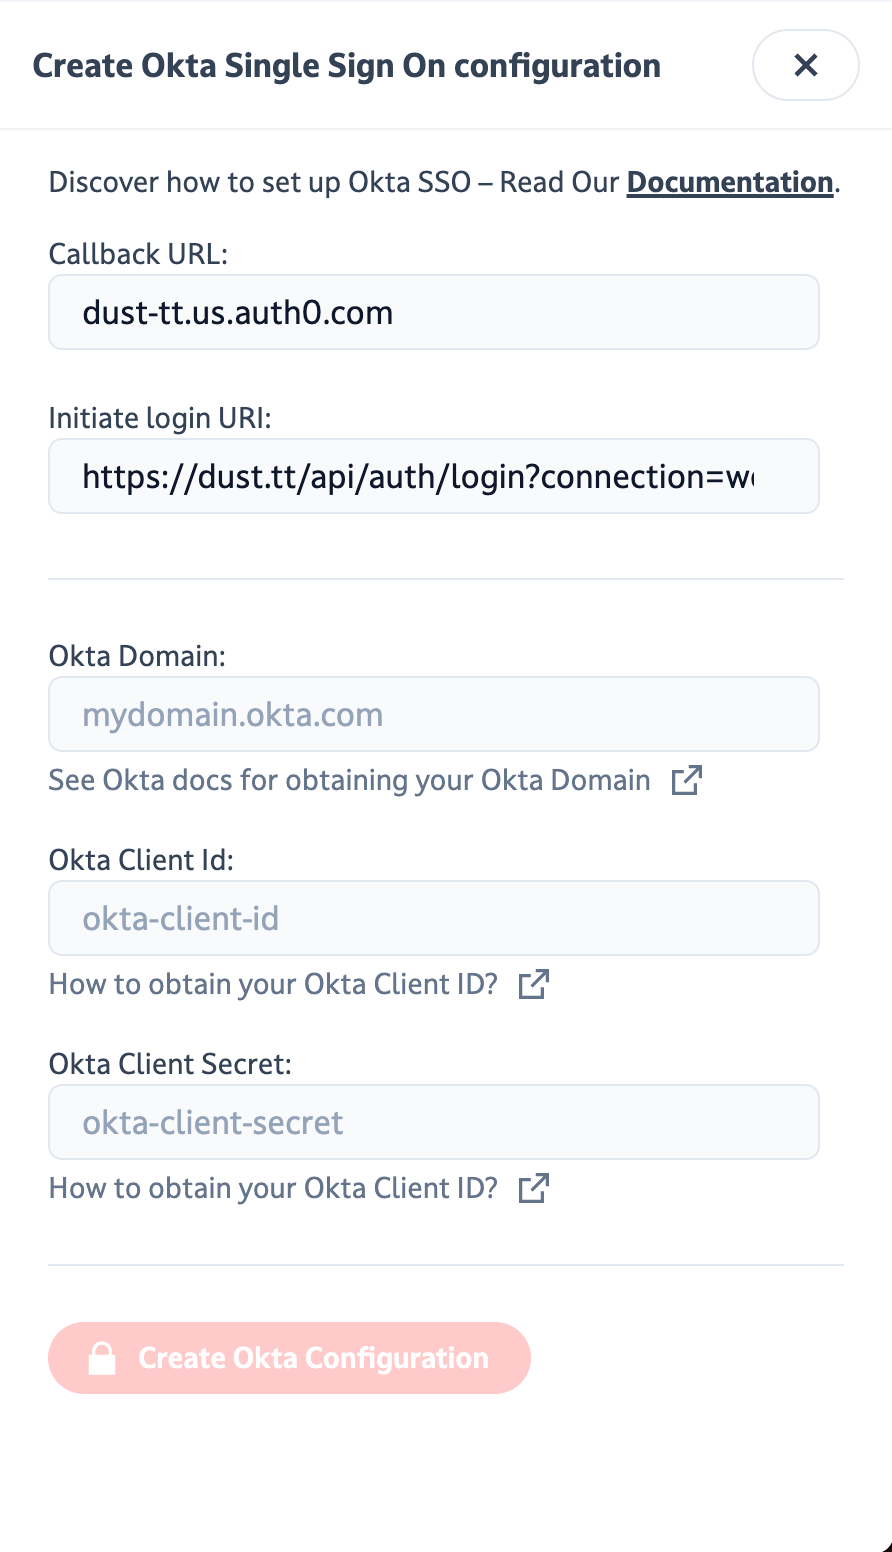
- To enable Okta SSO on your workspace, please provide the following details from the Okta setup step:
- Okta Domain
- Okta Client Id
- Okta Client Secret
Don't forget to copy
Copy the "Initiate Login" URL and save it somewhere easily accessible. You'll need this URL to add the Dust app to your users' Okta dashboards.
Once you've entered this information, click on Create Okta Configuration. Okta SSO is now enabled on your workspace.
If Auto-join Workspace is enabled, all members attempting to log in to Dust using their enterprise email addresses will be automatically redirected to Okta SSO for authentication.
4. Enforcing Okta Single Sign-On (SSO) in Dust
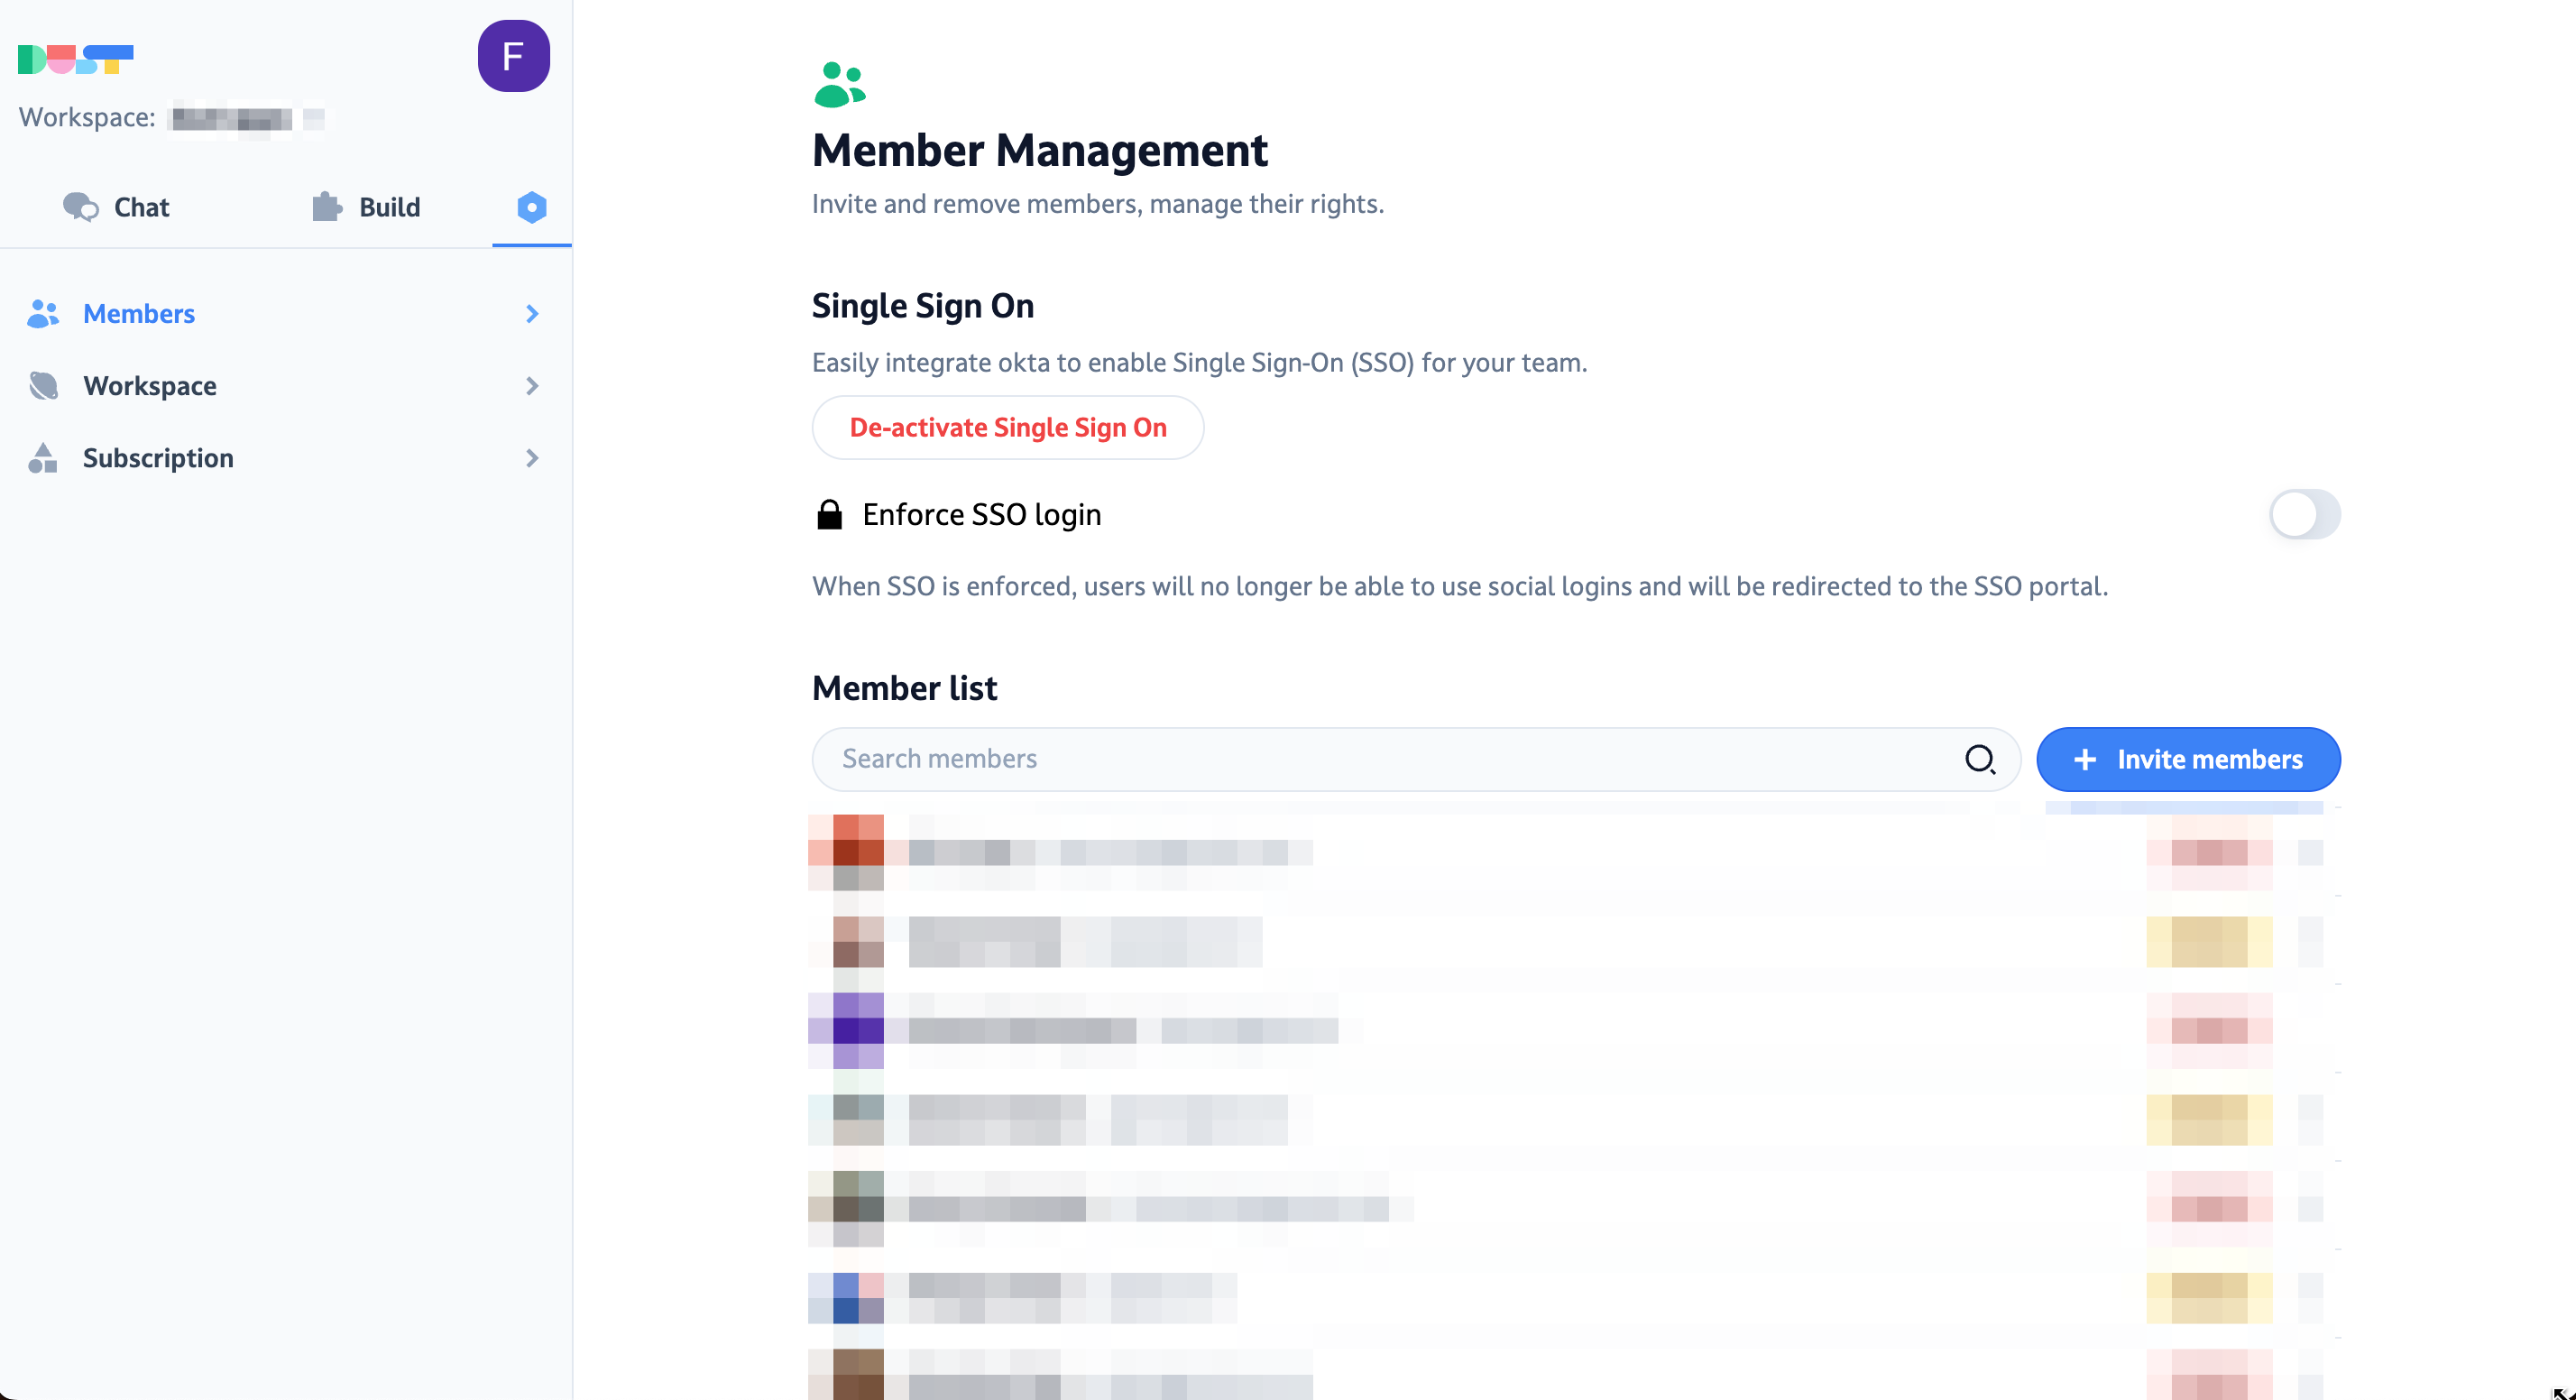
After enabling SSO, you have the option to enforce it across the entire workspace. This means that users will no longer be able to log in using their social media accounts. Please note that enabling this setting will log out all users who are not currently using Okta, and they will be required to log back in using their Okta credentials.
Updated 30 days ago
