Quickstart
This guide will help you get started with Dust with step-by-step instructions to build your first Dust app.
Setting up your first model provider
Dust apps rely on model providers to interact with large language models. You can setup your first model provider by clicking on the Providers pane and setting up the OpenAI provider (you can find the Providers pane on your main account page by clicking on the Dust logo when signed-in). You'll need to create an account at OpenAI and retrieve your API key.
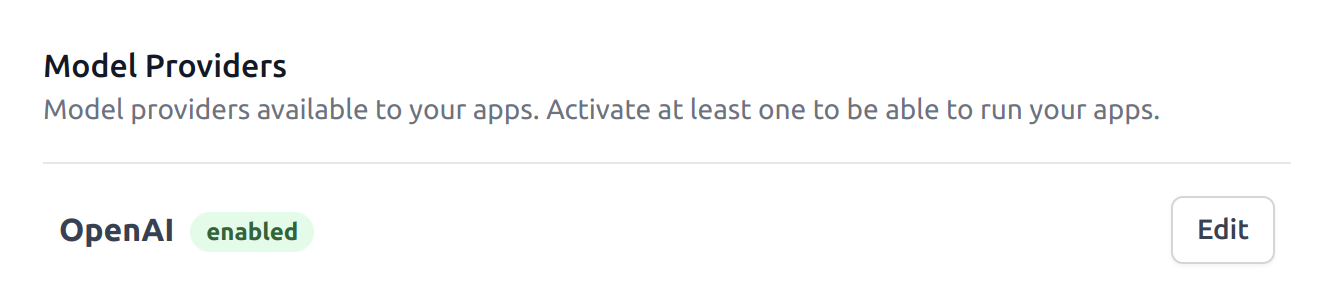
Once you have input a valid API key, you should see the OpenAI provider as enabled in the Providers panel.
Whenever your app interacts with an OpenAI model, it'll use the API key you provided to do so. The costs of running these models will be reported on OpenAI's dashboard.
Creating a new app
You can now create a new app by clicking on New App from your main dashboard. You'll need to provide the following information:
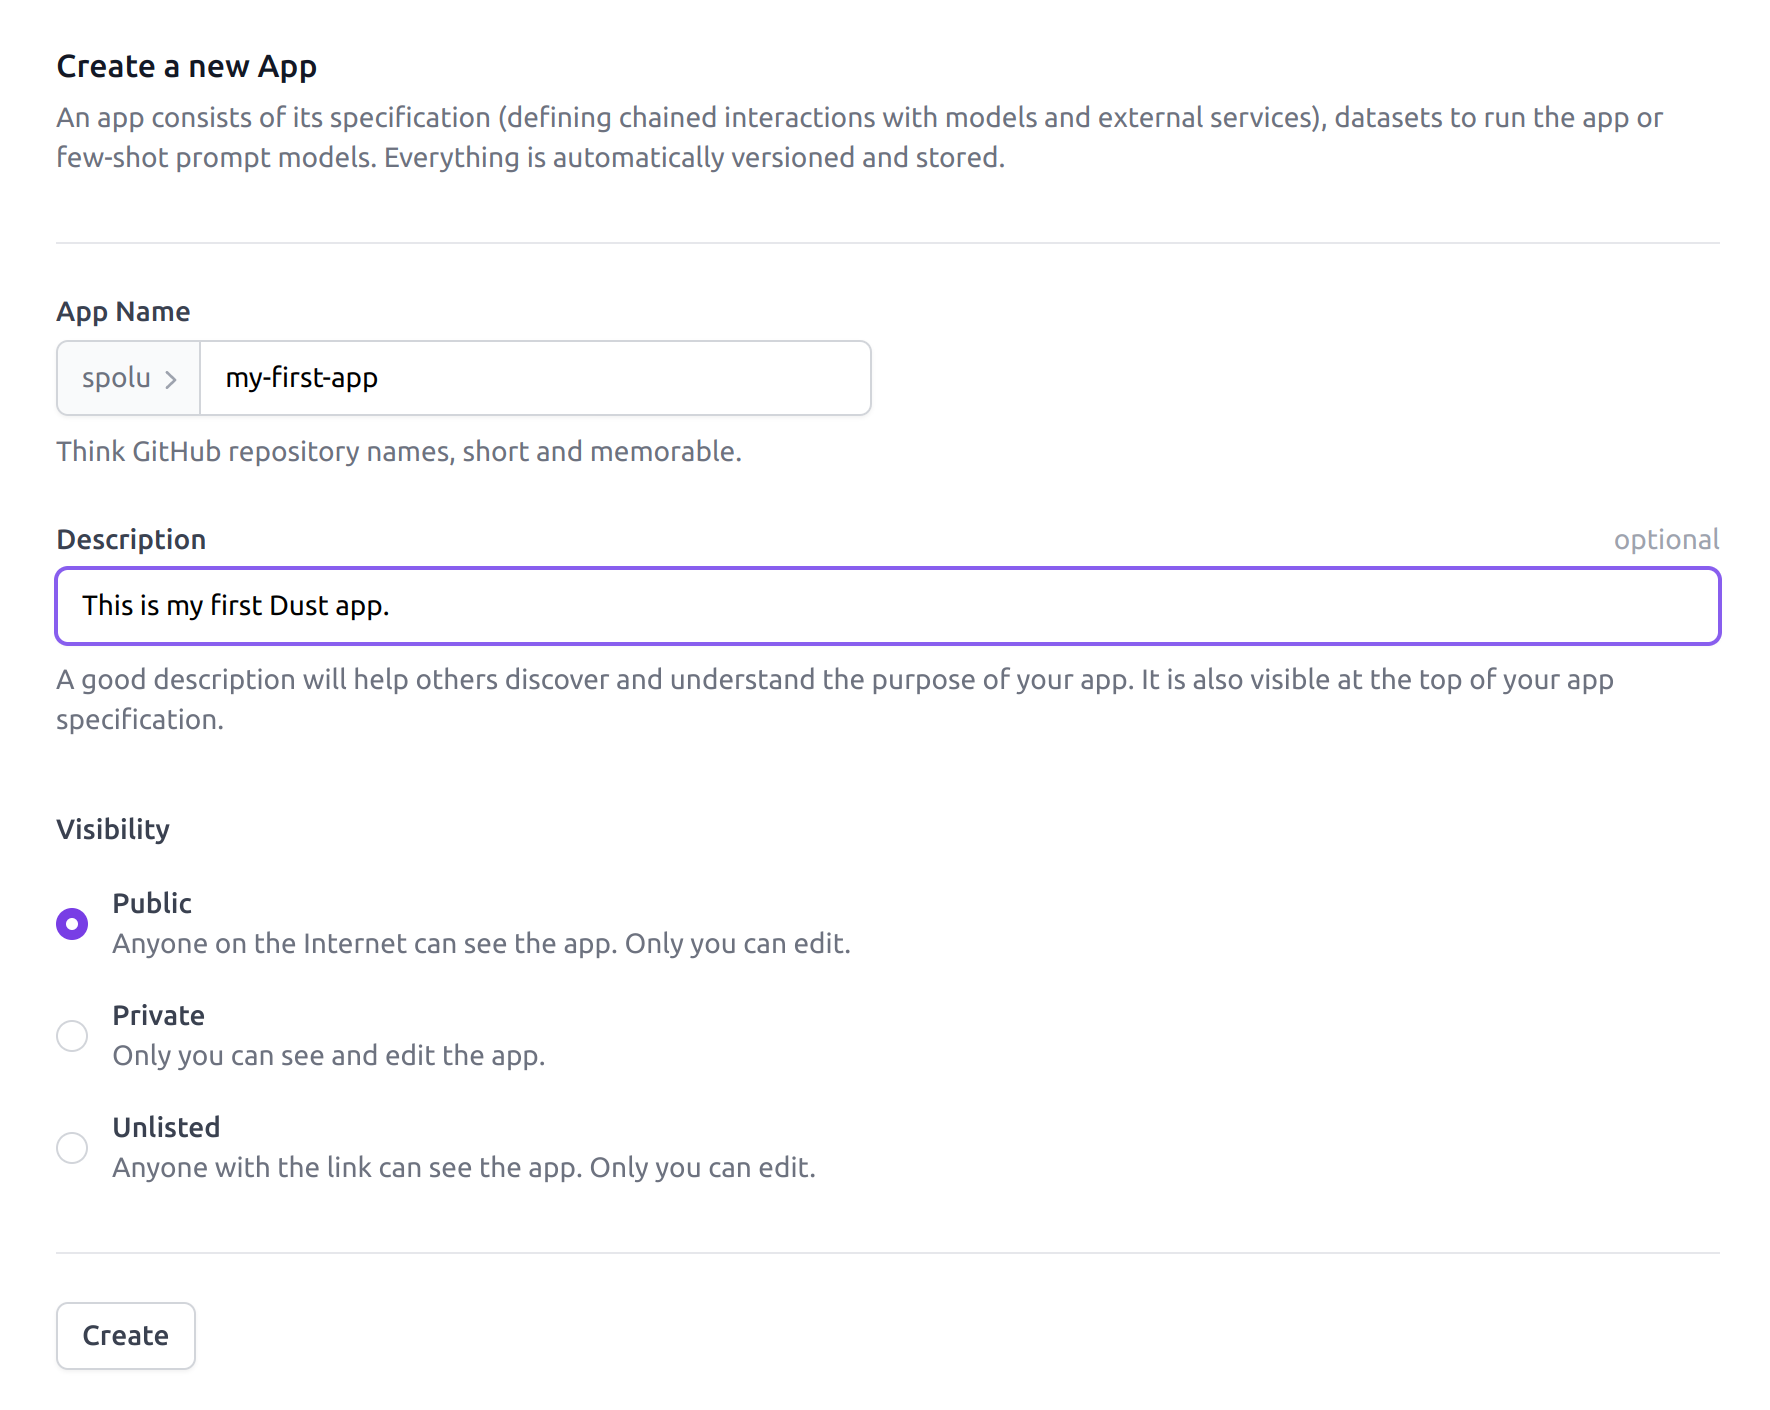
The Dust app creation panel. The name should be short and memorable,
lowercase without spaces.
Public apps are visible to everyone (only you can edit), private apps are solely accessible to you, unlisted apps can be viewed by URL (only you can edit). Public and unlisted apps can be cloned by others, but cannot be run by anyone else than you.
Once you click on Create you are redirected to your new Dust app's view. The default panel is the Specification panel where you will build your app by adding blocks. The Datasets panel lets you manage datasets (for inputs or few-shot examples).
The Run button is disabled at first as you haven't added any block to your app yet.
Add your first block
You are ready to add your first block. Click on + Block and add an input block. The
input block appears in your app specification view. The input block needs to get attached to a
dataset. Each time it will be executed, it'll fork your app execution on each element of the dataset
to enable you to design your app against multiple examples to avoid overfitting your design to one
input. You can learn more about how the input block works in the Inputs
section of the platform overview.
Click on Create Dataset inside the input block to create a new dataset. You are now redirected
to the Datasets panel. And a new draft dataset with basic arithmetic questions has been prepared
for you. Give the name dev to your dataset, you can leave the description empty. Our example app
will attempt to answer these basic arithmetic questions. The Schema lets you control the schema
of your dataset's entries. The Data section lets you edit, add, or remove elements to your dataset.
You can leave the dataset as-is and click Create.
You can now return to your app's specification view and select the dev dataset from the input
block dropdown.
It is time to run your app for the first time! Click Run and wait for the execution to complete.
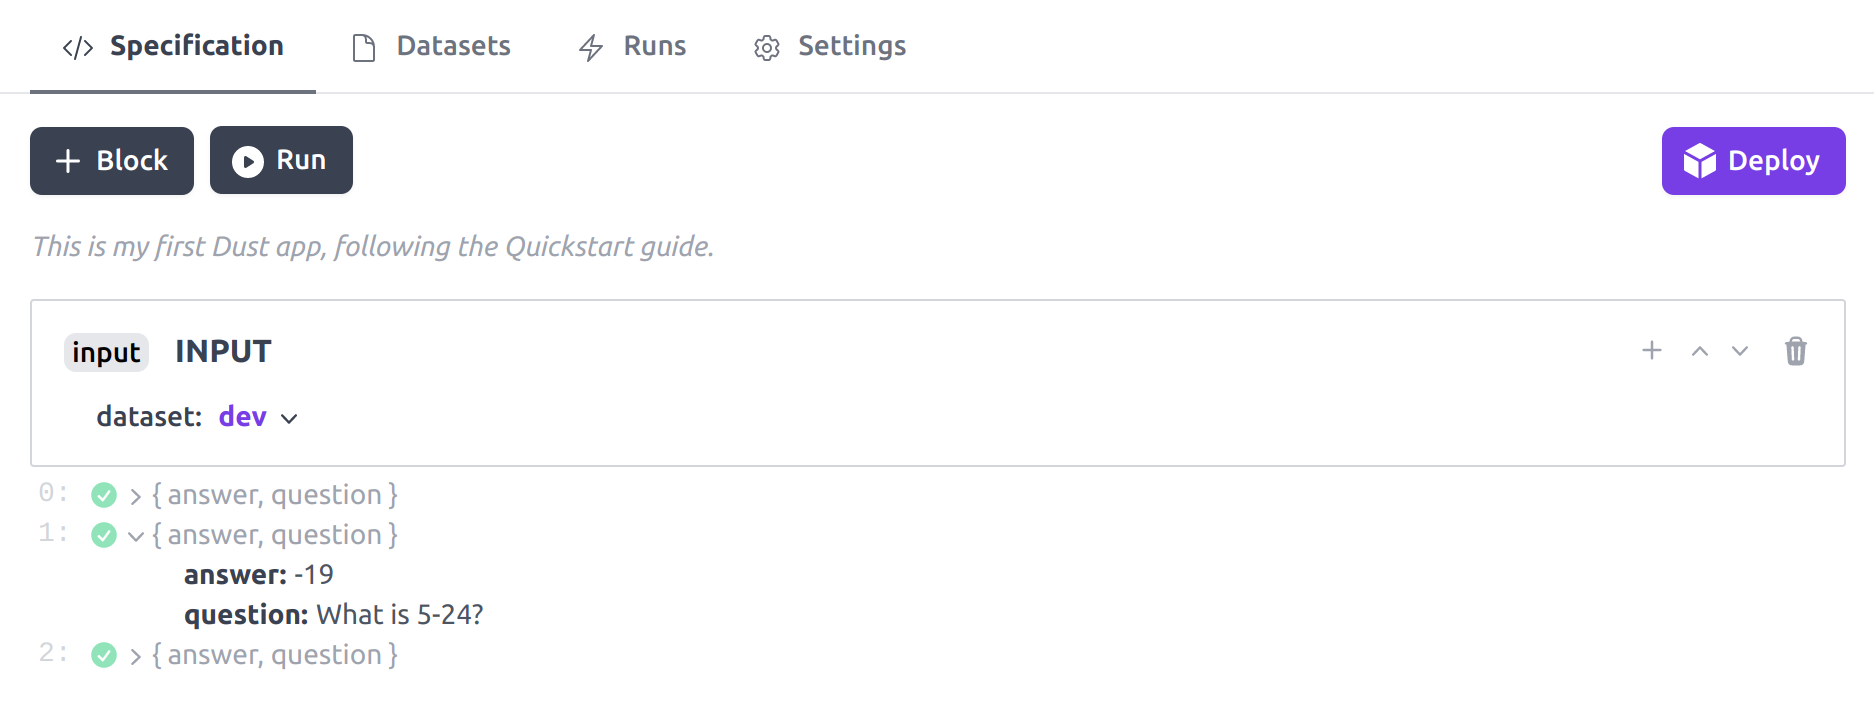
This is the expected state of your Dust app. The input block was run and
triggered 3 parallel executions of your app. For each execution you can see
the output of the input block which corresponds to each element of the
dataset it is associated with. The examples in your dataset might differ from
the ones shown above.
Data blocks
Before we can add our first llm block, we'll add a data block to the app to store the few-shot
examples used to prompt the model. Go to the Datasets panel and create a new dataset. Name it
examples and save it directly.
Return to the Specification panel and click the + Block button and add a data block.
Similarly to the input block, the data block must be attached to a dataset. Click on the data
block Select Dataset button and select examples.
Note that your blocks are automatically given a default name (EXAMPLES for
your data block). You can change the name of your blocks by clicking on the
block name in the specification view. Let's keep the default name for now so
that we can refer to it in the next blocks.
Run your app again! You should be able to see the outputs of both the input block and the newly
created data block.

This is the expected state of your Dust app. As you can see the data block
has a different behaviour than the input block. For each execution stream it
returns the entire dataset as an array. This dataset is the same for each
execution stream and will be use to few-shot prompt the model in the next
block. The examples in your datasets might differ from the ones shown above.
LLM blocks
We're ready to interact with a large language model. Add an llm block, select openai as provider
and text-davinci-003 as model. You can leave the temperature and max_tokens unchanged.
Now it's time to construct our prompt. The prompt field supports Tera templating to construct the prompt to the model from the outputs of the previously executed blocks. You can refer to the LLM Block documentation for more details on the templating system.
We will use the following prompt to encode in the model (using few-shot prompting) that we want it to reply with a valid numerical answer:
{% for e in EXAMPLES %}
QUESTION: {{e.question}}
ANSWER: {{e.answer}}
{% endfor %}
QUESTION: {{INPUT.question}}
ANSWER:
As the llm block will be executed, it will receive as prompt the result of executing the template
above, which should consists in:
QUESTION: What is 2+2?
ANSWER: 4

QUESTION: What is 5^2?
ANSWER: 25

QUESTION: What is 23*9?
ANSWER: 207

QUESTION: What is 12*4?
ANSWER:
This is called few-shot prompting, by showing a few valid examples, we encode the task in the model. We finish the prompt with just the question from the input we're working on. As the model will try to complete the prompt, it should naturally try to answer the question with a valid answer.
Also add a stop sequence, by typing in QUESTION and hitting enter. This will stop the generation
from the model once it encounters the QUESTION sequence. This may happen as the model may simply
tries to complete the prompt with more questions and answers after genereting the answer to your
question.
You can now run your app. It will be a bit slower this time as we'll have to wait for the model to generate an answer by calling into the OpenAI API.
If you run the unmodified app again, the automatic caching mechanism of the
llm block will kick in and you won't spend any resources on OpenAI.
You can explore the outputs of the llm block. It contains both a prompt object representing
what was sent to the model and a completion object which is the completion generated by the model.
You can check that the values returned by the model are indeed correct.
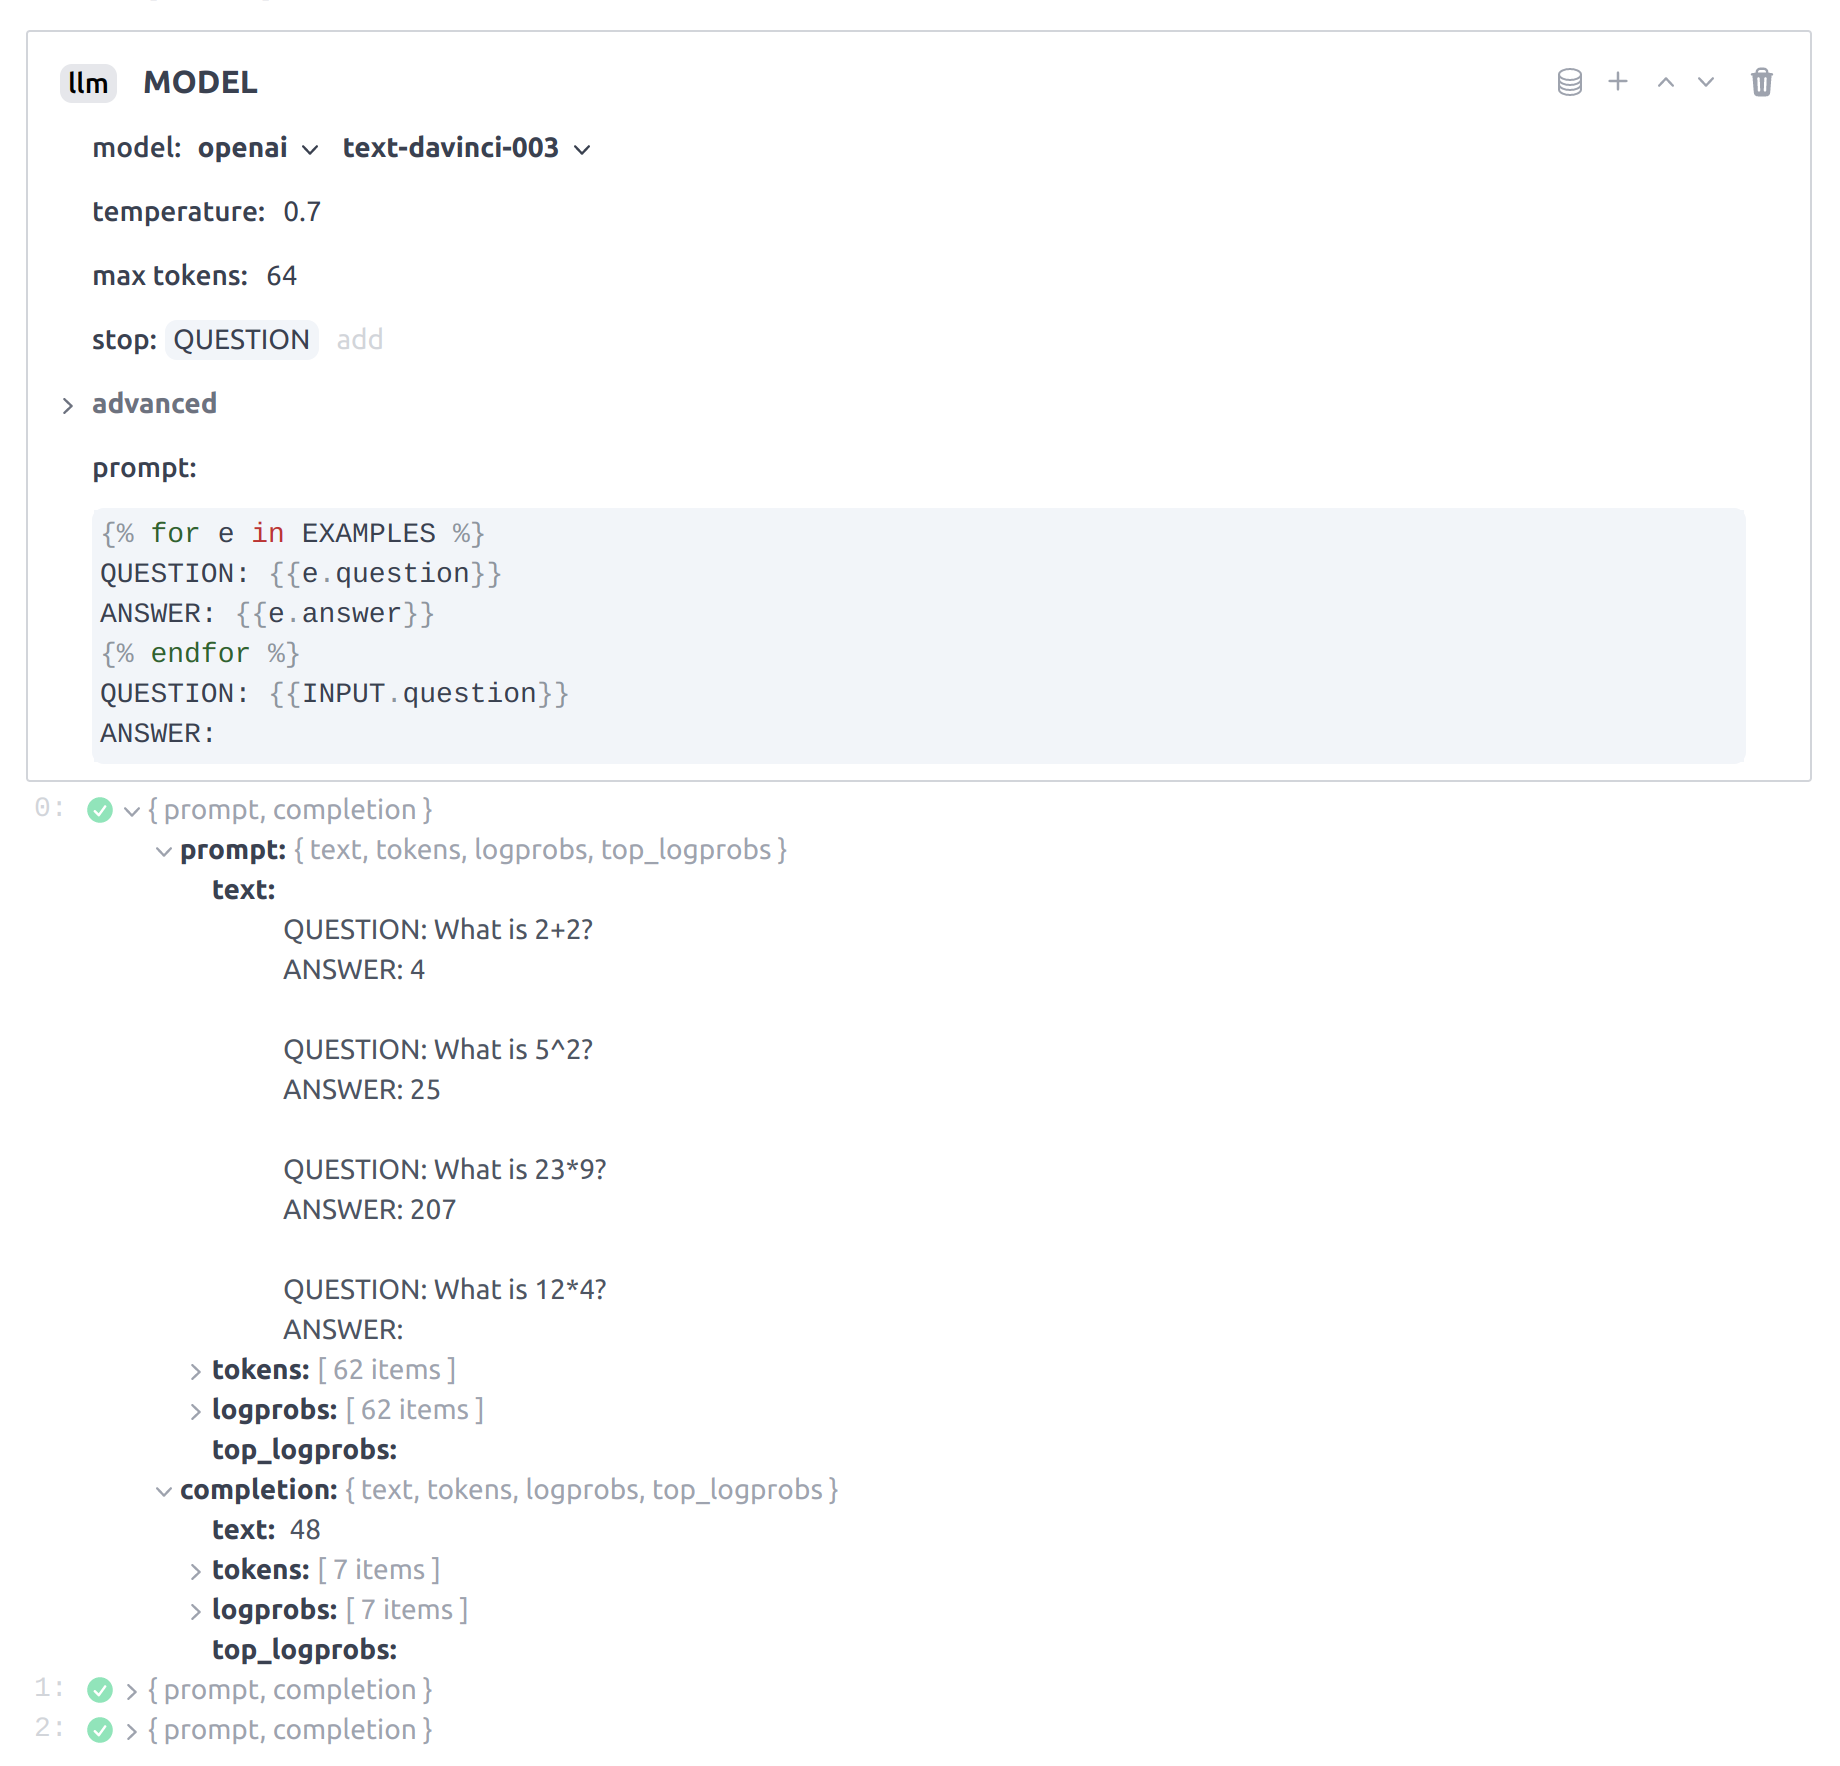
This is the expected configuration and state of the llm block after your
final execution of your app. Since there are 3 inputs in our input block
dataset, there are 3 parallel executions of the app and therefore 3 outputs
returned by the llm block.
Final code block
We can finally add a code block to extract the answers from the model's completion. Name the
code block FINAL. Code blocks' code parameter must define a Javascript _fun function accepting
an env variable. The env variable enables you to access the output of the previous blocks. We'll
use the following code:
_fun = (env) => {
  return {
    question: env.state.INPUT.question,
    answer: env.state.MODEL.completion.text.trim(),
  };
};
We're simply echoing the input question and returning the answer generated by the model by triming
its completion. You can now run your app and explore the 3 executions' final outputs to check that
all answers are correct.
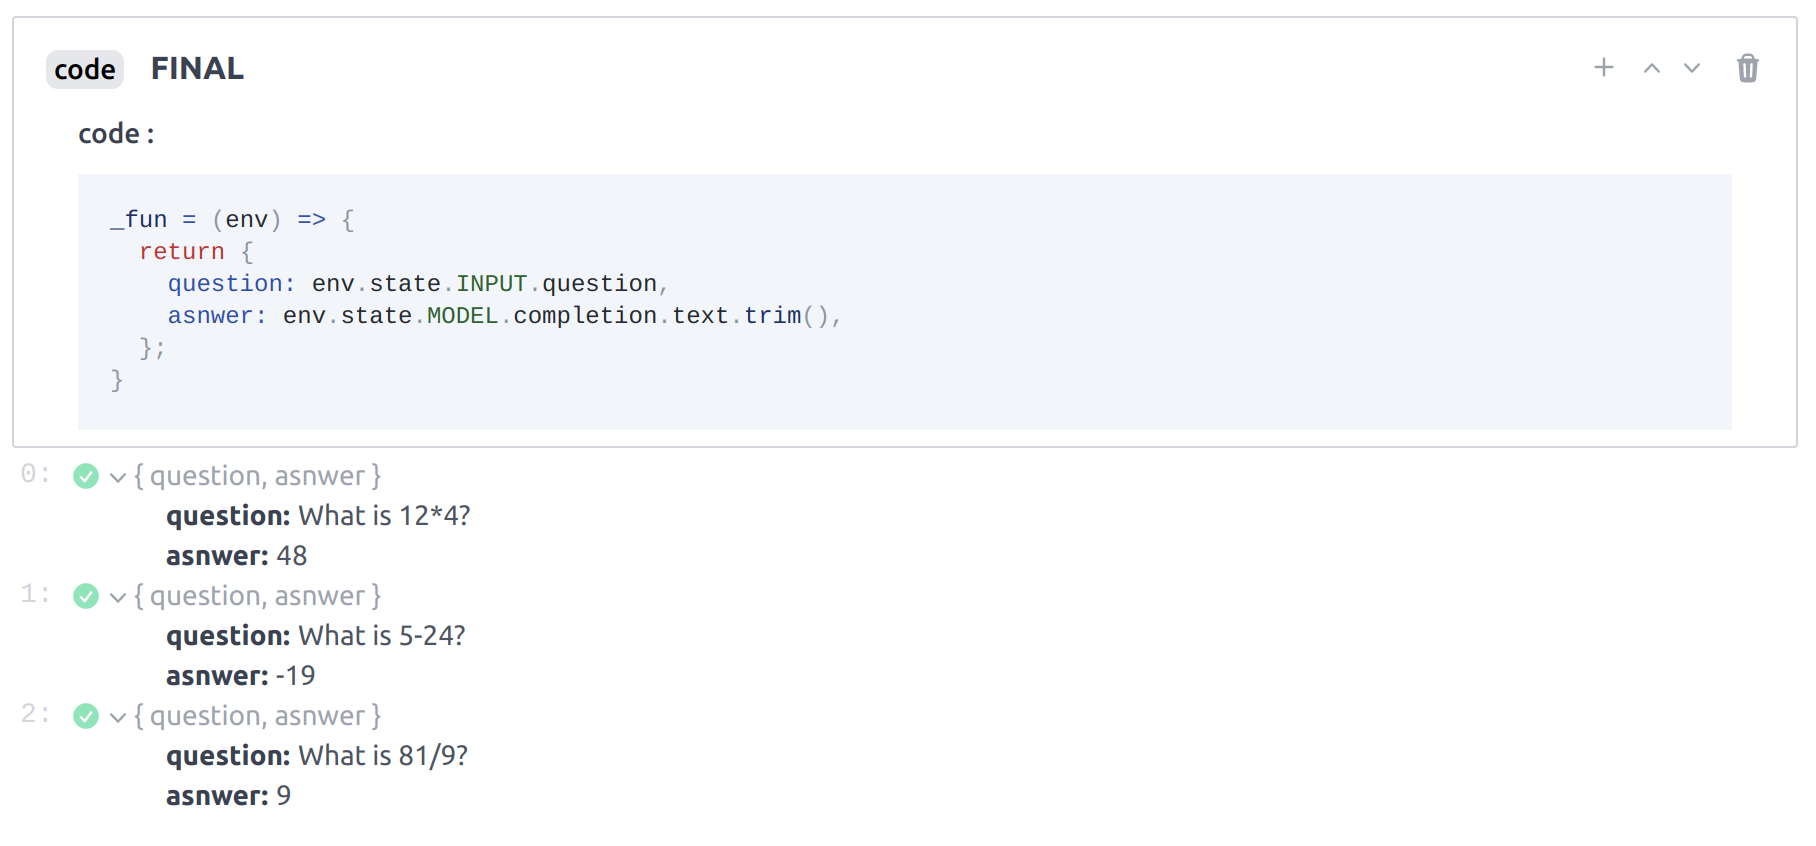
This is the expected output of the final block, echoing the intput question and the generated answer. The question may be different in your app.
Congrats on designing your first Dust app! You can inspect the different runs on your app in the Runs panel and see the various iterations we went through as we built the app.
(Advanced) Running your app by API
Congrats on designing your first app! You can now return to your profile by clicking the Dust logo to create a new API key in the API Keys panel. Click Create new secret key and return to the Apps panel and finally to your app.
As you can see the full state of the app is preserved, including block outputs.
Now return to the Specification panel and click the Deploy button. Simply click the Copy
button and copy the curl command in your favourite editor. You can leave the curl command untouched
exception for the input given that your app expects an object with a question field. Modify the
object and add an arithmetic question of your choice.
As you copy the curl command from the Deploy modal, your newly created API
key is automatically inserted as Authentication header.
You can now prefix your file with #!/bin/sh and save it as a .sh and execute it from your
terminal.
Congrats, you've executed your app by API. You can check the execution in the Runs panel under the API section.
Next steps
Great, you're now familiar with Dust app design. You can review the rest of the documentation portal or explore a few more complex community app examples:
- maths-generate-code Generate code to answer maths questions.
- wedding-thank-yous Solving the blank page problem for wedding thank you notes.
- web-search-assistant Answer questions with high factual accuracy by searching online and compiling responses based on content downloaded from websites (with references).
- toolbot-repro Teach LLM to teach itself new tasks by teaching it to generate few shot examples from high-level tasks descriptions and prompting itself with them (a reproduction of @chillzaza_'s ToolBot).